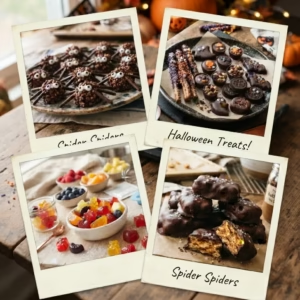
Looking for homemade Halloween candy recipes that are all treats and no tricks? From spooky chocolate bites to creepy candy creations, these devilishly delicious homemade sweets are perfect for making your Halloween celebration extra sweet and frightfully fun!
Homemade Halloween Candy: A Spooky American Tradition
In the USA, Halloween is all about trick-or-treating, dressing up in creative costumes, carving jack-o’-lanterns, and, of course, enjoying plenty of candy! From candy corn and chocolate peanut butter cups to caramel apples, fudge, and homemade gummy candies, sweets are at the heart of this beloved October 31st tradition. Making homemade Halloween candy is a fun way to bring classic American Halloween flavors into your own kitchen. Whether you’re preparing spooky treats for a Halloween party, filling trick-or-treat bags, or creating festive goodies to share with family and friends, these easy candy recipes are sure to make your celebration extra sweet!
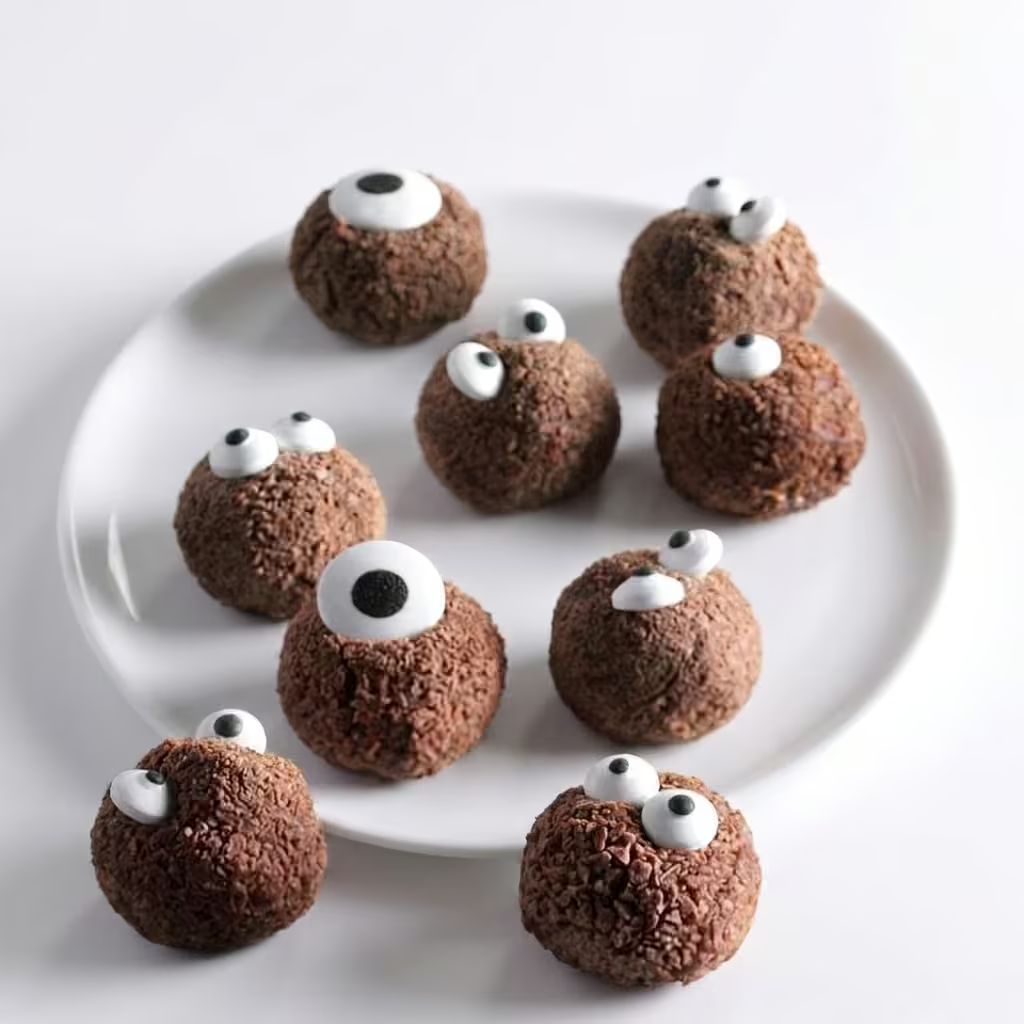
Homemade Halloween Candy: Spiced Chocolate Truffles
Ingredients
- 12 ounces milk chocolate baking bars, divided
- 1/2 cup heavy whipping cream
- 2 tablespoons canned pumpkin
- 1/4 teaspoon ground cinnamon
- 1/4 teaspoon ground ginger
- 1/4 teaspoon ground nutmeg
- Dash ground cloves
- Baking cocoa
- Candy eyeballs, optional
Directions
- 1Finely chop 10 ounces chocolate; place in a small bowl. In a small heavy saucepan, combine cream, pumpkin and spices; heat just to a boil. Pour over chocolate; let stand 5 minutes.
- 2Stir with a whisk until smooth. Cool to room temperature. Refrigerate, covered, at least 4 hours.
- 3Finely grate remaining chocolate; place in a small microwave-safe bowl. With hands dusted lightly with baking cocoa, shape chocolate mixture into 1-in. balls; roll in grated chocolate. (Mixture will be soft and truffles may flatten slightly upon standing.)
- 4If desired, melt unused grated chocolate in a microwave and use to attach eyeballs. Store in an airtight container in the refrigerator.
Homemade Halloween Candy: Nutrition Facts
1 truffle: 89 calories, 6g fat (4g saturated fat), 10mg cholesterol, 7mg sodium, 9g carbohydrate (8g sugars, 0 fiber), 1g protein.
Homemade Halloween Candy: Butterscotch Fudge
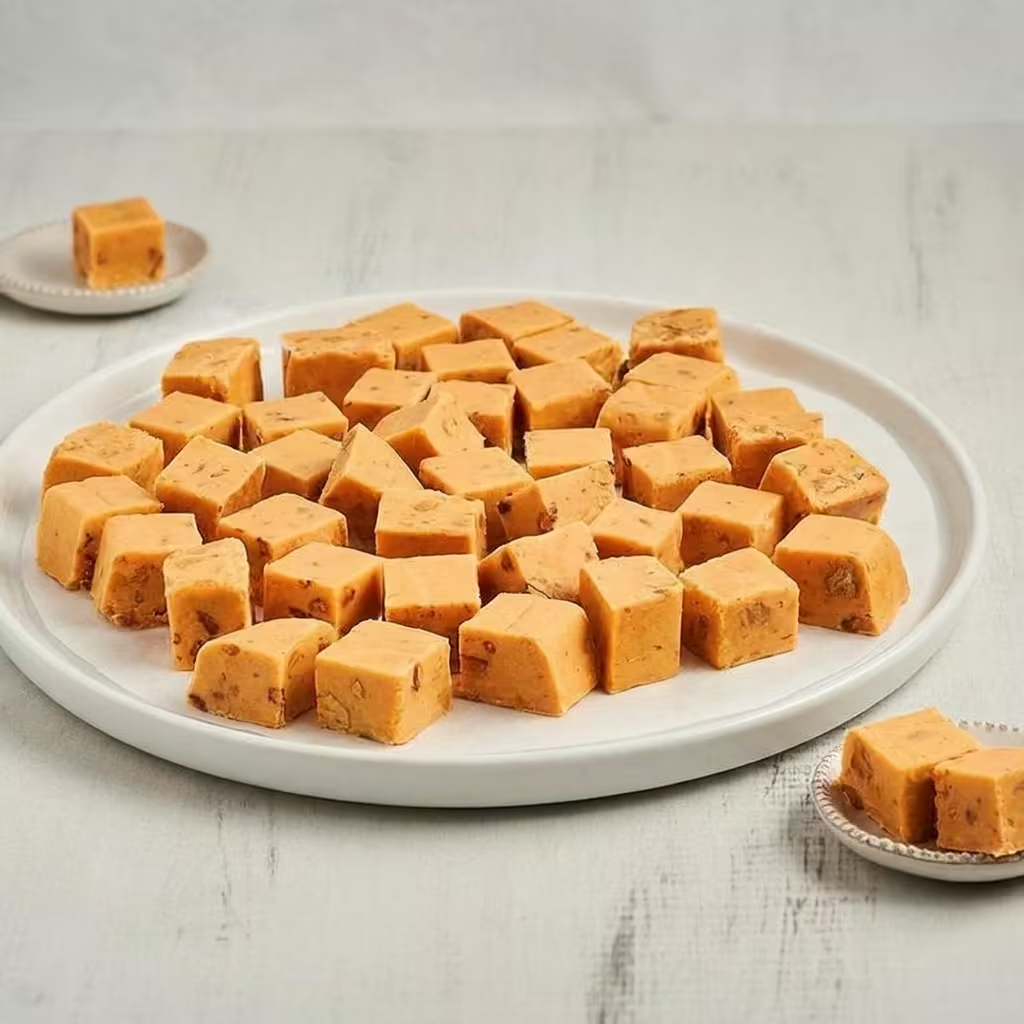
When I’m craving a decadent Homemade Halloween Candy, this butterscotch fudge is one of my favorites! It’s a delicious change from traditional chocolate fudge, with rich butterscotch flavor packed into every sweet, bite-sized piece. Trust me, Sadie knows a good fudge recipe when she tastes one!
Ingredients
- 3 tablespoons butter, divided
- 2 cups granulated sugar
- 2/3 cup evaporated milk
- 1/4 teaspoon salt (omit or reduce if using salted butter)
- 2 cups miniature marshmallows
- 1 package (11 oz) butterscotch chips
- 1/2 cup chopped walnuts
- 1 teaspoon maple flavoring
Step-by-Step Directions
Step 1: Prepare the Pan
- Line an 8-inch square pan with foil.
- Grease the foil with 1 teaspoon butter.
- Set aside.
Step 2: Cook the Fudge Base
- In a large saucepan, combine:
- sugar
- evaporated milk
- salt
- remaining butter
- Cook over medium heat, stirring constantly until the mixture comes to a boil.
- Continue boiling for 5 minutes, stirring constantly.
Step 3: Add the Mix-Ins
- Remove the saucepan from the heat.
- Stir in:
- miniature marshmallows
- butterscotch chips
- walnuts
- maple flavoring
- Mix until the marshmallows and chips are completely melted and smooth.
- Pour the mixture into the prepared pan and let it cool until fully set.
Step 4: Slice and Store
- Lift the fudge out using the foil.
- Discard the foil.
- Cut into 1-inch squares.
- Store in an airtight container at room temperature.
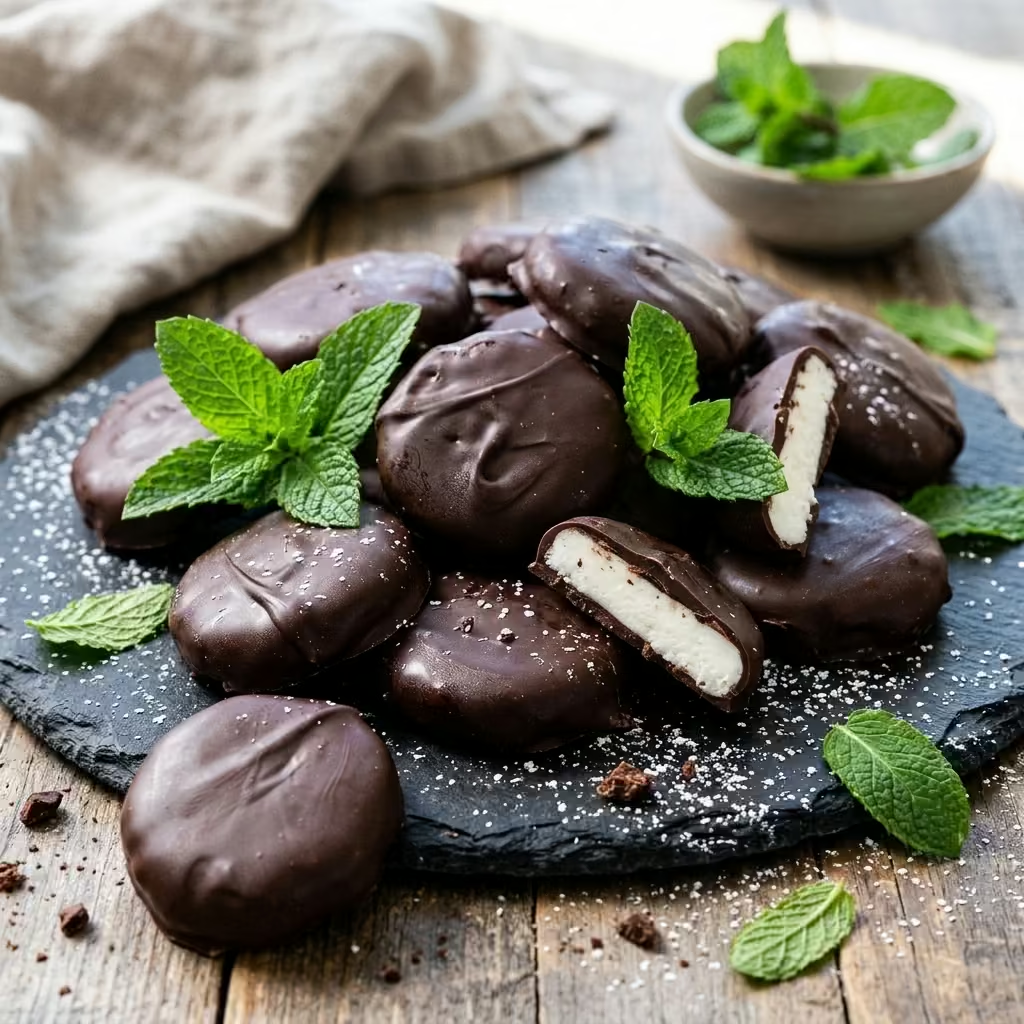
Homemade Halloween Candy: Perfect Peppermint Patties
Prep time: 20 minutes
Chilling time: 30 minutes
Yield: About 5 dozen patties
Ingredients
- 3 3/4 cups confectioners’ sugar
- 3 tablespoons butter, softened
- 2 to 3 teaspoons peppermint extract
- 1/2 teaspoon vanilla extract
- 1/4 cup evaporated milk
- 2 cups semisweet chocolate chips
- 2 tablespoons shortening
Step-by-Step Directions
Step 1: Make the Peppermint Dough
- In a large mixing bowl, combine the confectioners’ sugar, softened butter, peppermint extract, and vanilla extract.
- Add the evaporated milk and mix until a smooth, workable dough forms.
Step 2: Shape the Patties
- Roll the dough into 1-inch balls.
- Place them on a baking sheet lined with waxed paper or parchment paper.
- Flatten each ball with the bottom of a glass until it is about 1/4 inch thick.
Step 3: Chill the Patties
- Cover the baking sheet.
- Freeze the patties for 30 minutes, or until firm enough to dip in chocolate.
Step 4: Melt the Chocolate
- Combine the semisweet chocolate chips and shortening in a microwave-safe bowl.
- Microwave until melted, stirring frequently until smooth. Use short intervals to prevent the chocolate from burning.
Step 5: Coat the Patties
- Dip each chilled patty into the melted chocolate, using a fork to lift it out.
- Allow the excess chocolate to drip back into the bowl.
- Place the coated patties on waxed paper or parchment paper.
Step 6: Let the Chocolate Set
- Allow the patties to stand until the chocolate coating is completely firm.
- Once set, transfer them to an airtight container for storage.
Homemade Halloween Candy: Scary Eyeballs
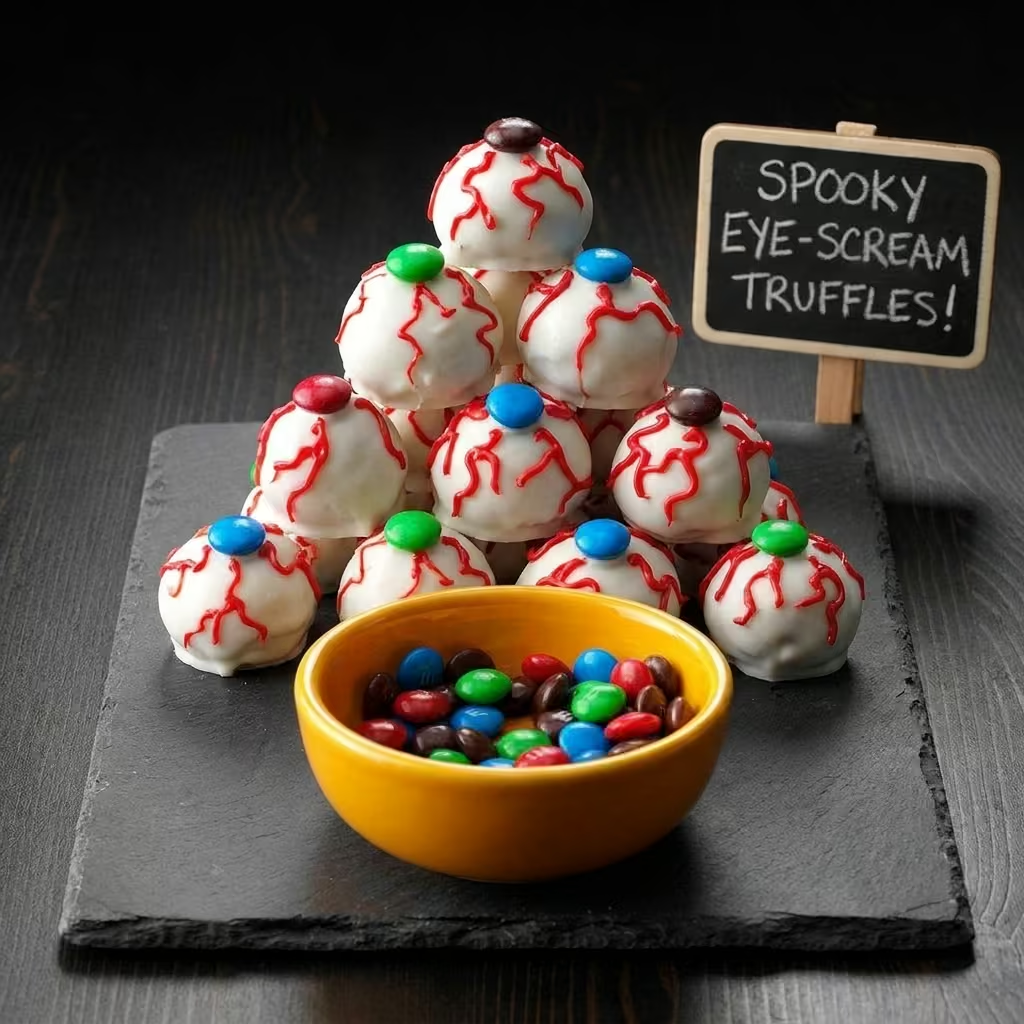
Prep time: 50 minutes · Standing time: Until set · Yield: 40 pieces
Ingredients
- 1 1/2 cups creamy peanut butter
- 1/2 cup butter, softened
- 1 teaspoon vanilla extract
- 3 3/4 cups confectioners’ sugar
- 12 ounces white candy coating, chopped
- 1 tablespoon shortening
- 40 milk chocolate M&M’s, assorted colors
- Red decorating gel
Step-by-Step Directions
Step 1: Make the Peanut Butter Mixture
- In a small bowl, beat the peanut butter and softened butter until light and fluffy.
- Add the vanilla extract and mix well.
- Gradually beat in the confectioners’ sugar until a firm dough forms.
Step 2: Shape and Chill
- Shape the mixture into 1-inch balls.
- Place them on a tray, cover, and refrigerate for at least 30 minutes, or until firm.
Step 3: Melt the Candy Coating
- Place the white candy coating and shortening in a microwave-safe bowl.
- Microwave until melted, stirring occasionally until smooth.
Step 4: Dip the Eyeballs
- Dip each chilled peanut butter ball into the melted white coating.
- Allow the excess coating to drip off.
- Place the coated balls on waxed paper.
Step 5: Add the Candy Pupils
- Immediately place one M&M on top of each ball, with the plain side facing up.
- Let the coating stand until completely set.
Step 6: Create the Bloodshot Effect
- Use red decorating gel to draw thin, wavy lines on each candy to create a spooky, bloodshot-eye effect.
- Allow the gel to set before serving.
Homemade Halloween Candy: Peanut Butter Cups
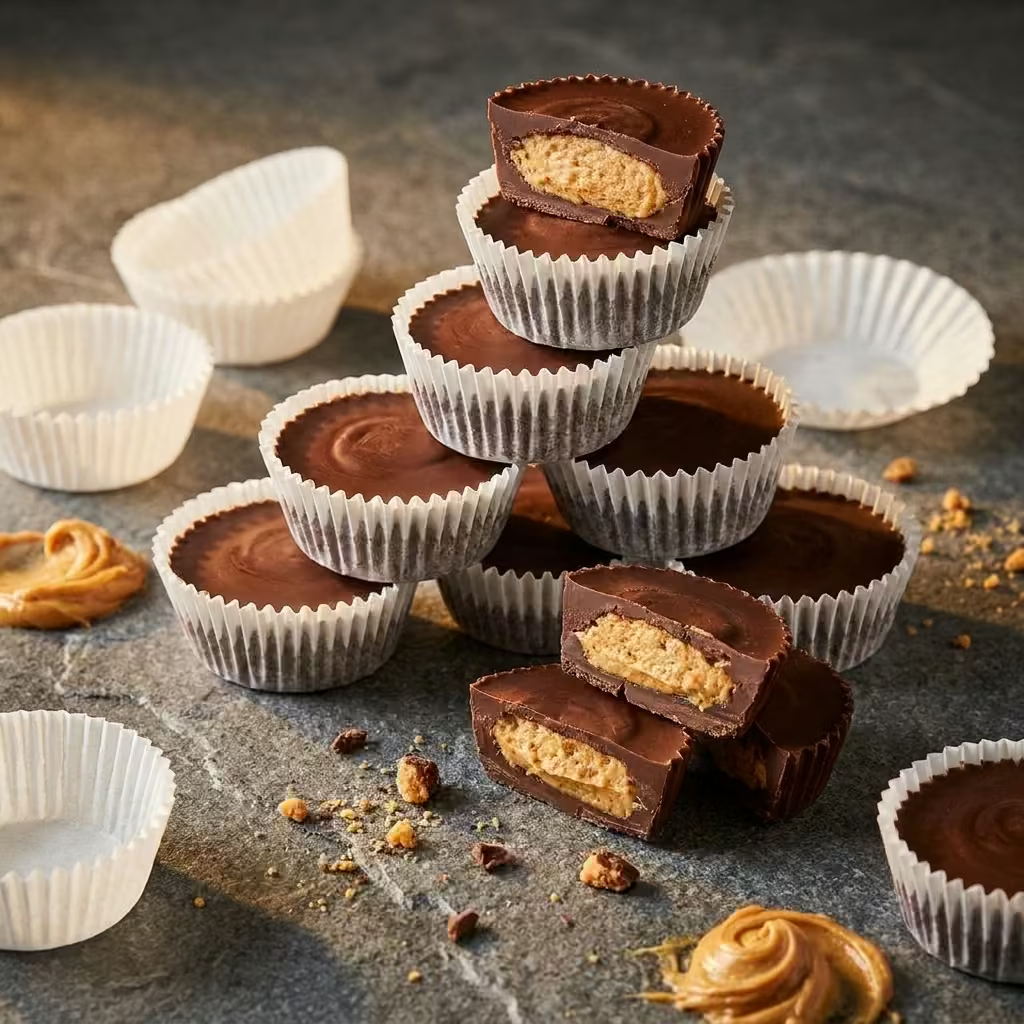
Ingredients
- 1 cup creamy peanut butter, divided
- 1/2 cup confectioners’ sugar
- 4 1/2 teaspoons butter, softened
- 1/2 teaspoon salt
- 2 cups semisweet chocolate chips
- 4 milk chocolate candy bars (1.55 ounces each), coarsely chopped
- Colored sprinkles, optional
Step-by-Step Directions
Step 1: Prepare the Peanut Butter Filling
- In a small bowl, combine 1/2 cup peanut butter, confectioners’ sugar, softened butter, and salt.
- Mix until smooth and creamy. Set aside.
Step 2: Melt the Chocolate
- In a microwave-safe bowl, combine the semisweet chocolate chips, chopped milk chocolate bars, and remaining 1/2 cup peanut butter.
- Microwave in short intervals, stirring frequently, until the mixture is completely melted and smooth.
Step 3: Add the First Chocolate Layer
- Line a miniature muffin tin with paper candy liners.
- Spoon about 1 teaspoon of the melted chocolate mixture into each liner.
Step 4: Add the Peanut Butter Filling
- Place a scant teaspoon of peanut butter filling in the center of each chocolate layer.
- Cover each filling with another teaspoon of melted chocolate, spreading it to the edges.
Step 5: Decorate
– Add colored sprinkles to the tops, if desired, before the chocolate sets.
Step 6: Chill and Serve
Store the peanut butter cups in an airtight container.
Refrigerate until the chocolate is completely firm.
Homemade Halloween Candy: Candied Pecans
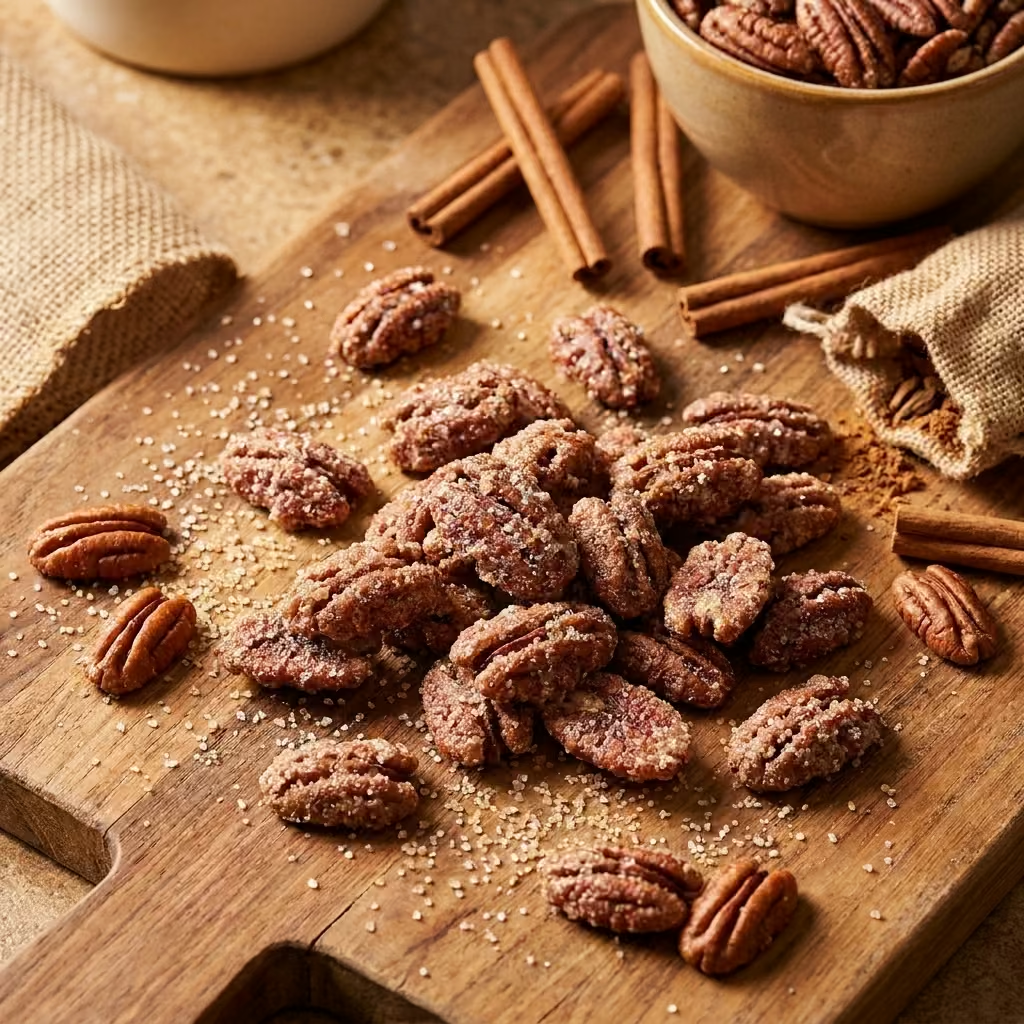
Prep time: 25 minutes · Cook time: 30 minutes · Yield: About 1 pound
Ingredients
- 2 3/4 cups pecan halves
- 2 tablespoons butter, softened, divided
- 1 cup granulated sugar
- 1/2 cup water
- 1/2 teaspoon salt
- 1/2 teaspoon ground cinnamon
- 1 teaspoon vanilla extract
Step-by-Step Directions
Step 1: Warm the Pecans
- Preheat the oven to 250°F.
- Spread the pecans in a shallow baking pan.
- Warm them in the oven for 10 minutes.
- Grease a 15 × 10 × 1-inch baking pan with 1 tablespoon of butter and set aside.
Step 2: Prepare the Sugar Syrup
- Grease the sides of a large, heavy saucepan with the remaining 1 tablespoon of butter.
- Add the sugar, water, salt, and cinnamon.
- Bring the mixture to a boil, stirring constantly until the sugar dissolves.
- Cover and cook for 2 minutes to dissolve any sugar crystals on the sides of the pan.
Step 3: Cook the Syrup
- Remove the lid and attach a candy thermometer to the saucepan.
- Cook without stirring until the syrup reaches 236°F, the soft-ball stage.
- Remove the saucepan from the heat.
- Stir in the vanilla extract.
Step 4: Coat the Pecans
- Add the warm pecans to the syrup.
- Stir until all the pecans are evenly coated.
- Spread them in a single layer on the prepared baking pan.
Step 5: Bake Until Crunchy
- Bake at 250°F for 30 minutes.
- Stir the pecans every 10 minutes to ensure even baking.
- Remove them from the oven when the coating is dry and crunchy.
Step 6: Cool and Store
- Transfer the pecans to a baking sheet lined with waxed paper.
- Spread them apart and let them cool completely.
- Store in an airtight container at room temperature.
Homemade Halloween candy : Trail Mix Slices
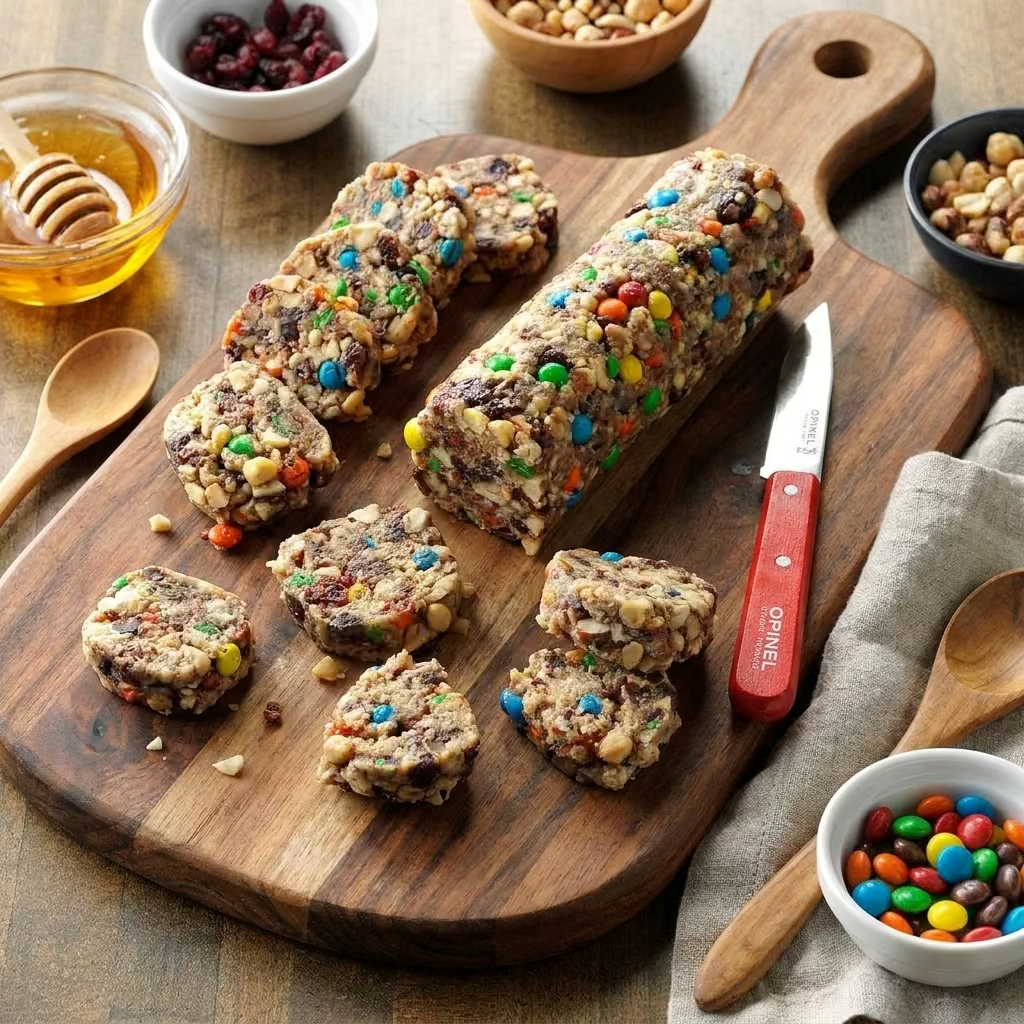
Prep time: 20 minutes · Cook time: 0 minutes · Yield: About 24 slices
Ingredients
- 2 cups old-fashioned rolled oats
- 1 cup creamy peanut butter
- 1/2 cup honey
- 1/2 cup chopped almonds
- 1/2 cup dried cranberries
- 1/2 cup raisins
- 1/4 cup sunflower seeds
- 1/4 cup mini chocolate chips
- 1 teaspoon vanilla extract
- 1/4 teaspoon salt
Step-by-Step Directions
Step 1: Prepare the Pan
- Line an 8 × 8-inch baking pan with parchment paper, leaving some overhang on the sides.
- Lightly grease the parchment paper if needed.
- Set the pan aside.
Step 2: Prepare the Peanut Butter Mixture
- Add the peanut butter and honey to a microwave-safe bowl.
- Microwave for 20–30 seconds, then stir until smooth and easy to combine.
- Stir in the vanilla extract and salt.
Step 3: Combine the Ingredients
- Place the rolled oats in a large mixing bowl.
- Add the chopped almonds, dried cranberries, raisins, and sunflower seeds.
- Pour the peanut butter mixture over the dry ingredients.
- Stir thoroughly until everything is evenly coated.
- Allow the mixture to cool slightly before adding the mini chocolate chips so they do not melt.
Step 4: Press the Mixture into the Pan
- Add the mini chocolate chips and gently fold them into the mixture.
- Transfer everything to the prepared baking pan.
- Press the mixture firmly into an even layer using the back of a spatula or the bottom of a measuring cup.
- Pay particular attention to the corners to help the slices hold together.
Step 5: Chill Until Firm
- Place the pan in the refrigerator for at least 2 hours, or until the mixture is firm enough to cut.
- For cleaner slices, chill for an additional 30 minutes if needed.
Step 6: Slice and Store
- Lift the chilled mixture out of the pan using the parchment paper.
- Place it on a cutting board and cut into approximately 24 bars or slices.
- Store the slices in an airtight container in the refrigerator for up to 1 week.
- For longer storage, freeze the slices in a freezer-safe container for up to 3 months.
Homemade Halloween Candy : Mini S’mores
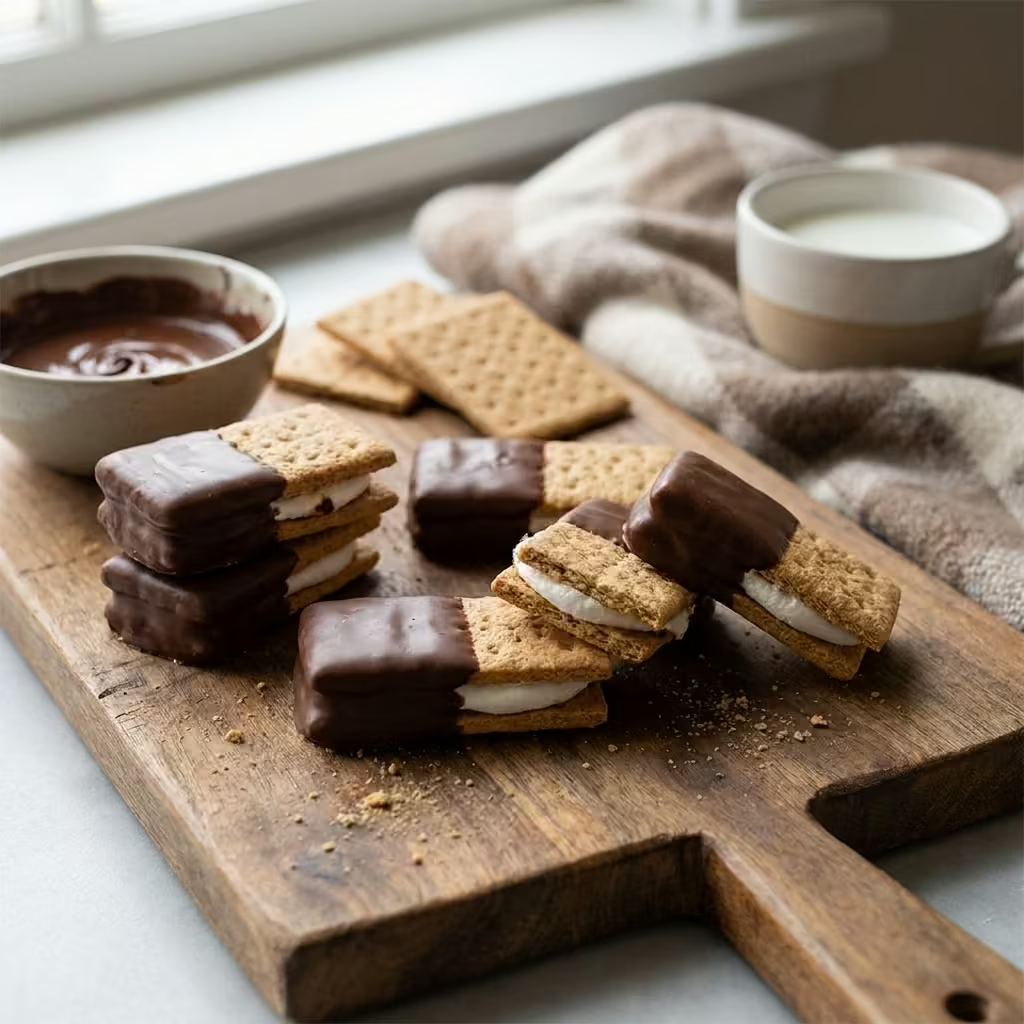
Ingredients
- 2 cups milk chocolate chips
- 1/2 cup heavy whipping cream
- 1 package (14.4 ounces) graham crackers, quartered
- 1 cup marshmallow creme
- 2 cartons (7 ounces each) milk chocolate for dipping
- 4 ounces white candy coating, melted (optional)
Step-by-Step Directions
Step 1: Prepare the Chocolate Filling
- Place the milk chocolate chips in a small bowl.
- In a small saucepan, bring the heavy whipping cream just to a boil.
- Pour the hot cream over the chocolate chips.
- Stir with a whisk until the chocolate melts and the mixture becomes smooth.
- Let the chocolate mixture cool to room temperature, or until it reaches a spreadable consistency, about 10 minutes.
Step 2: Assemble the Mini S’mores
- Break the graham crackers into quarters along their perforated lines.
- Spread the chocolate mixture over half of the graham cracker pieces.
- Spread the marshmallow creme over the remaining pieces.
- Place the marshmallow-covered crackers on top of the chocolate-covered crackers.
- Press the crackers gently together to form small sandwiches.
Step 3: Melt the Dipping Chocolate
- Melt the milk chocolate dipping wafers according to the package directions.
- Stir until the chocolate is smooth and fully melted.
- If the chocolate becomes too thick for dipping, follow the package instructions for thinning it safely.
Step 4: Dip the Mini S’mores
- Line baking sheets with waxed paper.
- Dip each mini s’more halfway into the melted chocolate.
- Allow the excess chocolate to drip back into the bowl.
- Place each dipped s’more on the prepared baking sheets.
Step 5: Decorate and Set
- Let the dipped mini s’mores stand until the chocolate coating is completely set.
- For an optional decorative finish, drizzle the tops with melted white candy coating.
- Allow the white coating to set before serving.
Step 6: Store and Serve
- Transfer the mini s’mores to an airtight container.
- Store them in the refrigerator to keep the filling firm and the chocolate coating intact.
- Serve chilled or allow them to sit briefly at room temperature before serving.
Homemade Halloween Candy : Licorice Caramels
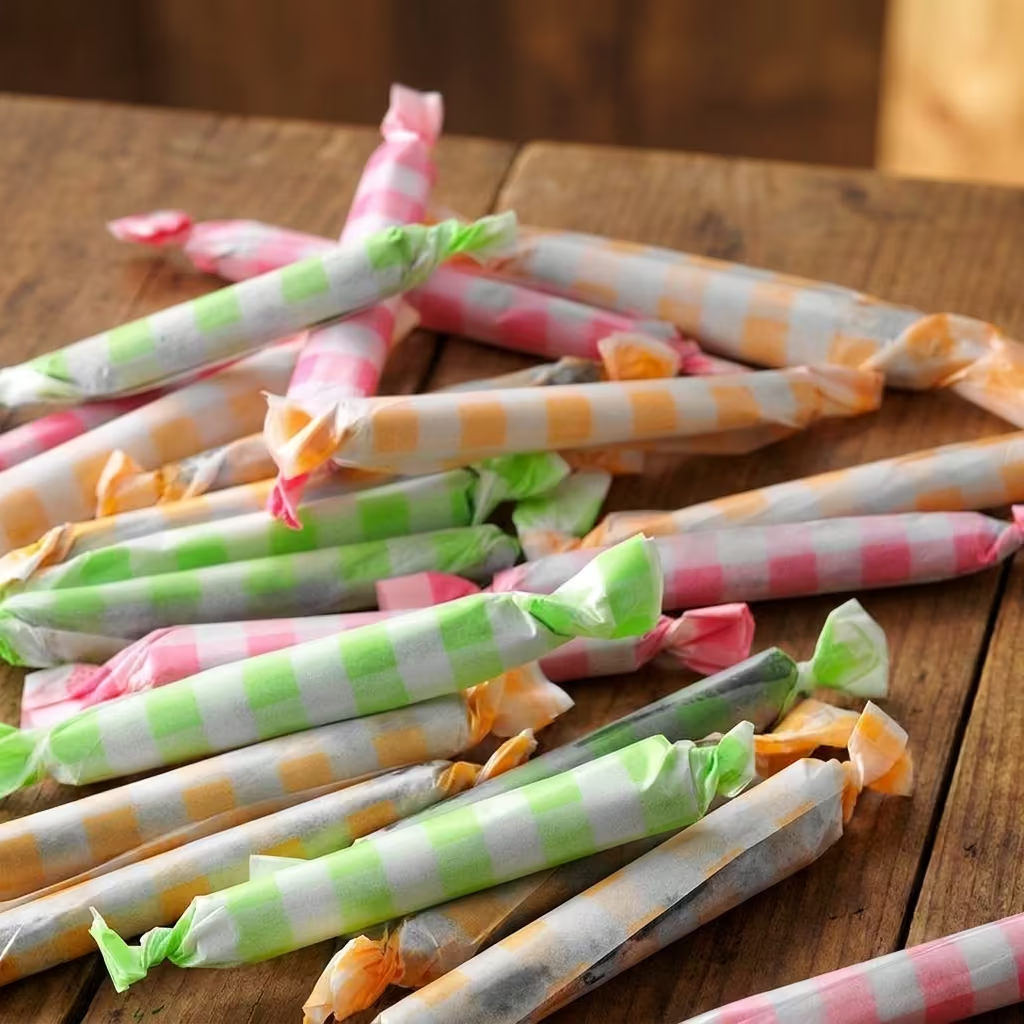
Prep time: 20 minutes · Cook time: 20 minutes · Yield: About 12 dozen
Ingredients
- 1 teaspoon butter, softened
- 1 cup butter
- 2 cups granulated sugar
- 1 1/2 cups light corn syrup
- 1 can (14 ounces) sweetened condensed milk
- 1/2 teaspoon salt
- 2 teaspoons anise extract
- 1/4 teaspoon black food coloring
Step-by-Step Directions
Step 1: Prepare the Pan
- Line an 8-inch square baking pan with aluminum foil, leaving some overhang on the sides.
- Grease the foil with 1 teaspoon of butter.
- Set the prepared pan aside.
Step 2: Combine the Ingredients
- In a large, heavy-bottomed saucepan, combine the sugar, light corn syrup, sweetened condensed milk, salt, and remaining 1 cup of butter.
- Place the saucepan over medium heat.
- Stir continuously until the butter melts and the ingredients are thoroughly combined.
- Attach a candy thermometer to the side of the saucepan, ensuring the tip does not touch the bottom.
Step 3: Cook the Caramel
- Continue cooking over medium heat, stirring constantly to prevent scorching.
- Cook until the candy thermometer reaches 244°F, the firm-ball stage.
- Monitor the temperature carefully because the mixture can scorch easily.
- Once the caramel reaches 244°F, immediately remove the saucepan from the heat.
Step 4: Add the Licorice Flavor
- Carefully stir in the anise extract and black food coloring.
- Mix until the flavoring and coloring are evenly distributed throughout the caramel.
- Work quickly, as the mixture will begin to thicken as it cools.
Step 5: Pour and Cool
- Immediately pour the hot caramel into the prepared baking pan.
- Avoid scraping the bottom of the saucepan into the pan, as the mixture there may have scorched.
- Let the caramel stand at room temperature for several hours, or until completely firm.
Step 6: Cut the Caramels
- Lift the firm caramel out of the pan using the overhanging foil.
- Peel away and discard the foilLightly butter a sharp knife.
- Cut the caramel into narrow strips, then cut the strips into bite-sized pieces.
Step 7: Wrap and Store
- Wrap each caramel individually in waxed paper, twisting the ends to secure the wrappers.
- Store the wrapped caramels in an airtight container in a cool, dry place.
- Keep them away from heat and humidity to help maintain their texture.
Homemade Halloween Candy, Recipe note: Anise extract gives these caramels their classic licorice flavor. The black food coloring is optional if you prefer to leave out artificial coloring.
Homemade Halloween Candy : Chocolate-Covered Peanut Butter & Pretzel Truffles

Ingredients
- 1 3/4 cups creamy peanut butter, divided
- 1/3 cup confectioners’ sugar
- 1/4 cup packed brown sugar
- 2 tablespoons butter, softened
- 1/8 teaspoon salt
- 3 1/4 cups crushed pretzels, divided
- 3 cups (18 ounces) semisweet chocolate chips
- 3 tablespoons shortening
Step-by-Step Directions
Step 1: Prepare the Peanut Butter Mixture
- In a large mixing bowl, beat 1 1/2 cups of peanut butter, the confectioners’ sugar, brown sugar, softened butter, and salt until well combined.
- Stir in 3 cups of crushed pretzels until evenly distributed throughout the mixture.
Step 2: Shape the Truffles
- Line baking sheets with waxed paper.
- Shape the peanut butter mixture into 1-inch balls.
- Arrange the balls on the prepared baking sheets, leaving a little space between each one.
- Refrigerate for at least 30 minutes, or until the balls are firm enough to dip.
Step 3: Melt the Chocolate
- Place the semisweet chocolate chips and shortening in a microwave-safe bowl.
- Microwave in short intervals, stirring after each interval, until the chocolate is completely melted and smooth.
- Avoid overheating the chocolate to prevent it from becoming thick or grainy.
Step 4: Dip the Truffles
- Remove the chilled peanut butter balls from the refrigerator.
- Dip each ball into the melted chocolate, turning it with a fork until fully coated.
- Lift each truffle out of the chocolate and allow the excess to drip back into the bowl.
- Return the coated truffles to the waxed-paper-lined baking sheets.
Step 5: Add the Peanut Butter Drizzle
- Place the remaining 1/4 cup of peanut butter in a microwave-safe bowl.
- Microwave on high for 30–45 seconds, or until melted and easy to drizzle.
- Drizzle the melted peanut butter over the chocolate-covered truffles.
- Sprinkle the remaining 1/4 cup of crushed pretzels over the tops.
Step 6: Chill Until Set
- Refrigerate the truffles until the chocolate coating is completely firm.
- Once set, transfer them to an airtight container, separating layers with waxed paper.
- Store in the refrigerator until ready to serve.
Homemade Halloween Candy Storage:
Keep the truffles refrigerated in an airtight container. Serve chilled or let them sit briefly at room temperature for a softer peanut butter center.
Source: Taste of Home — Original recipe
Homemade Halloween Candy : Magic Wands
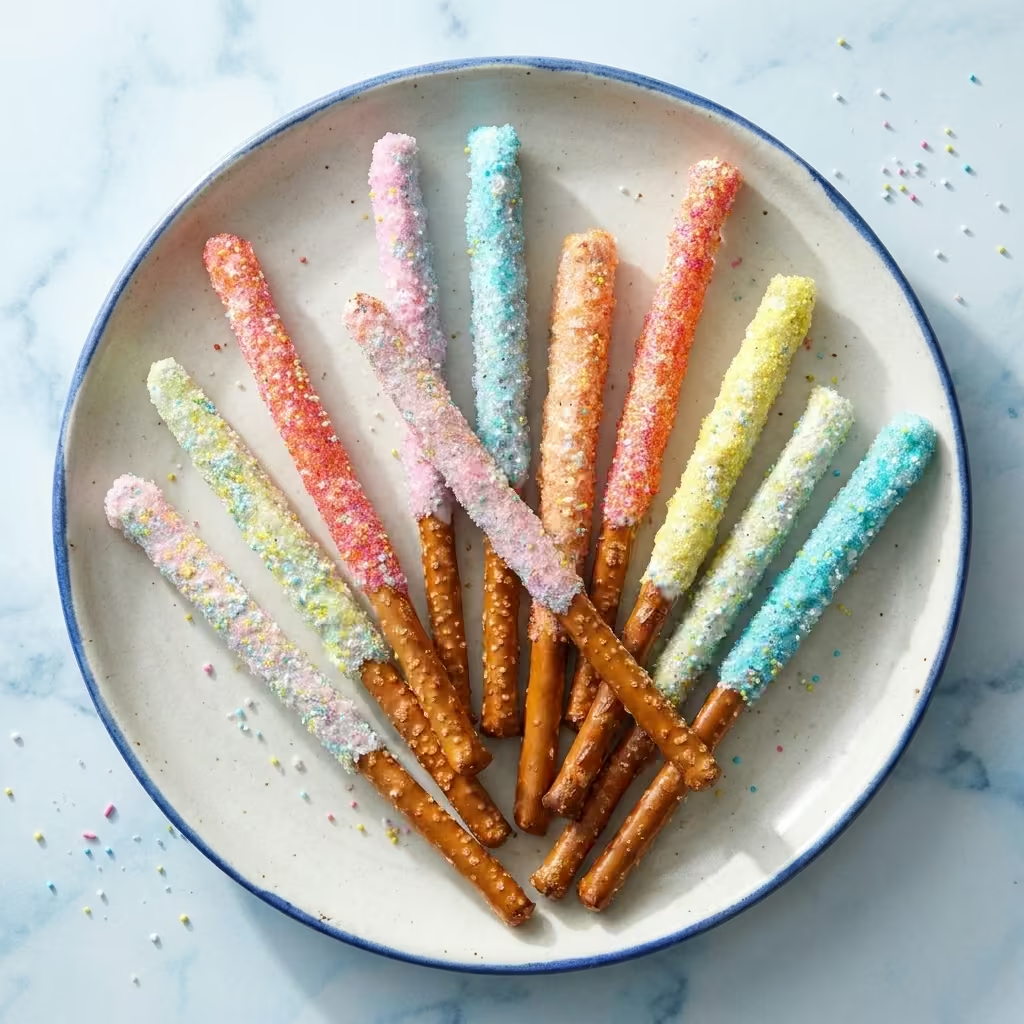
Ingredients
- 1 1/2 cups white baking chips
- 1 package (10 ounces) pretzel rods
- Colored candy stars or sprinkles
- Colored sugar or edible glitter
Step-by-Step Directions
Step 1: Melt the White Chocolate
- Place the white baking chips in a microwave-safe bowl.
- Microwave in short intervals, stirring between each interval, until the chips are completely melted and smooth.
- Stir thoroughly to remove any lumps and ensure an even consistency.
Step 2: Dip the Pretzel Rods
- Hold each pretzel rod at one end.
- Dip the other end halfway into the melted white chocolate.
- Gently shake off any excess chocolate to create an even coating.
- Repeat with the remaining pretzel rods.
Step 3: Decorate the Magic Wands
- Place the coated pretzel rods on a baking sheet lined with waxed paper.
- While the chocolate is still wet, sprinkle each wand with colored candy stars or sprinkles.
- Add colored sugar or edible glitter for a sparkling finish.
- Customize the colors to match your party theme or holiday celebration.
Step 4: Let the Coating Set
- Leave the pretzel rods at room temperature for about 15 minutes, or until the coating is completely dry and firm.
- If the chocolate takes longer to set, refrigerate the wands briefly until firm.
Step 5: Store and Serve
- Carefully remove the finished magic wands from the waxed paper.
- Arrange them on a serving platter or stand them upright in a decorative container.
- Store leftovers in an airtight container in a cool, dry place until ready to serve.
Homemade Halloween Candy: These colorful, crunchy magic wands make a fun treat for Halloween parties, birthdays, and other festive celebrations.
Homemade Halloween Candy : Martian Marshmallows
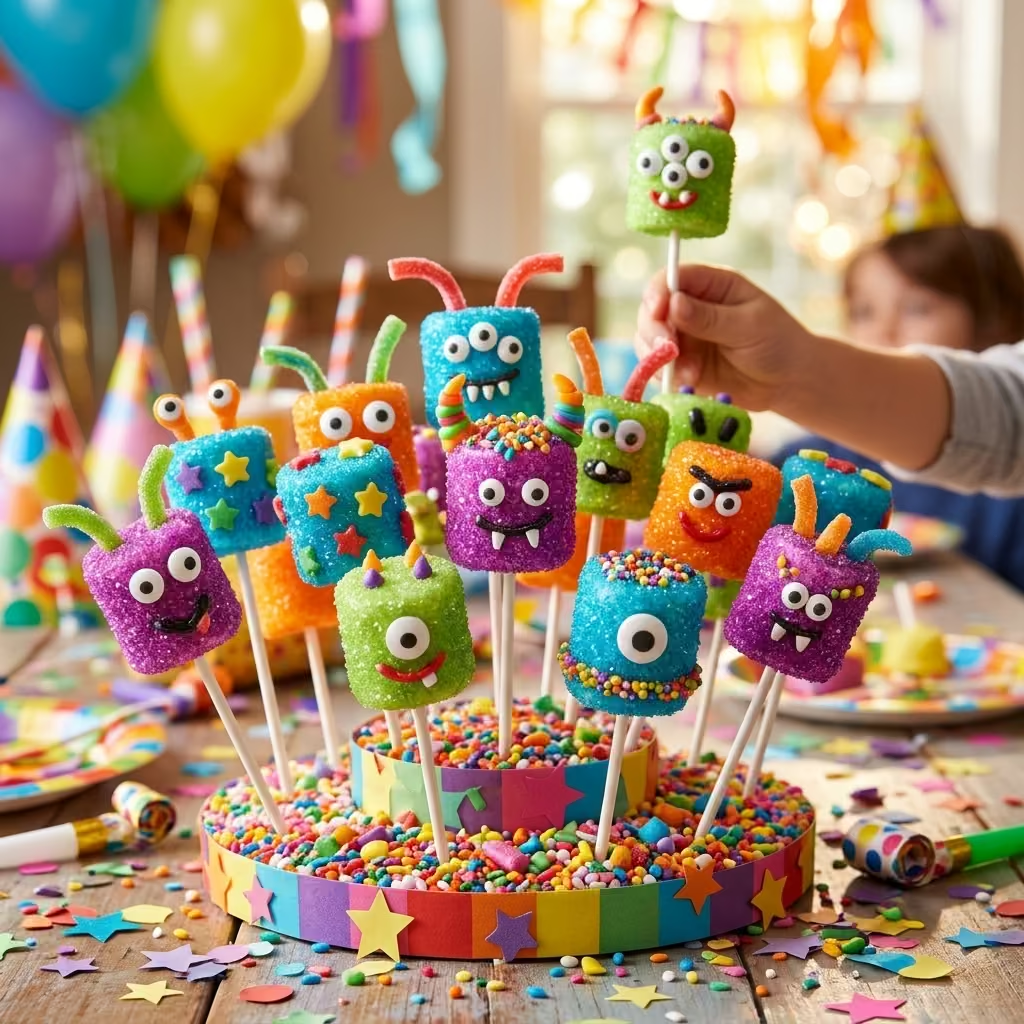
Prep time: 20 minutes · Cook time: 10 minutes · Yield: 3 dozen
Ingredients
- 12 ounces white candy coating
- 2 teaspoons shortening
- Paste food coloring, optional
- 36 lollipop sticks
- 1 package (10 ounces) large marshmallows (about 36)
- Colored sugar
- Assorted toppings: candy eyes, assorted nonpareils, licorice, and sour straws
Step-by-Step Directions
Step 1: Melt the Candy Coating
- Place the white candy coating and shortening in a microwave-safe bowl.
- Microwave in short intervals, stirring between each interval, until the mixture is completely melted and smooth.
- If desired, add a small amount of paste food coloring and stir until evenly blended.
Step 2: Prepare the Marshmallows
- Insert one lollipop stick into the center of each marshmallow.
- Line a baking sheet with waxed paper.
- Pour the colored sugar into a shallow bowl for easy coating.
Step 3: Dip the Marshmallows
- Dip each marshmallow into the melted candy coating, turning it gently until completely covered.
- Lift the marshmallow out and allow the excess coating to drip back into the bowl.
- Roll the coated marshmallow in colored sugar until evenly covered.
- Place it on the prepared baking sheet.
Step 4: Decorate the Martian Faces
- While the candy coating is still soft, prepare the assorted decorations.
- Use small dabs of melted candy coating to attach candy eyes and other toppings.
- Add licorice pieces to create mouths, antennae, or other funny alien features.
- Use sour straws to create colorful details and give each Martian its own personality.
Step 5: Let the Marshmallows Set
- Leave the decorated marshmallows on the waxed paper until the candy coating is completely firm.
- If your kitchen is warm, refrigerate them briefly to help the coating set.
- Check that all decorations are secure before serving.
Step 6: Serve and Store
Store leftovers in an airtight container in a cool, dry place, away from heat and humidity.
Arrange the Martian Marshmallows upright in a glass or decorative container for a fun party display.
For party favors, wrap each marshmallow individually in clear cellophane.
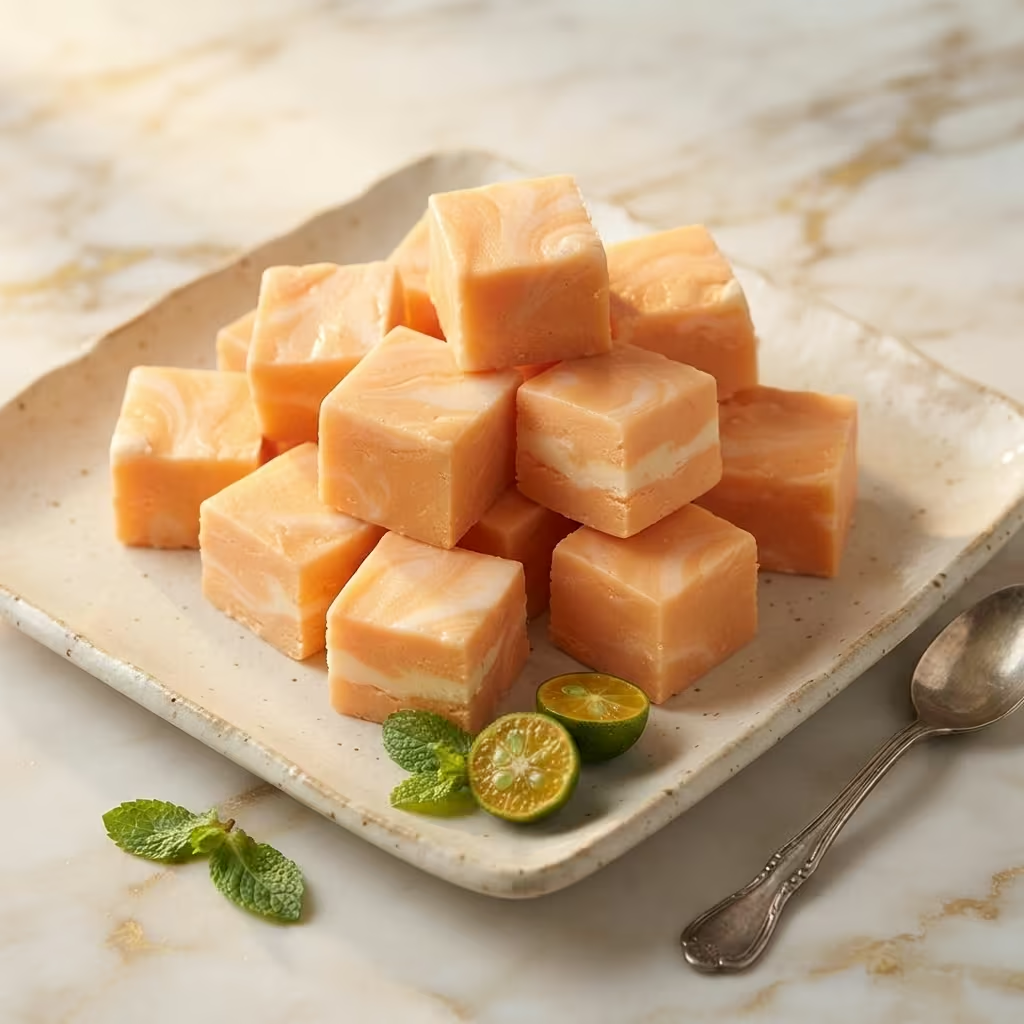
Homemade Halloween Candy : Marbled Orange Fudge
Prep time: 30 minutes · Cook time: 10 minutes · Yield: About 2 1/2 pounds
Ingredients
- 1 1/2 teaspoons butter, softened
- 3/4 cup butter
- 3 cups granulated sugar
- 3/4 cup heavy whipping cream
- 1 package (10 to 12 ounces) white baking chips
- 1 jar (7 ounces) marshmallow creme
- 3 teaspoons orange extract
- 12 drops yellow food coloring
- 5 drops red food coloring
Step-by-Step Directions
Step 1: Prepare the Pan
- Grease a 13 × 9-inch baking pan with 1 1/2 teaspoons of butter.
- Set the prepared pan aside.
Step 2: Cook the Sugar Mixture
- In a large, heavy-bottomed saucepan, combine the granulated sugar, heavy whipping cream, and remaining 3/4 cup of butter.
- Cook over low heat, stirring constantly, until the sugar dissolves completely.
- Bring the mixture to a boil.
- Continue cooking and stirring for 4 minutes.
Step 3: Add the White Chocolate and Marshmallow Creme
- Remove the saucepan from the heat.
- Immediately stir in the white baking chips and marshmallow creme.
- Continue stirring until the chips melt and the mixture becomes smooth.
- Remove 1 cup of the mixture and set it aside for the white marbled swirls.
Step 4: Add the Orange Flavor and Color
- Add the orange extract to the remaining mixture in the saucepan.
- Stir in the yellow and red food coloring until evenly blended and the fudge reaches a bright orange color.
- Adjust the color slightly if needed, using small additional amounts of food coloring.
Step 5: Create the Marbled Effect
- Pour the orange fudge mixture into the prepared baking pan.
- Drop spoonfuls of the reserved white mixture evenly over the orange surface.
- Using a butter knife, gently swirl the white mixture through the orange fudge to create a marbled pattern.
- Avoid overmixing so the contrasting colors remain visible.
Step 6: Chill Until Firm
- Cover the pan and refrigerate until the fudge is completely set.
- Allow several hours for the fudge to firm up, depending on your refrigerator and the depth of the mixture.
Step 7: Cut and Store
- Once firm, cut the fudge into approximately 1-inch squares.
- Arrange the pieces in an airtight container, separating layers with waxed paper if necessary.
- Store in the refrigerator to maintain freshness and texture.
Learn more :
- 5 Best Halloween Recipes for a Spooky Party
- Halloween Cake Pops: 17 Spooky & Fun Treats
- Best Spooktacular Halloween Cake Pops 1
- Monster Mash Recipe (Easy Halloween Treat)
- Witch Finger Cookies: A Spooky Treat Without Food Coloring
People Also Ask (PAA): Homemade Halloween Candy
1. What are the easiest homemade Halloween candies to make?
Some of the easiest homemade Halloween candies include chocolate peanut butter cups, pretzel treats, chocolate-covered marshmallows, homemade fudge, caramel apples, candy bark, and peanut butter truffles. Most require just a few ingredients and minimal cooking.
2. What candy can I make at home for Halloween?
You can make a variety of Halloween candies at home, including homemade caramels, chocolate truffles, peanut butter cups, candy corn-inspired treats, chocolate-covered pretzels, marshmallow pops, and Halloween-themed fudge.
3. How do you make homemade Halloween candy?
To make homemade Halloween candy, choose a simple recipe, prepare your ingredients, melt chocolate or cook a candy mixture as directed, and add festive decorations such as orange and black sprinkles, candy eyes, or colored sugar. Allow the candy to cool and set completely before packaging.
4. What are the best homemade Halloween candy recipes for kids?
Kid-friendly options include chocolate-covered pretzel rods, marshmallow pops, candy bark, peanut butter balls, chocolate-dipped cookies, and cereal treats decorated with Halloween sprinkles. Adults should handle hot sugar mixtures and melted candy when temperatures are high.
5. Can you make Halloween candy without a candy thermometer?
Yes. Many homemade Halloween candy recipes do not require a candy thermometer, including chocolate bark, peanut butter cups, chocolate-covered pretzels, truffles, and marshmallow treats. However, recipes for traditional caramels, toffee, and hard candy often require precise temperature control.
6. How far in advance can you make homemade Halloween candy?
Depending on the recipe, homemade Halloween candy can be prepared anywhere from a few days to two weeks in advance. Chocolate bark, fudge, and some hard candies generally keep longer than treats containing fresh cream or other perishable ingredients. Always follow the recipe’s storage instructions.
7. How do you store homemade Halloween candy?
Store homemade candy in airtight containers in a cool, dry place when appropriate. Refrigerate candies containing perishable ingredients, such as cream-based fillings, and separate layers with waxed paper to prevent sticking. Keep candy away from heat and humidity.
8. What are some no-bake homemade Halloween candy ideas?
No-bake Halloween candy ideas include chocolate peanut butter cups, Oreo truffles, chocolate bark, pretzel clusters, peanut butter balls, and chocolate-covered marshmallows. These treats are ideal when you want festive sweets without turning on the oven.
9. How do you package homemade Halloween candy for trick-or-treaters?
Place individual pieces in food-safe candy bags or wrappers and decorate them with Halloween-themed stickers, ribbons, or labels. For trick-or-treating, use individually wrapped treats, clearly identify common allergens when possible, and follow local food-safety recommendations.
10. What are the most popular homemade Halloween candies in the USA?
Popular homemade Halloween candy ideas in the United States include peanut butter cups, chocolate fudge, caramel apples, candy corn-inspired sweets, chocolate-covered pretzels, toffee, peanut butter truffles, and homemade candy bars.
11. Can you make homemade Halloween candy without corn syrup?
Yes. Some homemade candies can be made with alternatives such as honey, maple syrup, or sugar-based syrups, depending on the recipe. However, substitutions can affect texture, flavor, and crystallization, especially in caramels and hard candy.
12. What homemade Halloween candy makes the best party favors?
Chocolate-covered pretzel rods, decorated marshmallow pops, mini fudge squares, candy bark, and individually wrapped truffles make excellent Halloween party favors because they are easy to portion and decorate.
13. How do you make homemade Halloween candy look spooky?
Use candy eyes, edible googly eyes, orange and purple candy melts, black sprinkles, gummy worms, chocolate drizzle, and Halloween-shaped molds. You can turn ordinary truffles into eyeballs, marshmallows into monsters, and pretzels into magical wands.
14. Is homemade Halloween candy cheaper than store-bought candy?
Homemade candy can be cheaper per serving when made in batches, especially when using pantry staples such as sugar, chocolate chips, pretzels, and peanut butter. Specialty decorations and premium chocolate can increase the cost, so compare ingredient prices and serving sizes.
15. What is the best homemade Halloween candy to give as a gift?
Homemade fudge, chocolate truffles, peanut butter cups, salted caramels, and chocolate bark are excellent edible gifts. Package them in small boxes or decorative tins, and include the preparation date and relevant allergen information.
Frequently Asked Questions About Homemade Halloween Candy
What are the easiest homemade Halloween candies to make?
Some of the easiest homemade Halloween candies include chocolate peanut butter cups, chocolate-covered pretzels, homemade fudge, candy bark, marshmallow pops, and peanut butter truffles. Most require just a few ingredients and are easy to customize with festive decorations.
How far in advance can you make homemade Halloween candy?
Most homemade Halloween candy can be made 3–7 days ahead, depending on the recipe. Fudge, caramels, and chocolate bark may keep longer when stored properly, while candies containing cream or other perishable ingredients should be refrigerated according to the recipe instructions.
How do you store homemade Halloween candy?
Store homemade Halloween candy in an airtight container in a cool, dry place when appropriate. Refrigerate candies with perishable fillings, and separate layers with waxed paper to prevent sticking. Always follow the storage instructions for each recipe.
What homemade Halloween candy is best for kids?
Chocolate-covered pretzels, marshmallow pops, peanut butter cups, candy bark, and decorated fudge are fun options for kids. Adults should handle hot sugar mixtures and melted candy, and caregivers should check ingredients for allergens and choking hazards.
Can you make homemade Halloween candy without a candy thermometer?
Yes! Many recipes, including chocolate bark, peanut butter cups, truffles, and chocolate-covered pretzels, do not require a candy thermometer. Traditional caramels, toffee, and hard candy generally require more precise temperature control.
What ingredients do you need to make homemade Halloween candy?
Common ingredients include chocolate chips, peanut butter, sugar, butter, sweetened condensed milk, pretzels, marshmallows, and candy decorations. The exact ingredients depend on the recipe, but many Halloween treats use simple pantry staples.
Can homemade Halloween candy be frozen?
Many homemade candies, including fudge, truffles, and peanut butter treats, can be frozen in airtight, freezer-safe containers. Thaw them according to the recipe instructions to help prevent condensation from affecting the texture or chocolate coating.
How do you decorate homemade Halloween candy?
Decorate homemade Halloween candy with orange and black sprinkles, candy eyes, colored candy melts, edible glitter, gummy worms, or Halloween-shaped candies. Add decorations while the chocolate or candy coating is still soft so they adhere properly.