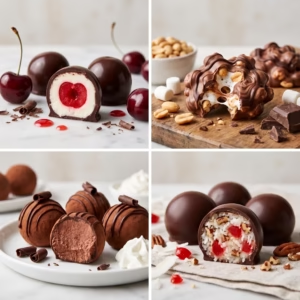
If you’re looking to wow your friends and family this October, Halloween cake pops are the perfect festive treat. These bite-sized delights are fun to make, easy to customize, and guaranteed to impress at any Halloween party. From cute pumpkins and mummies to spooky eyeballs and vampires, the possibilities are endless when it comes to decorating your Halloween cake pops.
Halloween isn’t just about costumes and candy—it’s a celebration of creativity, and what better way to celebrate than with treats you can make yourself? These Halloween cake pops are simple enough for beginners but fun enough to keep experienced bakers entertained.
A Brief History of Halloween
Halloween, celebrated on October 31st, traces its roots back to the ancient Celtic festival of Samhain. During Samhain, people lit bonfires and wore costumes to ward off ghosts. Over time, Halloween evolved, incorporating Christian traditions like All Hallows’ Eve. Today, Halloween is celebrated worldwide with costumes, parties, and lots of candy—making Halloween cake pops a delicious addition to the festivities.
Halloween in the USA
In the United States, Halloween is a major holiday for children and adults alike. People decorate homes with spooky themes, carve pumpkins into jack-o’-lanterns, and go trick-or-treating. Food plays a big role too, with themed desserts like Halloween cake pops becoming increasingly popular. From school parties to family gatherings, these treats are both fun and tasty for all ages.
1-Jack-O’-Lantern Halloween Cake Pops

Ingredients for 12 halloween pop cake treats:
- One standard box of chocolate cake mix
- Eggs, oil, and water as required by the cake mix instructions
- One cup buttercream frosting (homemade or store-bought)
- Orange candy melts for coating
- Black decorating icing or edible marker for details
- Twelve lollipop sticks for serving
Instructions:
- Bake the chocolate cake according to the package directions and allow it to cool completely. A fully cooled cake prevents the mixture from becoming too sticky or overly soft.
- Break the cake into pieces and crumble it in a large bowl until the texture is fine and even. Avoid leaving large chunks, since the dough must hold together well.
- Add the buttercream frosting gradually and mix with your hands or a spatula until a smooth, dough-like consistency forms. The mixture should be soft enough to shape but firm enough to keep its form.
- Scoop and roll the dough into twelve equal balls. Place them on a tray and chill for at least 15 minutes to firm up. This step helps the halloween pop cake balls stay secure on the sticks later.
- Melt the orange candy melts in a microwave-safe bowl, heating in short intervals and stirring to achieve a silky consistency. Do not overheat, since overheated melts can become thick and difficult to coat with.
- Dip the tip of each lollipop stick into the melted candy and insert it halfway into each chilled ball. This creates a stronger bond so the halloween pop cake stays attached.
- Carefully dip each ball into the melted orange coating, letting the excess drip off. Rotate the stick gently for an even and smooth shell. Place each coated halloween pop cake upright to allow the candy to set without creating flat spots.
- When the coating firms up slightly, use the black icing to draw classic jack-o’-lantern faces such as triangles for eyes and a spooky smile. Allow the decorations to dry fully so they remain sharp and neat.
- Once the coating and designs are completely set, the halloween pop cake is ready to display or serve. Store in a cool spot if preparing ahead to maintain shape and texture.
2-Pumpkin Spice Halloween Cake Pops

Ingredients for 24 halloween pop cake treats:
- One box yellow cake mix
- Eggs, oil, and water as required on the package
- One cup pumpkin puree for seasonal flavor
- One teaspoon pumpkin pie spice
- One half cup buttercream frosting
- Orange candy melts for coating
- Green candy melts for decorative stems
- Lollipop sticks for serving
Instructions:
- Prepare the yellow cake following the directions on the package, then let it cool fully to keep the texture from turning mushy when combined.
- Crumble the cooled cake into fine crumbs inside a large bowl. Add the pumpkin puree, buttercream frosting, and pumpkin pie spice. Mix until everything forms a smooth, slightly sticky dough that can be rolled easily.
- Shape the mixture into twenty-four evenly sized balls and place them in the freezer for about ten minutes. Chilling helps each halloween pop cake hold firmly to the stick when dipped.
- Melt the orange candy melts in short microwave intervals, stirring in between until smooth. Dip the tip of each stick into the melted coating before inserting it into each chilled ball. Then dip the halloween pop cake into the orange coating, allowing any excess to drip off for a clean finish.
- Melt the green candy melts and pipe a small stem on top of each coated ball to complete the pumpkin design. This detail gives every halloween pop cake a signature harvest look suitable for spooky celebrations.
- Allow the treats to cool and harden completely before arranging or serving so the coating stays glossy and intact.
3-Mummy Halloween Cake Pops

Ingredients for 12 halloween pop cake treats:
- One box vanilla cake mix
- Eggs, oil, and water as listed on the package
- One cup buttercream frosting
- White candy melts for coating
- Mini chocolate chips for the spooky eyes
- Lollipop sticks for handling and serving
Instructions:
- Bake the vanilla cake according to the package instructions and let it cool completely. A cool cake crumbles more cleanly and blends easily with frosting.
- Break the cake apart and crumble it in a bowl until no large pieces remain. Add the buttercream frosting and combine until a soft dough-like texture forms that can be rolled without cracking.
- Roll the mixture into twelve uniform balls and refrigerate them for about fifteen minutes to firm up. This helps keep each halloween pop cake securely attached to the stick during dipping.
- Melt the white candy melts gently so the coating becomes smooth. Dip the tip of each lollipop stick into the melts, then insert it halfway into each ball. Fully dip each halloween pop cake into the melted coating and rotate for even coverage, letting the extra drip away.
- Once the coating begins to set, use the remaining melted white candy or white icing to create thin lines that resemble mummy bandages wrapped around each pop. Leave a small space where the eyes will go.
- Press mini chocolate chips onto the space left uncovered to form the eyes. Allow everything to set completely so the mummy details stay sharp when handled or served.
4-Ghost Halloween Cake Pops

Ingredients for 12 halloween pop cake treats:
- One box white cake mix
- Eggs, oil, and water as directed on the package
- One cup vanilla frosting
- White candy melts for smooth ghostly coating
- Black decorating icing for the spooky faces
- Lollipop sticks for serving
Instructions:
- Bake the white cake following the package instructions and allow it to cool completely. Cooling fully prevents the mixture from becoming too sticky when blended with frosting.
- Crumble the cake into very fine crumbs in a large bowl. Add the vanilla frosting and mix until the texture becomes a soft dough that can be shaped without cracking or falling apart.
- Roll the mixture into twelve round balls. Place them on a tray and freeze for about ten minutes to help them firm up. Chilled dough makes each halloween pop cake easier to dip and keeps it secure on the stick.
- Melt the white candy melts in short heating intervals, stirring until smooth and silky. Dip the tip of each stick into the melted coating, then insert the stick into each chilled ball. Fully coat each halloween pop cake in the melted white candy, gently tapping off any excess for a neat finish.
- Set the coated pops upright and allow the coating to begin setting. Once slightly firm, use the black decorating icing to draw simple ghost faces such as round eyes and an open mouth to give each treat a playful, floating spirit look.
- Let the halloween pop cake set completely before arranging them for parties or packaging. A fully set coating keeps the design intact and gives each ghost its sleek, bright finish.
5-Monster Halloween Cake Pops

Ingredients for 12 halloween pop cake treats:
- One box chocolate or vanilla cake mix
- Eggs, oil, and water required for the cake mix
- One cup frosting of your choice
- Assorted candy melts in fun monster colors such as green, purple, blue, or bright yellow
- Edible googly eyes or candy eyes in different sizes for personality
- Lollipop sticks for shaping and serving
- Optional decorating icing for monster hair, teeth, and quirky features
Instructions:
- Bake the cake following the package directions and allow it to cool completely. Cooling keeps the mixture from turning mushy and ensures each halloween pop cake holds shape.
- Crumble the cake into a large mixing bowl, then add frosting and blend until the mixture becomes a smooth dough that sticks together easily without crumbling.
- Shape the dough into twelve round balls. Place them in the refrigerator for at least fifteen minutes to become firm. Chilling makes dipping easier and helps each halloween pop cake stay secured to the stick.
- Melt the candy melts in separate bowls, choosing a bold color for each monster. Stir until smooth. Dip the tip of each stick in the melted candy before inserting it into the chilled cake balls to help lock them in place.
- Fully dip each halloween pop cake into the melted coating, allowing excess to drip away. Set them upright to dry so the shells remain round and clean.
- Before the coating hardens completely, press candy eyes onto each pop. Use one eye for a silly cyclops monster or several eyes for a wild multi-eyed creature.
- Once the shell is set, add details using decorating icing. Create spiky hair, toothy grins, tangled eyebrows, jagged mouths, or goofy expressions that bring every monster to life. Encourage creativity so no two halloween pop cake characters look alike.
6-Eyeball Halloween Cake Pops

Ingredients for 12 halloween pop cake treats:
- One box vanilla cake mix
- Eggs, oil, and water as directed on the package
- One cup buttercream frosting
- White chocolate melts or white candy melts for a smooth eyeball coating
- Red decorating icing for spooky veins
- Blue or green decorating icing for the iris and pupil
- Lollipop sticks for easy serving and display
Instructions:
- Bake the vanilla cake by following the box instructions. Let it cool completely to achieve a clean crumble and a balanced texture when mixed with frosting.
- Crumble the cooled cake into fine crumbs inside a mixing bowl. Add the buttercream frosting gradually and combine until the mixture turns into a soft dough that can be shaped easily without falling apart.
- Roll the dough into twelve smooth and even balls. Place them on a tray and chill for fifteen minutes to firm up. A firm base helps each halloween pop cake stay securely attached to the stick during the dipping process.
- Melt the white chocolate or white candy melts in short microwave intervals, stirring between heating until silky and lump-free. Dip the end of each lollipop stick into the melted coating, then insert it midway into each chilled ball to create a secure hold.
- Fully dip each halloween pop cake into the white coating. Let the excess drip off to keep the spherical shape clean and polished. Set the coated pops upright and allow them to begin setting.
- Once the coating is almost firm, use blue or green decorating icing to draw a round iris in the center of each pop. Add a small black dot inside the iris to represent the pupil. Allow this detail to dry slightly so it stays distinct.
- Finish the look by drawing thin squiggly lines across the surface using red icing to mimic bloodshot veins. Spread these lines outward from the center for a creepy Halloween eyeball effect.
- Let the halloween pop cake set completely before arranging or packaging. A firm coating ensures the spooky eyeball design stays intact and visually striking.
7-Witch’s Cauldron Halloween Cake Pops

Ingredients for 12 halloween pop cake treats:
- One box chocolate cake mix
- Eggs, oil, and water as listed on the package
- One cup frosting such as chocolate or vanilla
- Black candy melts for the cauldron coating
- Green candy melts for a bubbling potion effect
- Lollipop sticks for serving and dipping stability
Instructions:
- Bake the chocolate cake as directed on the package and let it cool completely. Cooling ensures the cake blends smoothly with the frosting without becoming overly soft.
- Crumble the cooled cake into fine crumbs in a large bowl. Add the frosting and mix until a soft dough forms that can be shaped easily without cracking.
- Roll the dough into twelve firm, round balls. Refrigerate them for fifteen minutes to help each halloween pop cake stay secure when coated.
- Melt the black candy melts in short intervals, stirring until smooth. Dip the tip of each stick into the melted coating, then insert it halfway into a chilled ball for extra stability. Fully dip each halloween pop cake into the black coating and allow the excess to drip off while keeping the surface even.
- Stand the pops upright and allow the black coating to start setting. Melt the green candy melts and pipe a generous blob over the top of each pop to resemble bubbling witch’s potion overflowing from a cauldron.
- Let the green coating drip slightly over the edges for a realistic brew effect. Allow each halloween pop cake to set completely so the shine and details remain crisp.
- Arrange the finished treats for a spooky display. Every pop becomes a tiny bubbling cauldron perfect for Halloween parties.
8-Donut Hole Monster Halloween Cake Pops

Ingredients for 12 halloween pop cake treats:
- Twelve mini donut holes in any flavor
- Assorted candy melts for colorful monster coatings
- Edible candy eyes in different sizes
- Sprinkles for monster textures, spikes, and playful details
- Lollipop sticks for serving and decorating ease
Instructions:
- Insert a lollipop stick into each donut hole, pushing gently so the pop stays secure. Using chilled donut holes can help prevent tearing during assembly.
- Melt the candy melts in separate bowls, choosing bold and fun monster shades. Stir until completely smooth to ensure a clean coating on each halloween pop cake.
- Dip each donut hole into one of the melted candy coatings and rotate slowly for a smooth finish. Allow the excess candy to drip off so the surface remains neat and evenly covered.
- Before the coating dries, attach edible eyes. Use a single large eye for a silly cyclops or multiple small eyes for a more chaotic monster look that fits Halloween excitement.
- Add sprinkles while the coating is still tacky to create hair, spikes, scales, or quirky patterns that bring each monster character to life. No two halloween pop cake designs should look the same.
- Stand the finished pops upright and allow them to set fully until the shell is firm and glossy. Once dry, they are ready to serve or display as a fun and quick alternative to traditional cake pops.
9-Zombie Halloween Cake Pops

Ingredients for 12 halloween pop cake treats:
- One box chocolate cake mix
- Eggs, oil, and water as directed on the package
- One cup frosting of your choice
- White candy melts for base coating
- Red and green candy melts or decorating icing for zombie “wounds” and gory details
- Lollipop sticks for serving
Instructions:
- Bake the chocolate cake according to package instructions and allow it to cool completely. A fully cooled cake makes it easier to crumble and mix with frosting.
- Crumble the cake into fine pieces in a large bowl. Add frosting and mix until a smooth, moldable dough forms that holds together easily without falling apart.
- Roll the mixture into twelve uniform balls. Chill them in the refrigerator for at least fifteen minutes to firm up. Firm cake balls make dipping in candy melts easier and help them stay attached to the sticks.
- Melt the white candy melts in short microwave intervals, stirring frequently until smooth. Dip the tip of each stick into the coating before inserting it halfway into each ball to create a secure hold. Then fully dip each halloween pop cake into the melted white coating, letting any excess drip off.
- Stand the coated pops upright and allow the base coating to set slightly. Melt or prepare red and green candy melts or icing, then carefully pipe wounds, scars, and gory details onto each pop to create a spooky zombie effect. Spread lines and blobs for a realistic undead look.
- Let each halloween pop cake set completely before serving or displaying. Once hardened, the zombie features stay intact, giving a creepy and fun treat perfect for Halloween parties.
10-Candy Corn Halloween Cake Pops

Ingredients for 12 halloween pop cake treats:
- One box yellow cake mix
- Eggs, oil, and water as directed on the package
- One cup frosting (vanilla works best)
- White, yellow, and orange candy melts for the signature candy corn colors
- Lollipop sticks for serving
Instructions:
- Bake the yellow cake according to package instructions and allow it to cool completely. Proper cooling ensures a smooth, workable texture when mixed with frosting.
- Crumble the cooled cake into fine crumbs in a large bowl. Add the frosting and mix until a soft, moldable dough forms that can be shaped without cracking.
- Shape the dough into oval or teardrop shapes to mimic the classic candy corn shape. Place the shaped cake balls on a tray and freeze for at least 10 minutes to firm up. Freezing helps the halloween pop cake hold its shape during dipping.
- Melt the candy melts in three separate bowls: white, yellow, and orange. Stir each until smooth and glossy.
- Start by dipping the bottom third of each pop into orange candy melts, letting excess drip off. Next, dip the middle section in yellow candy melts, carefully overlapping slightly with the orange for a smooth transition. Finally, dip the top section in white candy melts to complete the candy corn look.
- Allow the layers to set completely while keeping the pops upright so the colors remain crisp and clean.
- Once fully set, the halloween pop cake is ready to serve or display. These festive treats perfectly capture the iconic Halloween candy corn appearance in a fun, bite-sized pop.
11-Poison Apple Halloween Cake Pops

Ingredients for 12 halloween pop cake treats:
- One box yellow cake mix
- Eggs, oil, and water as directed on the package
- One cup apple puree for a naturally sweet, fruity flavor
- Half a cup frosting to bind the mixture
- Red candy melts for a shiny, poison-apple coating
- Lollipop sticks for easy serving
Instructions:
- Preheat the oven and bake the yellow cake following the package instructions. Allow the cake to cool completely on a wire rack. Cooling fully ensures the crumbs combine smoothly with the apple puree and frosting without becoming mushy.
- Once cooled, crumble the cake into fine, uniform crumbs in a large mixing bowl. Add the apple puree and frosting, and gently fold until a smooth, moldable dough forms. The mixture should be firm enough to hold shape but soft enough to roll easily.
- Roll the mixture into twelve evenly sized balls. Place them on a parchment-lined tray and chill in the refrigerator for at least 15 minutes. Chilling the balls helps them stay firm during the candy coating process and ensures each halloween pop cake adheres well to the stick.
- Melt the red candy melts in short intervals in the microwave, stirring frequently until the mixture is smooth, glossy, and free of lumps. For extra stability, dip the tip of each lollipop stick into the melted candy before inserting it into the chilled cake balls. This creates a stronger bond between the stick and the pop.
- Fully dip each cake ball into the red candy melts, gently rotating to coat evenly. Allow any excess coating to drip off and place the pops upright on a tray lined with parchment paper. Let the coating set completely until firm and glossy.
- For a more realistic poison apple effect, you can drizzle a little extra red candy over the top or add tiny edible leaves for decoration.
- Once fully hardened, the Poison Apple Halloween Pop Cake is ready to display or serve. Each pop has a perfect glossy red finish, capturing the classic “poison apple” look while providing a sweet, fruity surprise inside.
12-Vampire Halloween Cake Pops

Ingredients for 12 halloween pop cake treats:
- One box chocolate cake mix
- Eggs, oil, and water as listed on the package
- One cup frosting of your choice
- White candy melts for coating
- Red decorating icing to create “blood” effects
- Lollipop sticks for serving
Instructions:
- Bake the chocolate cake according to the package instructions and let it cool completely. A fully cooled cake ensures a smooth texture when mixed with frosting.
- Crumble the cooled cake into fine crumbs in a large bowl. Add the frosting and mix until the dough becomes soft but firm enough to hold its shape.
- Roll the mixture into twelve uniform balls. Place them on a tray and chill in the refrigerator for at least fifteen minutes. Chilling helps the halloween pop cake stay firm during dipping and keeps the stick secure.
- Melt the white candy melts in short intervals, stirring until smooth and glossy. Dip the tip of each lollipop stick into the melted coating before inserting it into each chilled ball for added stability. Fully coat each pop in the white candy melts and allow excess to drip off. Stand them upright until the coating sets slightly.
- Use red decorating icing to create a “blood” effect near the mouth of each halloween pop cake. You can add drips or small lines to make the vampire design realistic and spooky.
- Let the coating and icing set completely before serving. The result is a fun, eerie vampire halloween pop cake perfect for parties, displays, or trick-or-treat treats.
13-Witch Hat Brownie Halloween Cake Pops

Ingredients for 12 halloween pop cake treats:
- One box brownie mix
- Eggs, oil, and water as directed on the package
- Frosting (to bind the brownie crumbs)
- Black candy melts for coating
- Chocolate triangles for the hat brim and tip
- Lollipop sticks for serving
Instructions:
- Bake the brownies according to package instructions and allow them to cool completely. Cooling ensures a workable texture when mixed with frosting.
- Crumble the cooled brownies into a large bowl and mix in enough frosting to create a soft, moldable dough. The mixture should hold its shape when rolled or shaped into cones.
- Shape the brownie mixture into small cone shapes to mimic witch hats. Insert a lollipop stick into each cone carefully so it stays secure. Chill the shaped pops in the refrigerator for at least 15 minutes to firm up.
- Melt the black candy melts in short microwave intervals, stirring until smooth and glossy. Dip each brownie cone fully into the melted candy melts, letting excess drip off for a clean finish. Place the coated pops upright on a tray to set.
- Attach chocolate triangles to the base or tip of each cone to complete the witch hat design. You can secure them with a dab of melted candy or frosting.
- Allow the pops to set completely before serving. The result is a spooky, festive witch hat halloween pop cake perfect for Halloween parties or themed displays.
14-Caramel Apple Donut Halloween Cake Pops

Ingredients for 12 halloween pop cake treats:
- Twelve mini apple-flavored donuts
- Caramel sauce or melted caramel for coating
- Chopped peanuts for texture and garnish
- Lollipop sticks for serving
Instructions:
- Insert a lollipop stick into each mini apple donut gently, making sure it is secure but doesn’t tear the donut.
- Warm the caramel gently until smooth and pourable. Dip each donut into the caramel, rotating to coat evenly. Allow excess caramel to drip off for a neat finish.
- Immediately sprinkle chopped peanuts over the caramel-coated donut to create a crunchy, festive topping.
- Place the coated pops upright on a tray lined with parchment paper. Chill in the refrigerator until the caramel is fully set.
- Once the caramel has hardened, the caramel apple donut halloween pop cake is ready to serve. Each pop combines the sweetness of caramel with the fruity flavor of apple donuts, making it a fun and festive treat for Halloween parties.
15-Bat Oreo Halloween Cake Pops

Ingredients for 12 halloween pop cake treats:
- Twelve Oreo cookies
- One cup frosting to bind the crushed cookies
- Black candy melts for coating
- Candy eyes for spooky bat faces
- Lollipop sticks for serving
Instructions:
- Crush the Oreo cookies into fine crumbs in a large mixing bowl. Add the frosting and mix until a moldable dough forms that holds together easily.
- Shape the mixture into small bat body shapes. Insert a lollipop stick into each bat carefully so it remains stable during dipping. Chill the shaped pops in the refrigerator for about 15 minutes to firm up.
- Melt the black candy melts in short microwave intervals, stirring frequently until smooth and glossy. Dip each bat pop fully into the melted candy, letting any excess drip off. Place the coated pops upright on a tray to set.
- Once the coating begins to firm, attach candy eyes on each bat. Use extra black candy melts or chocolate triangles to create wings on the sides of each bat for a realistic look.
- Allow the halloween pop cake to set completely before serving. The result is a spooky, fun bat-themed treat that’s perfect for Halloween parties or as a creative dessert display.
16-Caramel Apple Donut Halloween Cake Pops

Ingredients for 12 halloween pop cake treats:
- Twelve mini apple-flavored donuts
- Caramel sauce or melted caramel for coating
- Chopped peanuts for topping
- Lollipop sticks for serving
Instructions:
- Gently insert a lollipop stick into each mini apple donut, taking care not to tear the donut.
- Warm the caramel until smooth and pourable. Dip each donut into the caramel, rotating to coat evenly. Let any excess drip off for a clean finish.
- Immediately sprinkle chopped peanuts over the caramel coating to add texture and a festive look.
- Place the pops upright on a tray lined with parchment paper and chill in the refrigerator until the caramel has fully set.
- Once set, the caramel apple donut halloween pop cake is ready to serve. These pops combine the sweet flavor of caramel with the fruity apple donuts for a classic Halloween treat.
17-Bat Halloween Cake Pops

Ingredients for 12 halloween pop cake treats:
- Twelve cake balls in any flavor
- Frosting to bind and attach decorations
- Oreo cookies for wings
- Candy eyes for spooky bat faces
- Lollipop sticks for serving
Instructions:
- Prepare your cake balls and ensure they are firm and chilled. This helps them hold shape while decorating.
- Use frosting as “glue” to attach Oreo cookie halves to the sides of each cake ball to create bat wings. Press gently so they stay secure.
- Attach candy eyes on each bat using a small dab of frosting. Adjust placement for a fun or spooky look.
- Chill the completed pops in the refrigerator until the frosting sets and all decorations are firm.
- Once firm, the bat halloween pop cake is ready to serve. These spooky pops are perfect for Halloween parties, treats, or creative dessert displays.
LEARN MORE :
Best Spooktacular Halloween Cake Pops
Monster Mash Recipe (Easy Halloween Treat)
Witch Finger Cookies: A Spooky Treat Without Food Coloring
🎃 Nutritional Facts of Halloween Cake Pops
Halloween cake pops aren’t just cute—they’re also portion-friendly treats! While exact numbers depend on the recipe and size, here’s an approximate guide for one medium cake pop (about 40g):
- Calories: 150–200 kcal
- Total Fat: 7–10g
- Saturated Fat: 4–6g
- Carbohydrates: 20–25g
- Sugars: 15–18g
- Protein: 2–3g
- Fiber: <1g
Tips for healthier pops:
- Add fruit puree for natural sweetness and moisture.
- Use whole-grain or reduced-sugar cake.
- Swap regular frosting for Greek yogurt-based frosting.
👻 Funny Facts About Halloween Cake Pops
- Cake pops were invented in 2008—but quickly became “spooky snack stars” during Halloween!
- Candy eyes can sometimes give cake pops a “surprisingly judgmental stare.”
- The stick in a cake pop is sometimes called the “wand of dessert magic.”
- Pumpkin-shaped cake pops are technically mini pumpkin imposters—no seeds required!
- Cake pops are more Instagram-famous than some celebrities on Halloween night.
- A well-decorated cake pop can survive a zombie apocalypse… if it doesn’t get eaten first.
- Some people collect cake pop sticks like Halloween spoons or coffee mugs.
- Oreo wings on bat cake pops make them the ultimate flying treats.
- The phrase “one more cake pop” has been scientifically proven to be irresistible.
- A cake pop can double as a festive centerpiece—until someone bites it.
🎃 Conclusion
Halloween cake pops are more than just a sweet treat—they’re a fun, creative, and festive way to celebrate the spooky season! From classic pumpkin shapes to ghostly designs and bat-inspired creations, these bite-sized delights bring joy to kids and adults alike. With simple ingredients, easy-to-follow instructions, and plenty of room for personalization, anyone can make these adorable treats at home.
Whether you’re hosting a Halloween party, sending treats to school, or looking for a fun family activity, Halloween cake pops are a perfect choice. Remember, you can make them healthier, decorate them with a touch of spooky humor, and even enjoy the process of crafting them as much as eating them!
So grab your cake, frosting, and candy decorations—let your creativity run wild, and make this Halloween the sweetest one yet. After all, nothing says “trick or treat” quite like a homemade cake pop!