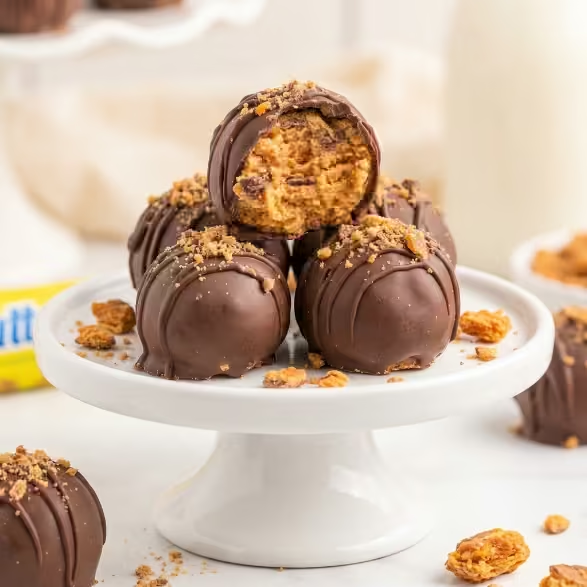
Butterfinger Balls are the ultimate no-bake treat for anyone who loves the combination of creamy peanut butter, crunchy candy, and chocolate. These bite-sized dessert balls are easy to prepare, require no oven, and have a delicious contrast between a soft, peanut-butter-rich center and a crisp chocolate coating.
If you love homemade candy recipes, Butterfinger Balls are an especially fun choice for holidays, parties, cookie exchanges, game-day gatherings, or simply keeping a sweet treat in the refrigerator for when a craving hits.
The best part? You only need a handful of everyday ingredients to make these irresistible peanut butter truffles.
Why You’ll Love These Butterfinger Balls
Butterfinger Balls combine several textures and flavors in one easy dessert. The creamy peanut butter creates a rich base, graham cracker crumbs add body and a subtle crunch, crushed Butterfinger candy brings that familiar peanut-butter crunch, and the chocolate coating gives every bite a satisfying finish.
There is no complicated candy-making technique involved. You simply mix the filling, roll it into balls, chill it, dip each piece in melted chocolate, and decorate.
Here are a few reasons this recipe deserves a place in your dessert rotation:
- No baking required
- Ready with simple ingredients
- Perfect for making ahead
- Easy to customize
- Great for parties and holidays
- Freezer-friendly
- Delicious straight from the refrigerator
- Easy to make in a large batch
Butterfinger Balls Ingredients
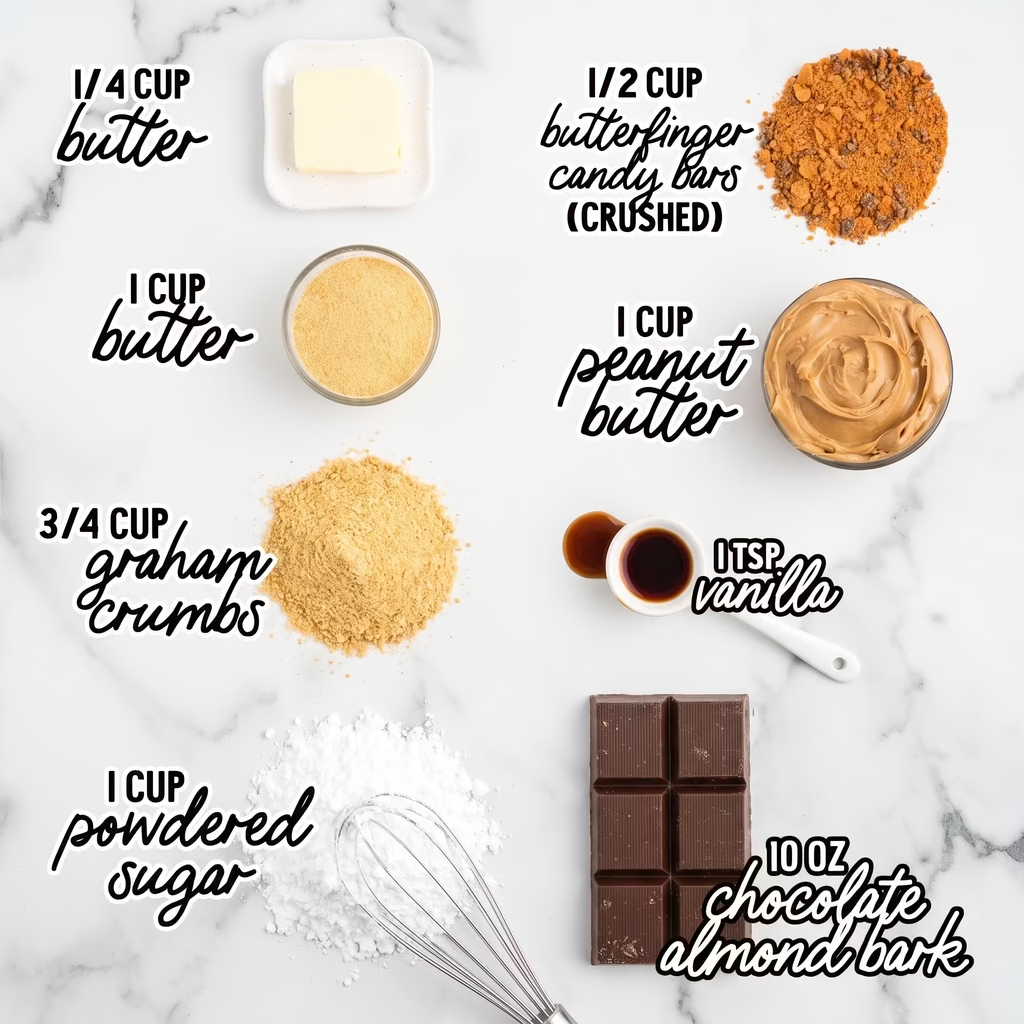
Before starting, gather everything you need. Having the ingredients ready makes the preparation quick and straightforward.
Ingredients for Butterfinger Balls
- 1 cup creamy peanut butter
- ¼ cup salted butter, softened
- 1 teaspoon pure vanilla extract
- 1 cup powdered sugar
- ¾ cup graham cracker crumbs
- ½ cup crushed Butterfinger candy, plus extra for topping
- 10 ounces chocolate almond bark or melting chocolate
What Kind of Peanut Butter Should You Use?
For the most reliable texture, use regular creamy peanut butter rather than natural peanut butter.
Natural peanut butter tends to separate and contain more oil, which can make the filling softer and more difficult to roll. Creamy conventional peanut butter gives the mixture enough structure to form neat, sturdy balls.
You can use chunky peanut butter if you deliberately want additional peanut pieces, but the final texture will be noticeably different.
Can You Use Another Chocolate?
Absolutely. Chocolate almond bark is convenient because it melts smoothly and sets with a firm coating.
You can also use:
- Milk chocolate
- Dark chocolate
- Semi-sweet chocolate
- White chocolate
- Chocolate melting wafers
- Candy melts
The choice of chocolate can completely change the character of your finished dessert.
How to Make Butterfinger Balls
Making Butterfinger Balls is a simple three-stage process: prepare the filling, chill the balls, and coat them in chocolate.
Step 1: Prepare the Baking Sheet
Line a baking sheet with parchment paper or wax paper.
This prevents the candy from sticking and makes cleanup much easier.
Step 2: Mix the Peanut Butter Filling
Add the softened butter, creamy peanut butter, and vanilla extract to a large mixing bowl.
Beat until the mixture becomes smooth and creamy.
Add the powdered sugar, graham cracker crumbs, and crushed Butterfinger candy.
Mix until everything is evenly incorporated and the mixture forms a soft, manageable dough.
The filling should be firm enough to roll without falling apart.
Step 3: Shape the Butterfinger Balls
Use approximately 1 tablespoon of the mixture for each ball.
Roll the portion between your palms until you have a smooth, round ball.
Place each ball onto the prepared baking sheet.
Continue until all of the filling has been used.
For more uniform Butterfinger Balls, use a small cookie scoop or tablespoon measure.
Step 4: Chill the Balls
Place the baking sheet in the refrigerator for at least 30 minutes.
This step is important because chilled peanut butter balls are much easier to dip into melted chocolate without losing their shape.
If your kitchen is particularly warm, you can chill them a little longer.
Step 5: Melt the Chocolate
Place approximately 8 ounces of your chocolate coating into a microwave-safe bowl.
Heat in short intervals, stirring between each interval, until the chocolate is smooth.
Avoid overheating the chocolate. Short bursts of heat help prevent scorching and allow you to control the consistency.
Step 6: Dip the Butterfinger Balls
Remove the chilled balls from the refrigerator.
Using a fork, dipping tool, or small spoon, carefully place each ball into the melted chocolate.
Turn it gently until completely coated.
Lift it out and allow the excess chocolate to drip back into the bowl.
Return the coated ball to the parchment-lined baking sheet.
Repeat with the remaining balls.
Step 7: Add the Chocolate Drizzle
Melt the remaining chocolate.
Once the chocolate coating on the balls has started to set, drizzle additional chocolate over the top.
For an attractive finish, use a fork or a piping bag with a very small opening.
Step 8: Add Extra Butterfinger Crunch
Immediately sprinkle a little crushed Butterfinger candy over the chocolate drizzle.
The extra candy gives the finished treats more crunch and makes them look especially tempting.
Place the finished Butterfinger Balls in the refrigerator until the chocolate has completely hardened.
How to Get the Best Texture
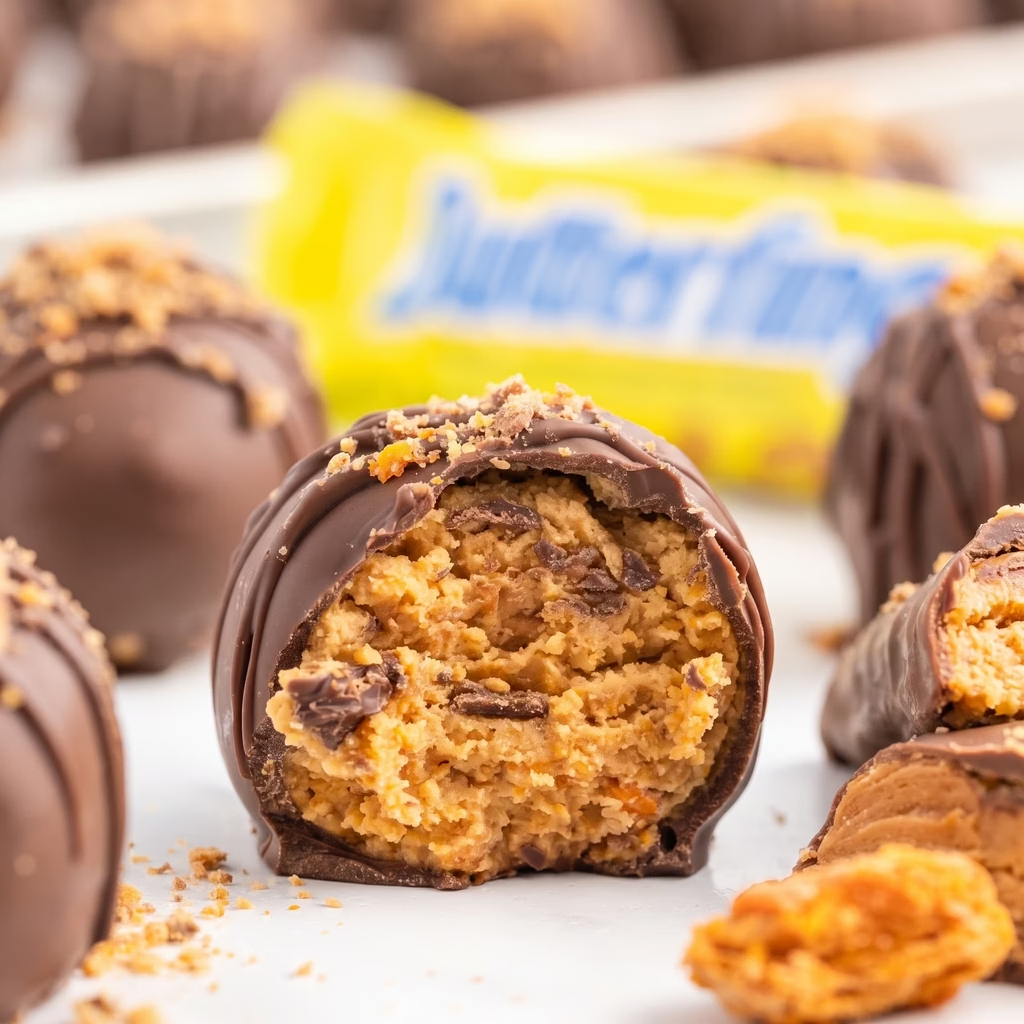
Texture is one of the best things about homemade Butterfinger Balls.
You want the inside to be soft and creamy while the outside remains firm and chocolatey.
For the best result:
- Chill the peanut butter mixture before dipping.
- Don’t make the balls too large.
- Use finely crushed graham crackers.
- Don’t add too much natural peanut butter.
- Avoid overheating the chocolate.
- Allow the chocolate shell to set completely before serving.
- Add crushed Butterfinger candy while the drizzle is still slightly soft.
If your filling feels too soft to roll, refrigerate it for another 15–20 minutes before shaping.
If it feels too dry, add a small amount of peanut butter and mix again.
Butterfinger Balls Variations
The classic recipe is delicious, but changing the ingredients slightly can give you completely different textures.
1. Crunchy Butterfinger Balls
For maximum crunch, increase the amount of crushed Butterfinger candy and use slightly coarser graham cracker crumbs.
The result is a filling with little crunchy pieces throughout every bite.
Texture: Soft center with lots of crispy, crunchy pieces.
2. Extra-Creamy Butterfinger Balls
For a smoother filling, crush the Butterfinger candy very finely and process the graham cracker crumbs until almost powder-like.
This creates a much more uniform center.
Texture: Smooth, creamy, and melt-in-your-mouth.
3. Crispy Butterfinger Balls
For a stronger crisp texture, replace part of the graham cracker crumbs with finely crushed crispy cookies or cereal.
The added crumbs create more structure and a lighter crunch.
Texture: Firm, crispy, and slightly crumbly.
4. Chewy Butterfinger Balls
For a softer and chewier version, reduce the graham cracker crumbs slightly and add a small amount of finely chopped soft caramel candy.
The caramel adds chewiness and creates a richer candy-shop-style center.
Texture: Soft, chewy, and gooey with crunchy Butterfinger pieces.
LEARN MORE
- Chocolate Balls Covered in Coconut – Easy No-Bake Recipe
- The latest and greatest dessert recipes people can’t stop making
- 4 Irresistible No-Bake Candies You Can Make at Home
Can You Make Butterfinger Balls Ahead of Time?
Yes. Butterfinger Balls are excellent for preparing ahead.
Once the chocolate coating has completely set, transfer the finished treats to an airtight container.
Keep them refrigerated until you’re ready to serve.
This makes them particularly useful for:
- Christmas dessert trays
- Thanksgiving gatherings
- Birthday parties
- Baby showers
- Game-day parties
- Cookie exchanges
- Potlucks
- Holiday gift boxes
For the best texture, allow refrigerated balls to sit at room temperature for several minutes before serving.
How to Store Butterfinger Balls
Store the finished treats in an airtight container in the refrigerator.
Place parchment paper between layers if you are stacking them to prevent them from sticking together.
They can generally be refrigerated for up to about one week when properly sealed.
For longer storage, freezing is a better option.
Can You Freeze Butterfinger Balls?
Yes, these no-bake treats freeze very well.
Place the finished balls in a single layer on a baking sheet and freeze until firm.
Then transfer them to a freezer-safe container or freezer bag.
For best quality, remove as much excess air as possible before sealing.
When you’re ready to eat them, transfer the desired amount to the refrigerator and allow them to thaw gradually.
How to Serve Butterfinger Balls
There are plenty of ways to serve these chocolate-covered treats.
Arrange them on a dessert platter alongside cookies, brownies, fudge, and other homemade candies.
For holidays, add decorative sprinkles that match the occasion.
You can also place individual Butterfinger Balls into mini cupcake liners. This makes them easier to serve at parties and gives them a polished candy-shop appearance.
Another fun idea is to crumble one over vanilla ice cream or use chopped pieces as a dessert topping.
Tips for Perfect Butterfinger Balls
Use Softened Butter
Butter should be softened rather than melted. Soft butter blends smoothly with the peanut butter without making the mixture excessively oily.
Chill Before Dipping
Don’t skip the refrigeration step.
Cold balls maintain their shape much better when they are dipped into warm melted chocolate.
Don’t Overheat the Chocolate
Chocolate that becomes too hot can turn thick, grainy, or difficult to work with.
Heat it gradually and stir frequently.
Keep the Balls Similar in Size
A cookie scoop makes this easy.
Uniform balls look better on a serving platter and are easier to coat evenly.
Add Toppings Before the Chocolate Sets
If you’re adding crushed Butterfinger pieces, sprinkles, or chopped nuts, do it while the chocolate is still soft enough for the toppings to stick.
Frequently Asked Questions About Butterfinger Balls
What are Butterfinger Balls made of?
Butterfinger Balls are made with creamy peanut butter, softened butter, powdered sugar, graham cracker crumbs, crushed Butterfinger candy, vanilla, and a chocolate coating.
The combination creates a creamy, crunchy peanut butter center surrounded by chocolate.
Can I make Butterfinger Balls without graham crackers?
Yes.
You can substitute another finely crushed cookie, such as Biscoff-style cookies, gingersnaps, or gluten-free cookies.
Keep in mind that changing the crumbs will change both the flavor and texture of the finished candy.
Can I use chocolate chips instead of almond bark?
Yes.
Chocolate chips can be used, although they may produce a slightly different coating.
For the smoothest dipping texture, use chocolate specifically designed for melting or candy coating.
Why are my Butterfinger Balls too soft?
The mixture may contain too much moisture or the peanut butter may be particularly oily.
Try chilling the mixture longer before rolling.
You can also add a little additional graham cracker crumb if necessary.
Why do my Butterfinger Balls fall apart?
If the balls don’t hold together, the mixture may need more structure.
Make sure you’re using creamy conventional peanut butter and that the ingredients have been thoroughly mixed.
Chilling the mixture before shaping can also help considerably.
How long do Butterfinger Balls last in the refrigerator?
When stored in an airtight container, they can generally be kept refrigerated for up to about one week.
Can Butterfinger Balls be frozen?
Yes. They can be frozen in an airtight freezer-safe container for longer storage.
Thaw them gradually in the refrigerator before serving.
Can I make Butterfinger Balls without baking?
Yes. This is a completely no-bake dessert, making it especially convenient when you want homemade candy without turning on the oven.
Can I make Butterfinger Balls with different chocolate?
Definitely.
Try milk chocolate for a sweeter result, dark chocolate for a richer contrast, or white chocolate for a completely different flavor profile.
People Also Ask About Butterfinger Balls
Do Butterfinger Balls need to be refrigerated?
For the best texture and storage life, yes. Refrigeration helps keep the peanut butter center firm and the chocolate coating intact.
How do you keep peanut butter balls from falling apart?
Use a thick, well-balanced filling and chill the mixture before shaping. Avoid overly oily natural peanut butter, which can make the mixture difficult to hold together.
How long do homemade peanut butter balls last?
When stored properly in an airtight container in the refrigerator, homemade peanut butter balls can generally stay fresh for about a week.
Can you freeze homemade peanut butter balls?
Yes. Peanut butter balls can be frozen in an airtight freezer-safe container. Thaw them in the refrigerator before serving.
What can I use instead of graham cracker crumbs in peanut butter balls?
Crushed cookies, crispy cereal, or gluten-free cookie crumbs can work as alternatives. The substitution will affect the final flavor and texture.
What chocolate is best for dipping peanut butter balls?
Melting wafers, candy coating, or almond bark are convenient choices because they melt smoothly and set firmly. Chocolate chips can also work but may produce a different consistency.
Final Thoughts
These Butterfinger Balls prove that an impressive homemade dessert doesn’t have to involve complicated baking.
With creamy peanut butter, crunchy Butterfinger pieces, graham cracker crumbs, and a chocolate coating, every bite delivers a satisfying combination of creamy, crunchy, and chocolatey textures.
They’re easy enough for a weekend treat but special enough for a holiday dessert tray. Make the classic version first, then try one of the four texture variations to find your favorite.
Once you have a batch chilling in the refrigerator, don’t be surprised if they disappear faster than expected!