Discover the latest and greatest dessert recipes everyone is making right now. From easy favorites to irresistible new dishes, find recipes worth trying today.
Italian Love Cake
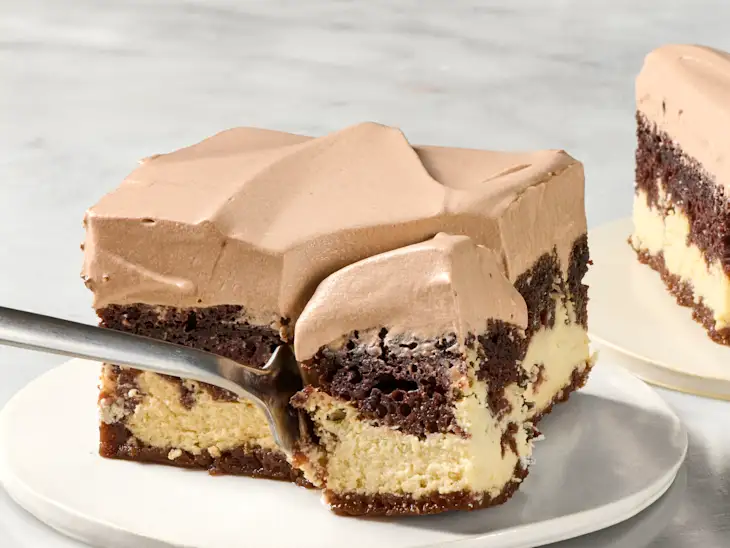
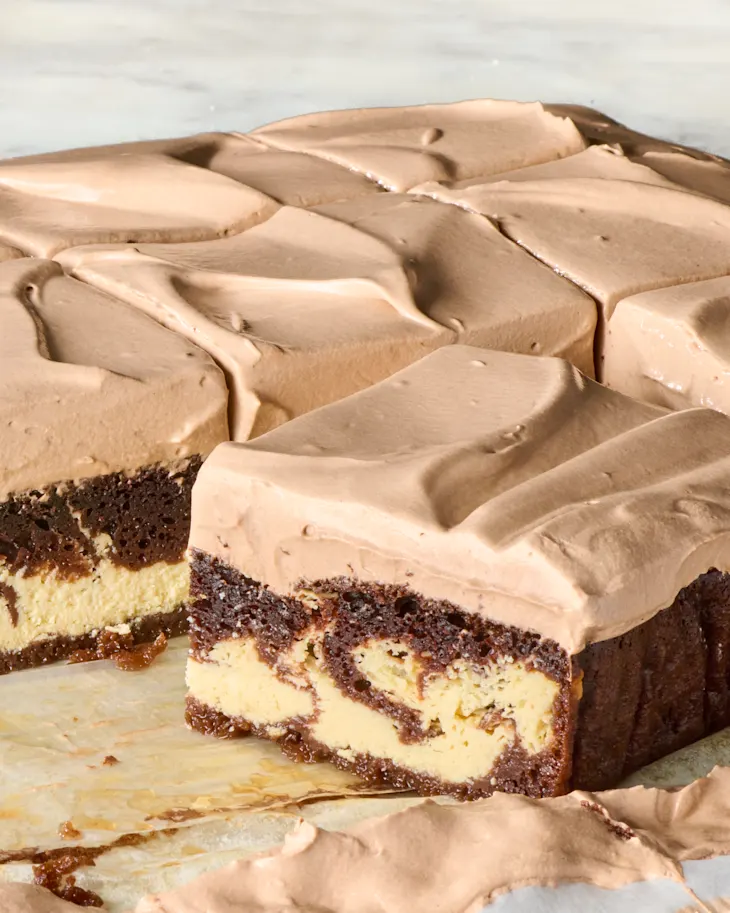
Most popularly believed to have come from Italian immigrants wanting to honor their home country with their new roots in America, Italian love cake is a delightfully light, yet decadent dessert consisting of chocolate cake, a cheesecake-like ricotta filling, and an airy chocolate pudding topping. Leaning on boxed chocolate cake mix, instant chocolate pudding, and Cool Whip makes this cake super easy to prepare.
Why You’ll Love It
- It’s reminiscent of cheesecake. The ricotta filling has a smooth and creamy texture that is similar to the popular dessert. Even better, the cake is deceivingly light (even when chilled) and not too dense or heavy.
- Perfectly chocolaty. A dessert that will satisfy all chocolate-lovers, but not so intense that non-chocolate-lovers won’t love it too.
Key Ingredients in Italian Love Cake
- Boxed chocolate cake mix: Feel free to use any variation of chocolate cake (Devil’s food, dark chocolate, etc.). Just take care to use a 15.25-ounce box.
- Espresso powder: Gives the chocolate a little boost, but can be omitted if you don’t have any on hand.
- Whole-milk ricotta: This has a slightly creamier texture than lower-fat ricotta, which makes for a smoother filling.
- Light brown sugar: Provides a subtle caramel-y undertone that pairs well with the chocolate cake and keeps the filling from becoming cloying.
- Instant chocolate pudding mix: Just as the cake mix, feel free to use any variation of chocolate-flavored pudding.
- Cool Whip: Makes for an exceptionally airy and creamy topping. If you prefer, the Cool Whip can be substituted with 3 cups sweetened whipped cream.
How to Make Italian Love Cake
- Prepare the cake batter. Follow package directions, adding instant espresso powder to the batter if using.
- Prepare the ricotta mixture. Combine ricotta cheese, granulated sugar, light brown sugar, eggs, vanilla extract, and kosher salt in a food processor, which makes for a smooth, silky filling.
- Layer the batters and bake. Don’t worry if there are thin streaks of the ricotta mixture or cracks on the surface once baked. You won’t be able to tell once topped.
- Make the pudding topping and finish the cake. Because the cake needs to be chilled, it’s a great make-ahead dessert.
Lemon-Cranberry Bars
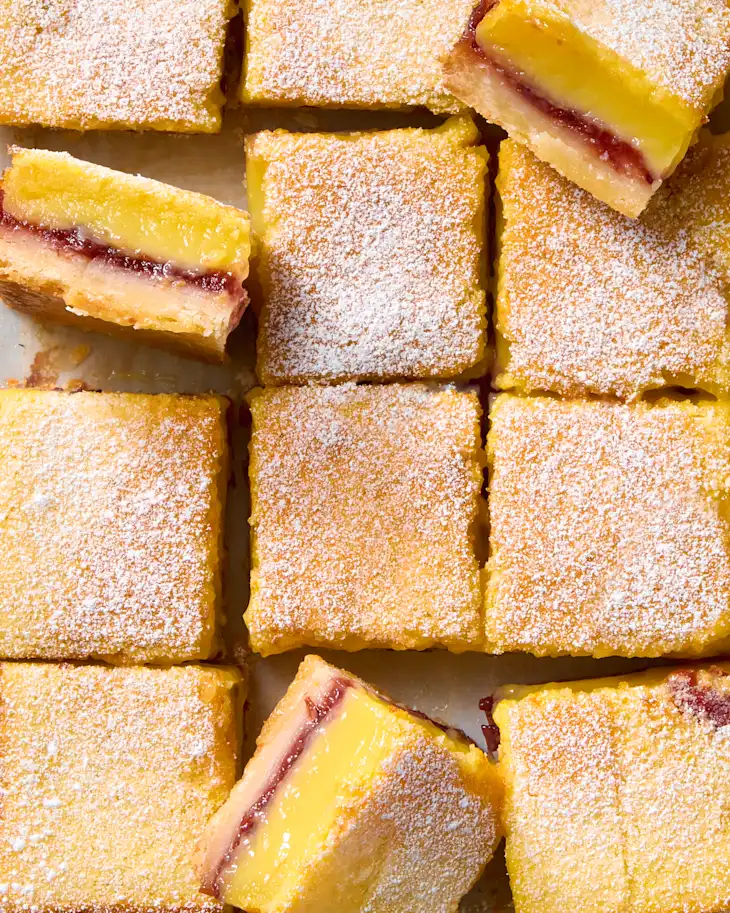
There are those who only swear by chocolate desserts, but a bright citrus dessert wins out in my book any day. I love classic lemon bars, with their buttery shortbread cookie crust and lemon curd-like filling. Around Thanksgiving and the holidays, I like to shake things up by giving them a festive twist. Meet: Lemon-cranberry bars.
Spreading some cranberry onto the crust (made from canned cranberry sauce!) adds a vibrantly colored, sweet-tart layer to all the deliciousness that’s already there. Bring a tray of these to your next gathering and I promise you they’ll be one of the first desserts to be gobbled up.
Key Ingredients in Lemon-Cranberry Bars
- Lemons: To get the best lemon-y flavor into the bars, use both zest and freshly squeezed juice in the filling. Get 4 medium lemons, and try to buy organic if you can, as you’ll be using the zest.
- Whole berry cranberry sauce: Yup, the canned stuff served at Thanksgiving dinner with turkey makes for an easy cranberry layer in these bars. Get a whole berry one so that there are juicy pieces of cranberry, and serve the leftover sauce in the can with some turkey meatballs.
- Eggs: These help to add richness and set the lemon filling. You’ll need 4 that are at room temperature.
- Butter: Softened unsalted butter gives the crust a delicious flavor and shortbread-like texture.
How to Make Lemon-Cranberry Bars
- Make and parbake the crust. Beat softened butter, sugar, and salt together until fluffy, then beat in all-purpose flour just until a crumbly dough forms. Press this dough evenly into a parchment paper-lined 8×8-inch baking pan (use a metal pan for the most evenly shaped pieces, as the sides of the pan are straighter than glass or ceramic). Bake until light golden-brown around the edges.
- Spread on the cranberry layer. As soon as the crust is ready and while it’s still hot, spread on the cranberry sauce. It’s important to work quickly while the crust is still hot.
- Pour on the lemon layer. Pour a filling that’s made by whisking eggs, sugar, lemon juice, lemon zest, and salt together onto the crust. The best way to do this so that the cranberry layer is minimally disturbed is by pouring it slowly over the back of a large spoon. Again, work quickly because if the crust cools down too much, the lemon layer will not set quickly enough in the oven and will run underneath the crust.
- Bake and chill. Bake the bars until the filling is completely set and doesn’t jiggle anymore. Let cool for 1 hour, then refrigerate for at least 4 more hours to let the layers really set up so that they slice cleanly.
- Cut and serve. Cut into pieces and dust generously with powdered sugar right before serving.
No-Bake Boston Cream Pie Bars
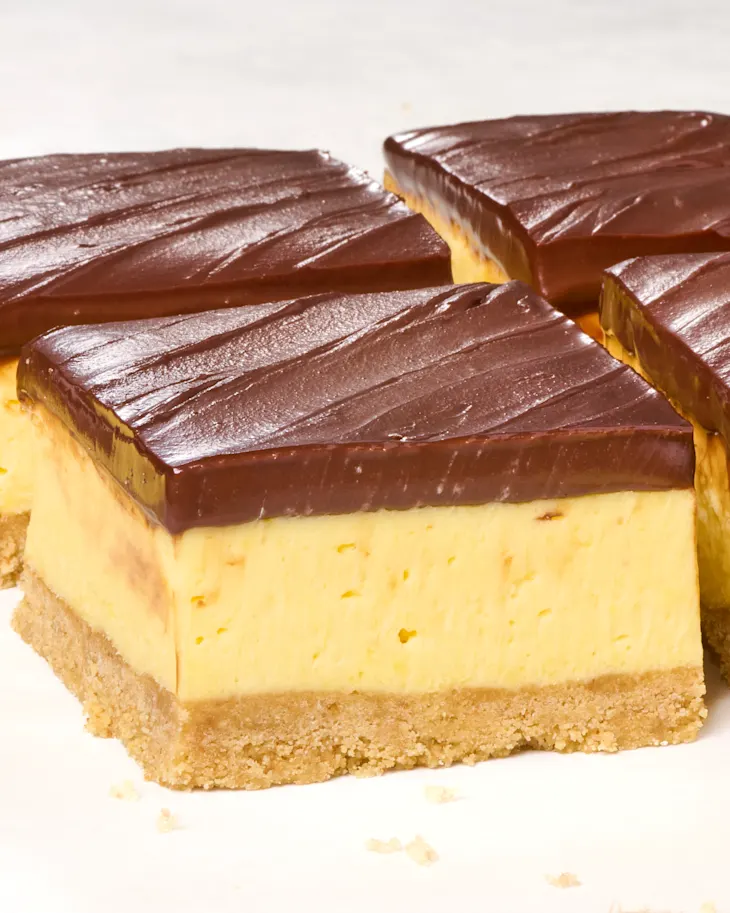
It’s hard to beat a no-bake treat — especially when there’s chocolate involved. These no-bake Boston cream pie bars combine three delicious layers of flavor — cookie crust, creamy vanilla custard, and rich chocolate — into one bite. And you only need six ingredients to make them.
The base makes good use of crushed wafer cookies, which mimic the sponge cake in a traditional Boston cream pie. Layer with a simple custard-like filling (it comes together in a snap, thanks to instant vanilla pudding) and pour an easy chocolate ganache over the top. These bars are right at home at any occasion, whether you need a quick weeknight dessert or something sweet to take to a backyard BBQ.
Why You’ll Love It
An easy, make-ahead treat. You’ll have these bars prepped in no time. Plus, they can chill in the fridge until serving.
Only 6 ingredients. You don’t need much to pull off this impressive dessert.
Key Ingredients in No-Bake Boston Cream Pie Bars
- Vanilla wafer cookies: The base is made from a combination of cookie crumbs, granulated sugar, and melted butter.
- Vanilla instant pudding: Instead of making pastry cream, take a shortcut here and use instant vanilla pudding mix.
- Heavy cream: You’ll need it for the filling and the easy ganache topping.
- Semi-sweet chocolate: Use chopped semisweet chocolate or chocolate chips to make the ganache layer on top.
How to Make No-Bake Boston Cream Pie Bars
- Prep the cookie crust. Line an 8×8 baking pan with parchment paper. Pulse wafers, granulated sugar, and melted butter in a food processor. Press the mixture into the pan and place it in the freezer.
- Make the filling. Beat the vanilla instant pudding and heavy cream together, and spread the mixture over the crust. Chill in the fridge.
- Top with ganache. Heat the heavy cream and pour it over the chocolate in a heat-safe bowl. Whisk the mixture until smooth and pour it over the custard layer.
- Chill and cut. Chill the bars for at least one hour. Lift the parchment out of the baking pan and cut the slab into bars. For the cleanest slices, wipe the knife with a cloth in between each cut.
Pecan Upside-Down Cake
hile I actually don’t mind making a flaky pie dough, baking a pie always feels like a little too much when I’m managing a Thanksgiving main and all the sides. I want big flavor, but without any chilling, rolling, and flouring my counter (one of my least favorite things, personally). That’s why this cake is just so freaking great.
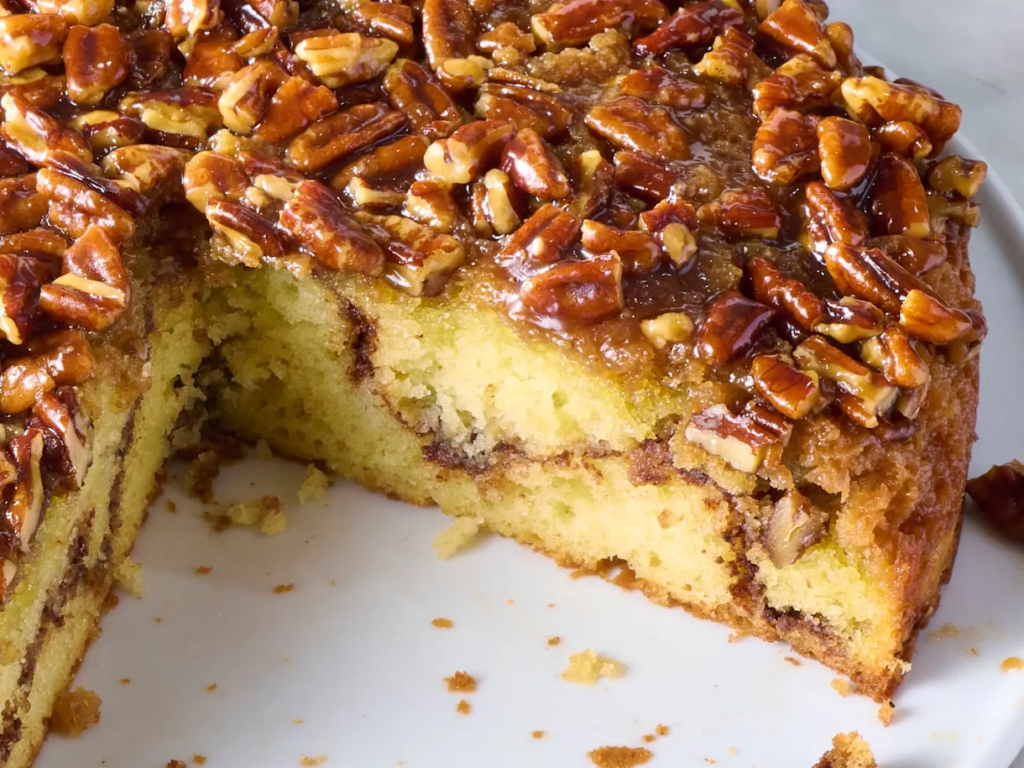
This pecan upside-down cake requires no stand mixer, no laminating dough, and no blind baking — and about 15 minutes of prep time. Even better, it’s served at room temperature so you can make it early in the day and let it sit out on the counter to taunt all of your guests.
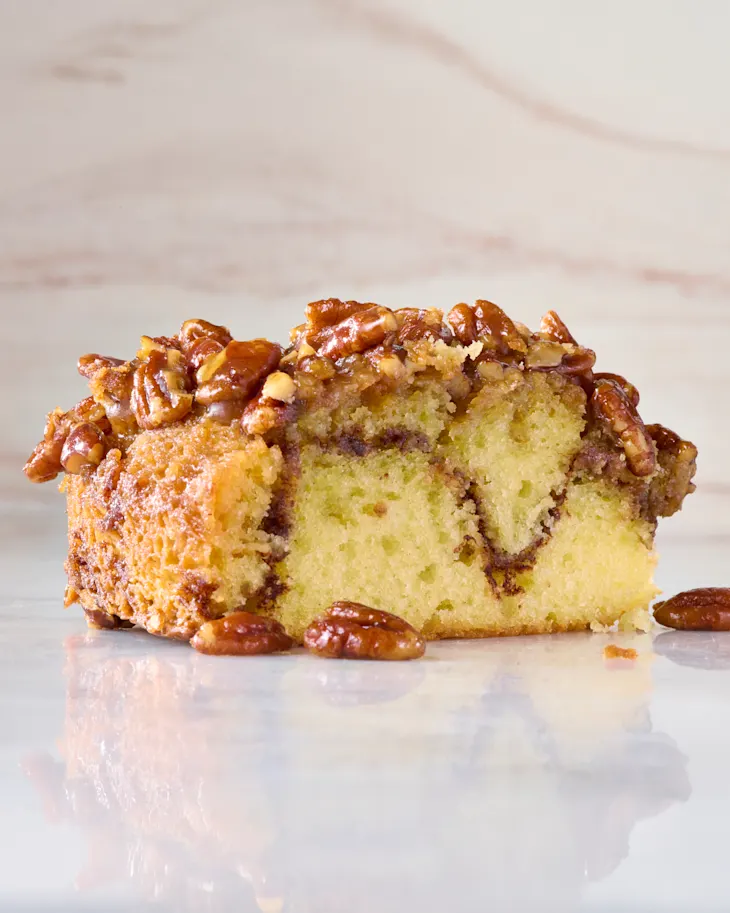
During recipe testing, I brought this cake to my monthly record club (it’s like a book club, but for an album), and everyone wanted a slice. We all decided that in addition to giving serious pecan pie vibes, the cake was like biting into a giant sticky bun. To say it’s a crowd-pleaser is an understatement — especially with a little sprinkle of flaky salt on top. It takes everything to the next level, with or without a scoop of ice cream.
Why You’ll Love It
- No fussy crust. Don’t bother making a crust for pecan pie — this hits all the notes without any of the effort.
- It’s just like a giant sticky bun! The gooey pecan topping and ripple of cinnamon sugar give serious sticky bun vibes.

Key Ingredients in Pecan Upside-Down Cake
- Pecans: It’s worth it to chop the pecans yourself; they have a better flavor than the pre-chopped kind.
- Honey: You can use honey or corn syrup as the base for the gooey topping, but honey will have a richer flavor.
- Brown sugar: Light or dark brown sugar both work here; dark brown sugar will have a slightly deeper molasses flavor.
- Sour cream: This keeps the cake tender and moist. Full-fat Greek yogurt also works well.
- Cinnamon: A layer of cinnamon sugar rippling through the center of the cake brings the topping flavor through the rest of the cake.
- Flour: Regular all-purpose flour works best here.
- Flaky salt: Although optional, I love the balance of a little salt with the sticky sweet topping.
How to Make Pecan Upside-Down Cake
- Make the pecan topping. Combine brown sugar, butter, salt, and honey in a saucepan over medium-low heat and cook until the butter is melted and sugar is dissolved. Stir in chopped pecans, then transfer to a greased round cake pan and spread in an even layer.
- Make the batter. Whisk together all-purpose flour, baking powder, and baking soda. In a separate bowl, whisk together sour cream, eggs, granulated sugar, neutral oil, and vanilla. Add the dry mixture and stir until just combined. In a separate bowl, mix together brown sugar and cinnamon.
- Assemble the cake. Dollop half of the cake batter over the pecans in the cake pan and spread in an even layer. Sprinkle evenly with the cinnamon sugar mixture, then dollop with the remaining cake batter and carefully spread it in an even layer.
- Bake the cake. Bake until deep golden-brown and a toothpick inserted into the cake comes out clean. Let the cake cool in the pan for about 10 minutes, then run a knife along the edges to loosen the cake. Invert onto a serving plate and sprinkle with flaky salt. Let cool to room temperature before cutting into it.