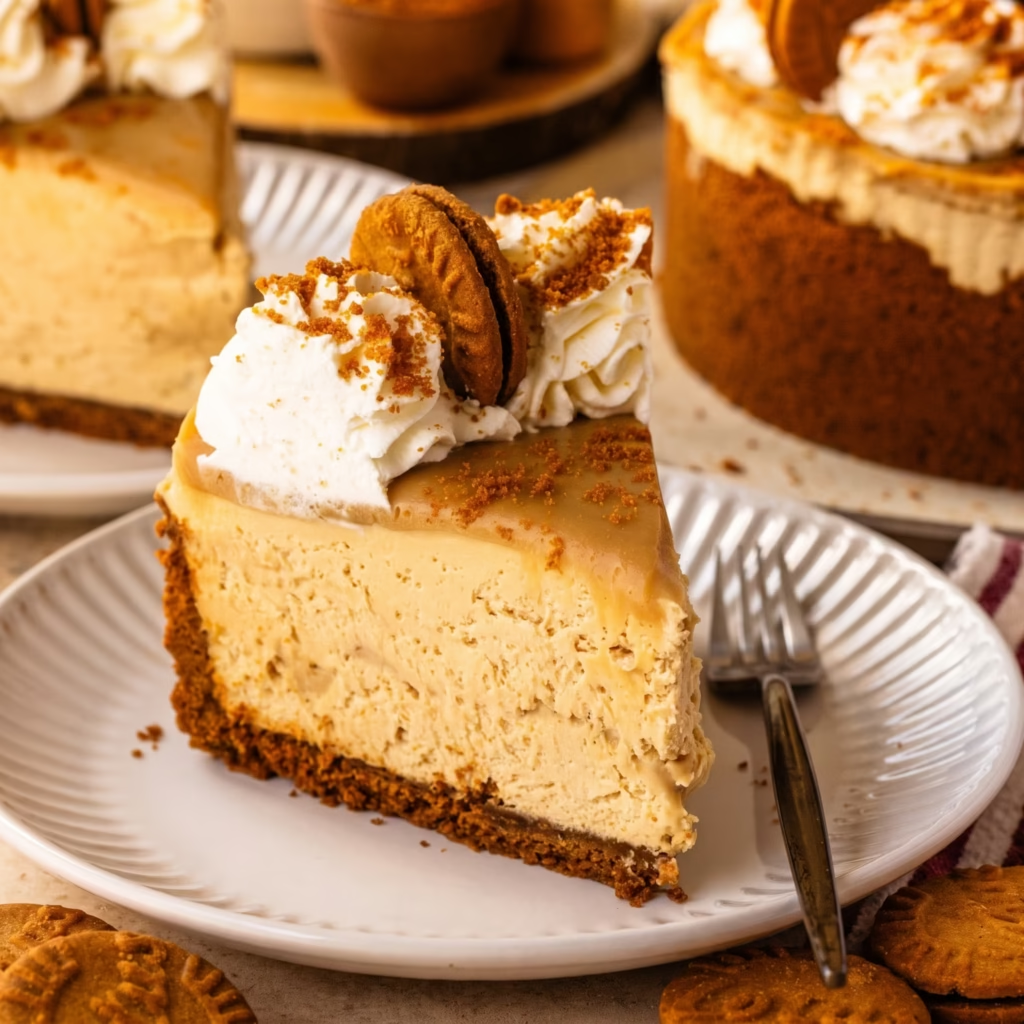
No-Bake Biscoff Cheesecake is one of my favorite easy desserts, especially when I want something creamy, flavorful, and completely fuss-free.
Biscoff cookies have that irresistible warm spice and caramel-like flavor that makes every bite extra special. If you’ve followed my recipes for a while, you’ve probably noticed that Biscoff makes frequent appearances!
This No-Bake Biscoff Cheesecake is one of my most reliable go-to desserts—simple to assemble, packed with flavor, and even better after chilling overnight in the fridge.
Why I Love This No-Bake Biscoff Cheesecake
No-Bake Biscoff Cheesecake is one of those desserts I keep coming back to when I want something that feels special without creating extra work in the kitchen. After loving my Biscoff Cheesecake recipe, I wanted to create a no-bake version that was just as delicious but even easier to prepare. It’s especially convenient when you’re making dessert ahead of time and want everything ready before your guests arrive.
Here’s why this No-Bake Biscoff Cheesecake is a favorite:
- Perfect make-ahead dessert: Prepare it in advance and let it chill while you focus on everything else.
- Biscoff flavor in every bite: The cookies and Biscoff spread create a rich, warm, caramelized flavor throughout.
- No oven required: Simply assemble, chill, and enjoy.
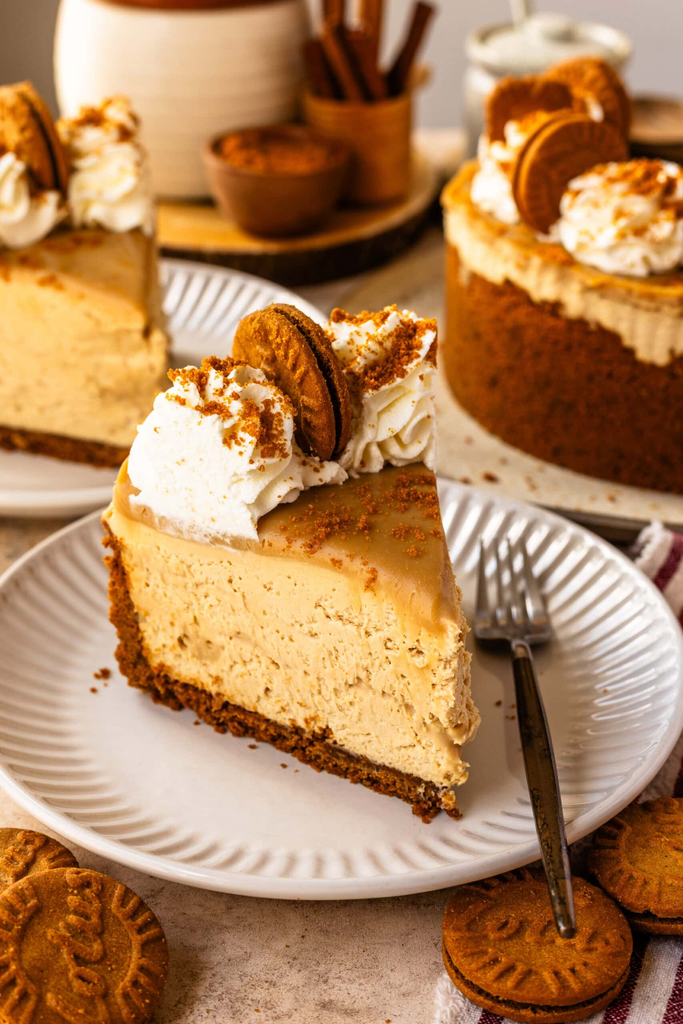
- Creamy and easy to slice: Once properly chilled, the cheesecake sets beautifully and cuts into neat slices.
Key Ingredients & Why I Use Them
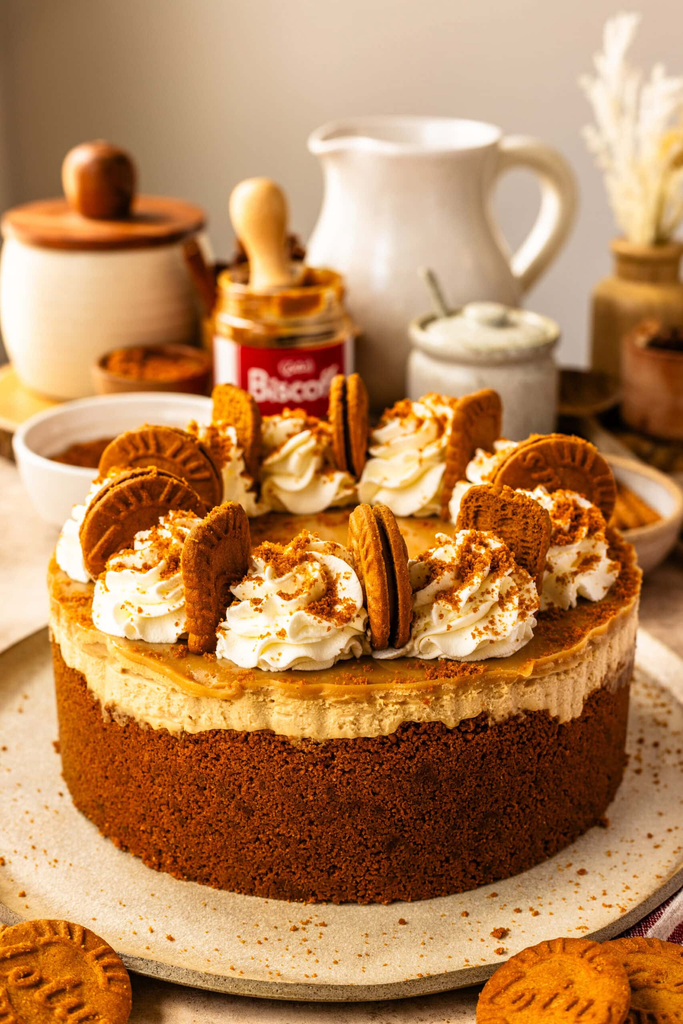
Biscoff Cookies: These cookies create a deliciously spiced crust with plenty of natural caramel flavor, so there’s no need for additional spices or excessive sugar.
Cream Cheese: Full-fat cream cheese provides the rich, creamy texture and structure needed for the cheesecake to set properly in the refrigerator.
Whipped Cream: Whipping the cream to stiff peaks helps create a light, airy filling while giving the cheesecake enough stability without using eggs.
Biscoff Spread: Biscoff spread is used in both the cheesecake filling and the ganache, making sure that unmistakable Biscoff flavor comes through in every layer.
White Chocolate: White chocolate gives the ganache a smooth, glossy finish and helps it set while complementing the warm spice and caramel notes of the Biscoff without overpowering them.
How to Make No-Bake Biscoff Cheesecake
The full recipe card is below, but here’s how I make this No-Bake Biscoff Cheesecake step by step. Starting with the ganache gives it plenty of time to cool while you prepare the cheesecake.
Step 1: Make the Biscoff Ganache
I like to start with the ganache because it needs time to cool before it goes onto the cheesecake. In a small saucepan, I heat the heavy cream and glucose syrup, if using, over medium heat until hot but not boiling.
I remove the saucepan from the heat and whisk in the Biscoff spread until it melts completely and the mixture is smooth.
Next, I place the chopped white chocolate in a heatproof bowl and pour the hot cream mixture over it. I let it sit undisturbed for about 2–3 minutes, giving the chocolate time to soften and melt gently.
Then I slowly stir from the center outward until the mixture becomes smooth, glossy, and evenly combined. If a few pieces of chocolate remain, I microwave the ganache for a few seconds at a time, stirring between each interval, until completely smooth.
I set the ganache aside to cool to room temperature while I prepare the rest of the No-Bake Biscoff Cheesecake. If I’m preparing it ahead of time, I refrigerate the ganache and let it return to room temperature before using it. This helps it reach the perfect consistency for pouring over the cheesecake.
Step 2: Prepare the Crust
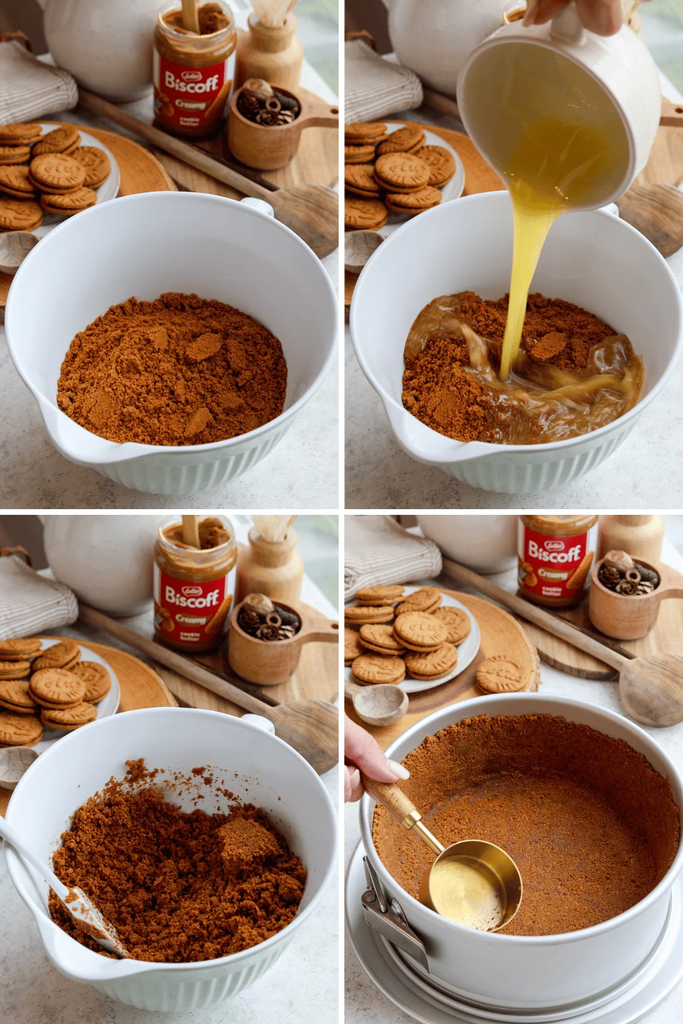
I lightly grease and line an 8- or 9-inch springform pan with parchment. Then I crush a full pack of Biscoff cookies into fine crumbs—usually in a food processor, because it’s faster and more even. I mix the crumbs with melted butter until the texture looks like damp sand and holds together when pressed.
I press the mixture firmly into the bottom of the pan, using the bottom of a measuring cup or glass to really compact it. This is what keeps the crust from crumbling when you slice.
If I’m keeping the cheesecake fully no-bake, I freeze the crust for about 30 minutes while I make the filling. If I want a slightly sturdier, cleaner-slicing base, I bake it at 325ºF for about 15 minutes and let it cool completely. Both work—this is just preference.
Step 3: Make the cheesecake batter
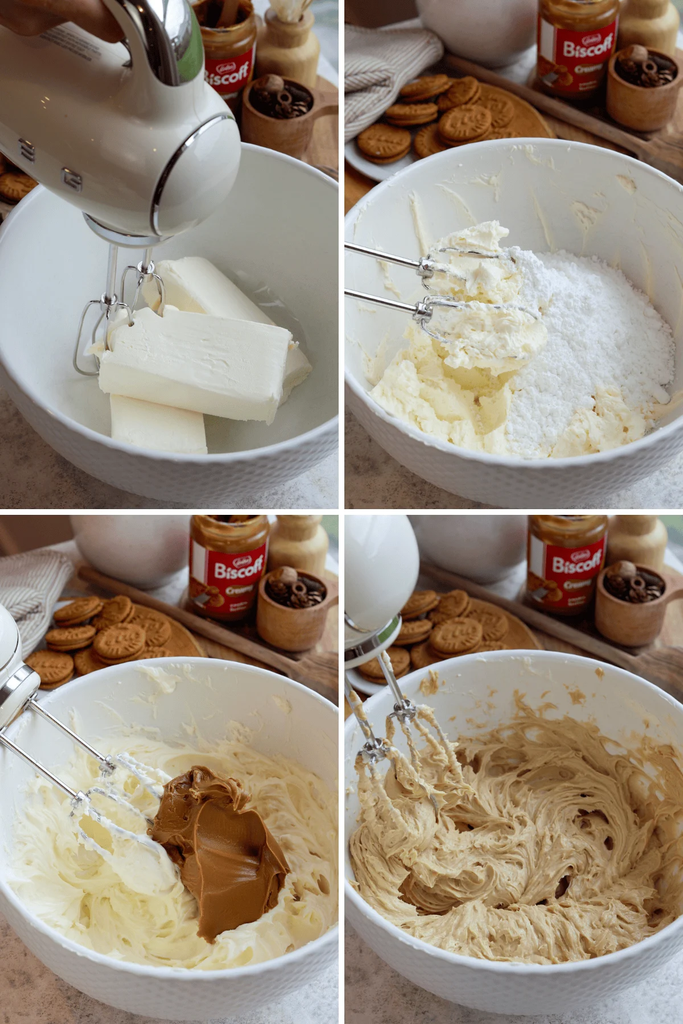
I beat the softened cream cheese for about 2 minutes until creamy, then add the powdered sugar and mix for another minute. I scrape the bowl well here—small lumps are almost always just cream cheese stuck to the sides.
Next, I add the Biscoff spread (any cookie butter brand you love works), plus sour cream, lemon juice, and vanilla. I mix just until smooth and fully combined. The lemon juice isn’t there to make it “lemony”—it just lifts the sweetness and keeps the filling from tasting flat.
Step 4: Whip heavy cream and add
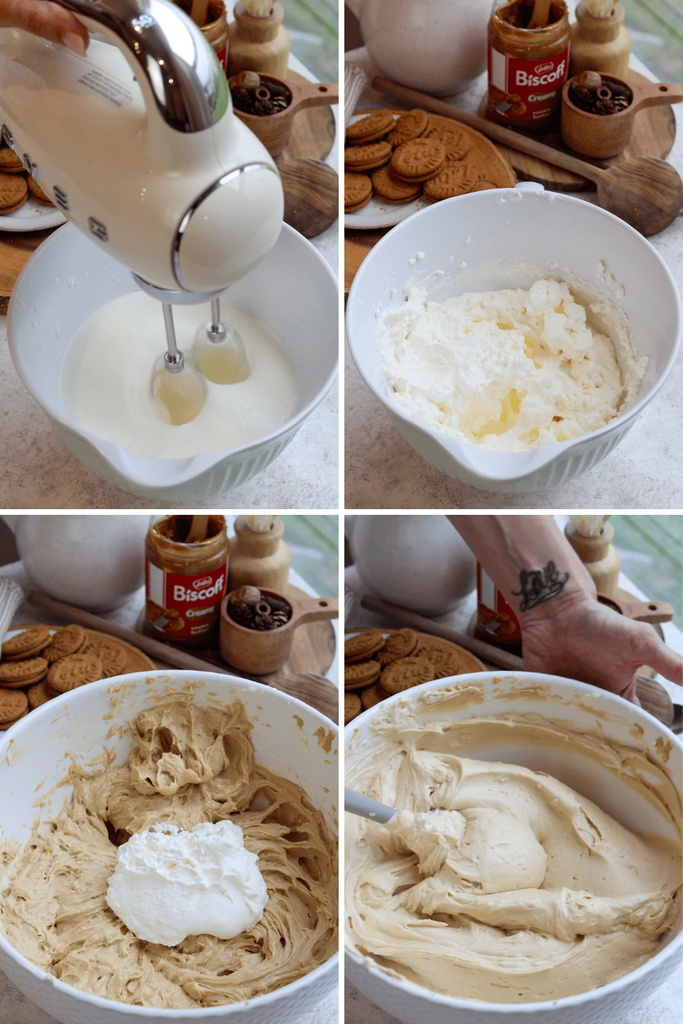
In a separate bowl, I whip the cold heavy cream to stiff peaks. I want it to hold its shape clearly when I lift the whisk. Then I fold half of the whipped cream into the cream cheese mixture to lighten it, and fold in the rest gently until the filling looks smooth and airy. I keep the folding calm and deliberate so the mixture stays light.
Step 5: Assemble & chill
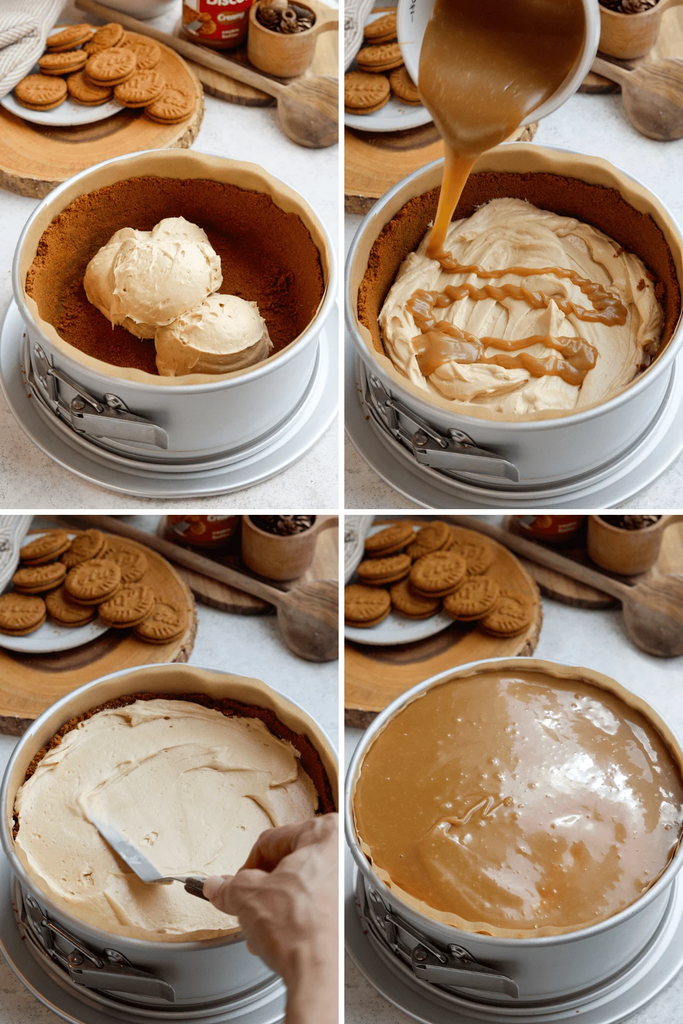
I spread about one-third of the cheesecake filling over the chilled crust and smooth it into an even layer. I drizzle some of the cooled ganache over the surface and swirl it lightly with a knife, keeping the motion loose so the layers stay defined.
I repeat this layering once more with filling and ganache. Then I add the final layer of filling, smooth the top, and pour the remaining ganache over the surface, spreading it into an even layer.
I refrigerate the cheesecake for at least 6 hours, though overnight is ideal. This resting time allows the filling to fully set and gives the cheesecake its clean, sliceable structure.
Step 6: Decorate
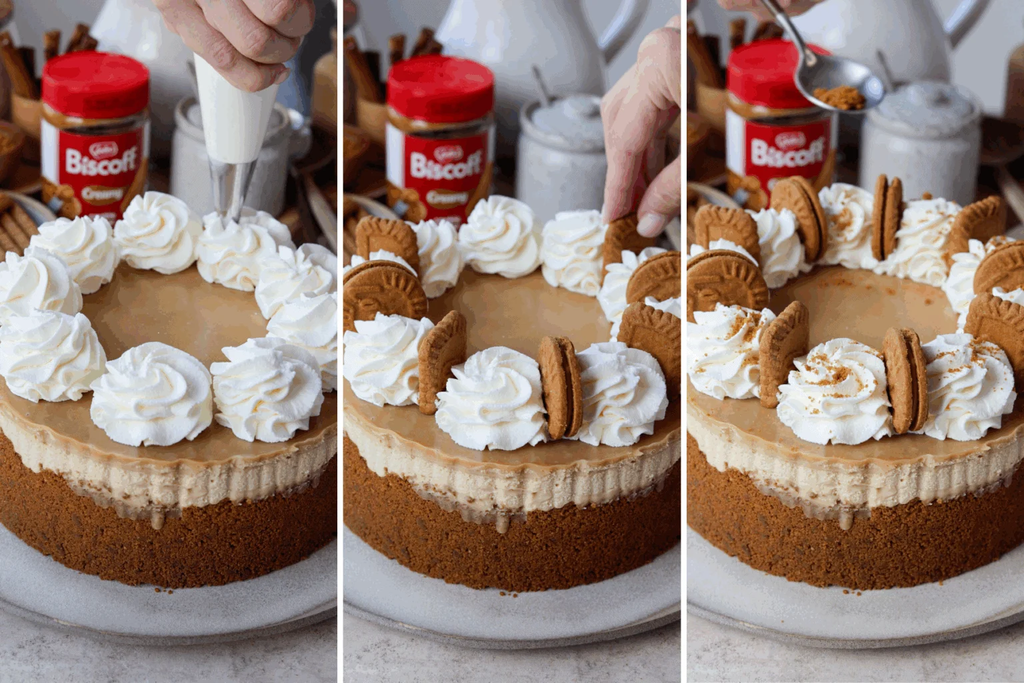
Right before serving, I whip fresh cream and transfer it to a piping bag. I pipe swirls around the edge of the cheesecake, then finish with crushed and whole Biscoff cookies. I decorate at the end so the whipped cream stays fresh and the cookies remain crisp.
Storage & Freezing
Baked cookies keep well in an airtight container at room temperature for 3–4 days.
The dough freezes beautifully for up to 3 months. I bake straight from frozen — just add 1–2 extra minutes to the bake time. I almost always keep a batch in the freezer.
Learn more About Cheese cakes :
- Reese’s Caramel Cheesecake : creamy and sweet
- Crown Royal Cheesecake Whiskey: Dessert with Boozy Twist
- Jello No-Bake Cheesecake Recipe
Expert Tips for No-Bake Biscoff Cheesecake
Making a No-Bake Biscoff Cheesecake is easier than it may seem, but a few simple tricks can make a big difference in the final texture and presentation. These are the tips I always keep in mind when making this cheesecake.
- Let the ganache cool completely: I always allow the ganache to cool to room temperature before adding it. Warm ganache can soften the cheesecake filling and cause the layers to lose their clean definition.
- Press the crust firmly: Don’t skip this step! A firmly packed Biscoff crust gives the cheesecake a sturdy base and helps you achieve neat slices instead of a crumbly crust.
- Warm thickened ganache gently: If the ganache becomes too thick while sitting, warm it briefly and stir gently until it becomes smooth and pourable again. Avoid overheating it.
- Chill the cheesecake overnight: For the best texture and cleanest slices, I recommend letting the No-Bake Biscoff Cheesecake chill overnight. When slicing, wipe the knife clean between each cut for beautifully defined layers.
Variations
This No-Bake Biscoff Cheesecake is delicious as written, but it’s also easy to customize when you want to change up the flavors or textures. Here are a few simple variations I love:
- Use dark chocolate ganache: Swap the Biscoff ganache for a rich dark chocolate ganache to create a delicious contrast with the sweet, spiced cheesecake.
- Add crushed Biscoff cookies: Fold finely crushed Biscoff cookies into the filling for extra crunch and even more cookie flavor in every bite.
- Add warm spices: Mix a small pinch of cinnamon or nutmeg into the crust for an extra layer of cozy spice.
- Drizzle with caramel: Finish the cheesecake with a generous drizzle of caramel sauce for an extra sweet, buttery touch that pairs beautifully with Biscoff.
FAQs No-Bake Biscoff Cheesecake
Can I make this cheesecake ahead of time?
Yes. This is a great make-ahead dessert. Prepare it 1–2 days in advance, refrigerate, and decorate just before serving.
Do I need to bake the crust?
No. Freezing works perfectly, but baking helps the crust hold together more firmly when sliced.
Can I skip the ganache?
Yes, though it adds beautiful flavor and shine. You can drizzle melted Biscoff spread on top as an alternative.
How long should I refrigerate the cheesecake?
Chill for at least 6 hours, or overnight, so the cheesecake filling sets properly.
Can I freeze this cheesecake?
Yes. Wrap well and freeze (without whipped cream) for up to 2 months. Thaw in the fridge overnight.
Even more biscoff….
If you loved this No-Bake Biscoff Cheesecake, try some of my other Biscoff desserts. My Biscoff Cheesecake is so creamy and delicious, perfect for parties. For something ultra-rich, my Biscoff Brownies layer cookie butter over fudgy chocolate batter. If you love cake, my Biscoff Layer Cake is light, spiced, and ideal for special occasions. And don’t miss my Biscoff Cupcakes—they’re airy, elegant, and a great make-ahead dessert for entertaining.
No-Bake Biscoff Cheesecake
Ingredients
For the Biscoff Crust
- 2 cups Biscoff cookie crumbs
- 6 tablespoons unsalted butter, melted
For the Cheesecake Filling
- 16 oz full-fat cream cheese, softened
- ¾ cup Biscoff spread
- ¾ cup powdered sugar
- 1 teaspoon vanilla extract
- 1½ cups heavy whipping cream, cold
For the Biscoff Ganache
- ½ cup heavy cream
- ½ cup Biscoff spread
- 5 oz white chocolate, finely chopped
- 1 tablespoon glucose syrup, optional
For Decorating
- Crushed Biscoff cookies
- Whole Biscoff cookies, optional
- Extra Biscoff spread, optional
Instructions
- Make the ganache: Heat the heavy cream and glucose syrup, if using, in a small saucepan over medium heat until hot but not boiling.
- Remove from the heat and whisk in the Biscoff spread until completely smooth.
- Place the chopped white chocolate in a heatproof bowl. Pour the hot cream mixture over the chocolate and let it sit for 2–3 minutes.
- Slowly stir from the center outward until the ganache is smooth and glossy. Set aside to cool to room temperature.
- Make the crust: Combine the Biscoff cookie crumbs and melted butter until evenly moistened.
- Press the mixture firmly into the bottom of a lined 9-inch springform pan. Refrigerate while preparing the filling.
- Make the filling: Beat the softened cream cheese, Biscoff spread, powdered sugar, and vanilla until smooth and creamy.
- In a separate bowl, whip the cold heavy cream to stiff peaks.
- Gently fold the whipped cream into the Biscoff cream cheese mixture until smooth and evenly combined.
- Spread the filling evenly over the chilled Biscoff crust and smooth the top.
- Pour the cooled Biscoff ganache over the cheesecake and gently spread it into an even layer.
- Refrigerate for at least 6 hours, preferably overnight, until fully set.
- Before serving, decorate with crushed Biscoff cookies and whole cookies if desired. Slice with a clean, sharp knife.