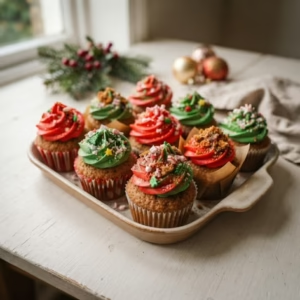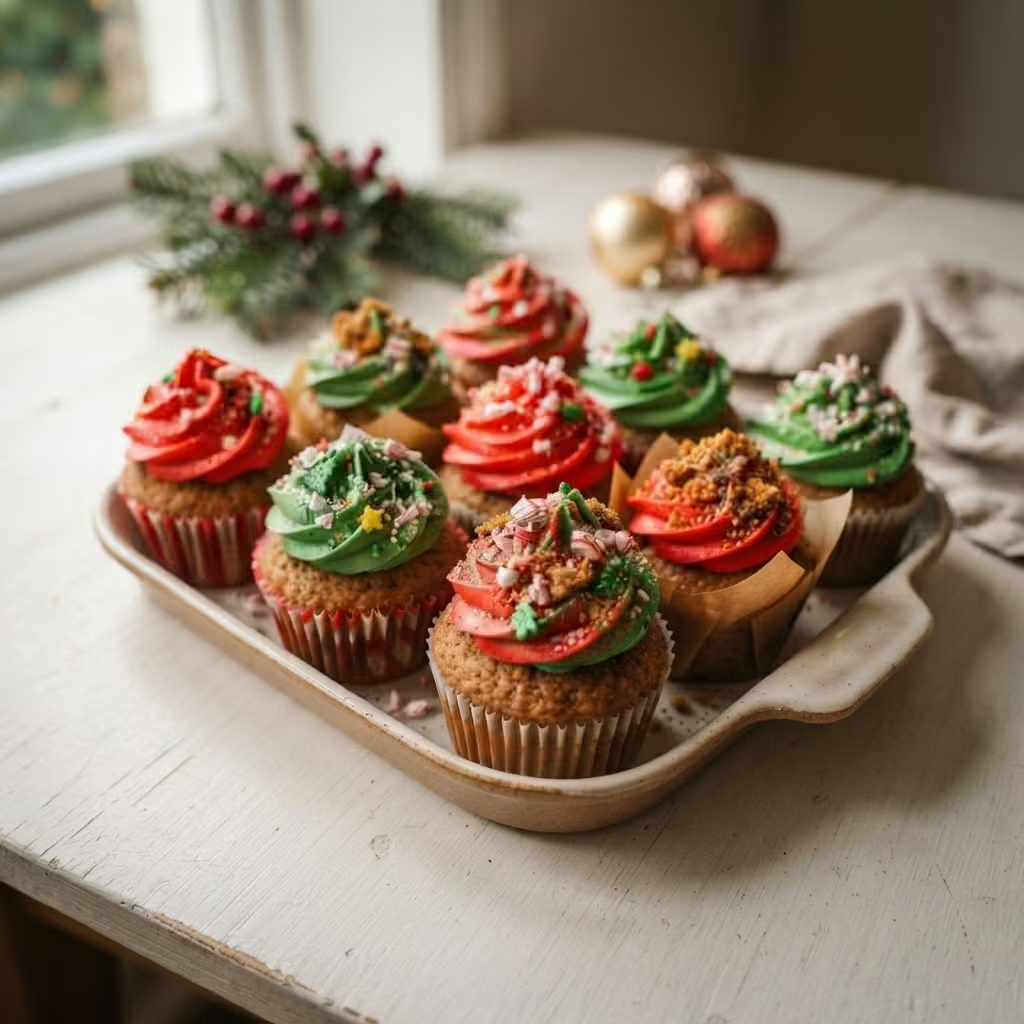
Christmas cupcake bring festive flavors, beautiful decorations, and a little holiday magic to every celebration! From classic peppermint and rich chocolate to delightful gingerbread creations, these 20 easy Christmas cupcake recipes are perfect for sharing with family and friends. Get ready to bake sweet holiday treats that look as amazing as they taste and make every Christmas gathering extra special.
Christmas cupcake are even more special when filled with the warm, cozy flavors of gingerbread! These festive treats are perfect for holiday baking, whether you’re sharing them with neighbors, serving them at a Christmas gathering, or enjoying one with a warm cup of tea on a chilly winter day.
Discover the best Christmas cupcake recipes with photos to help you find easy, quick, and delicious treats for the holiday season. Choose from 20 delicious Christmas cupcake recipes featuring festive flavors, creative decorations, and sweet ideas perfect for sharing with family and friends.
Christmas cupcake tiramisu
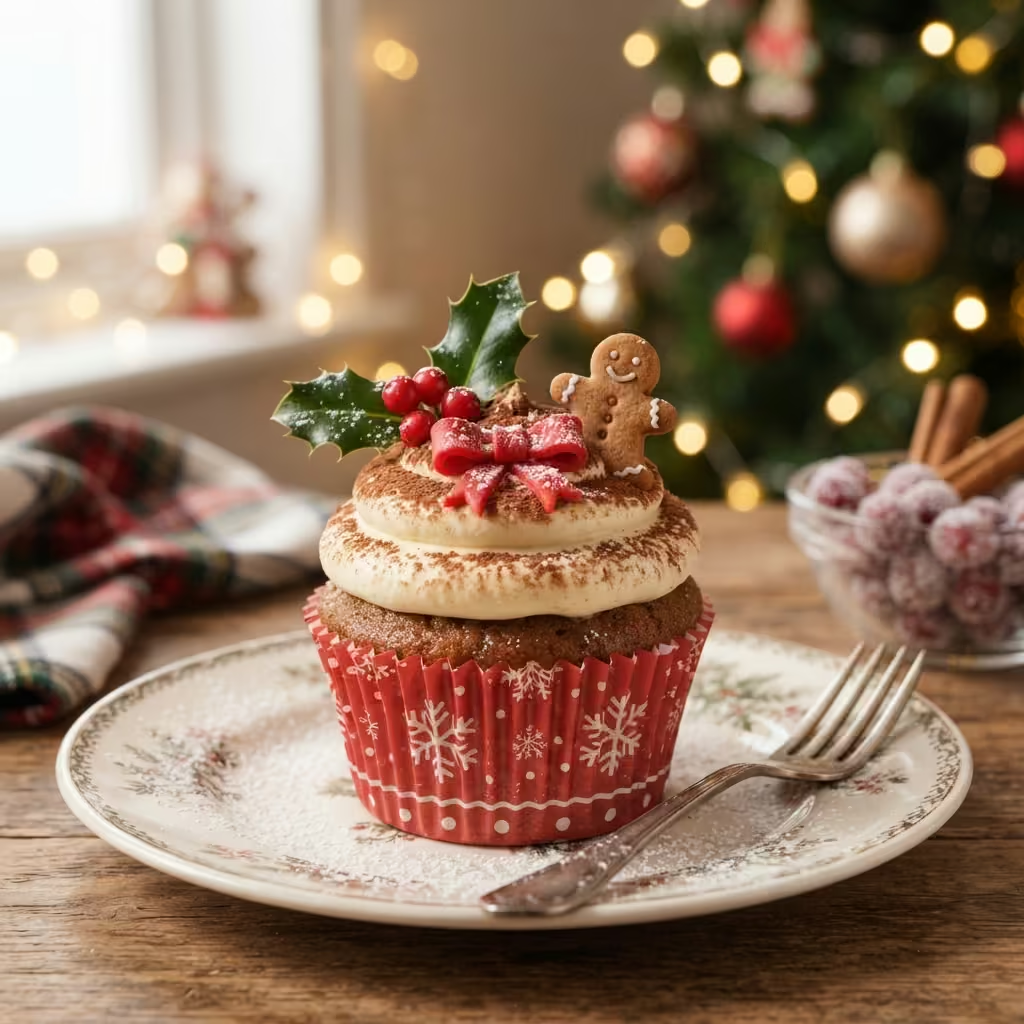
Christmas Tiramisu Cupcakes
Prep Time: 25 minutes | Cook Time: 18–22 minutes | Cooling Time: 45 minutes | Total Time: About 1 hour 30 minutes
Yield: 12 cupcakes
Description
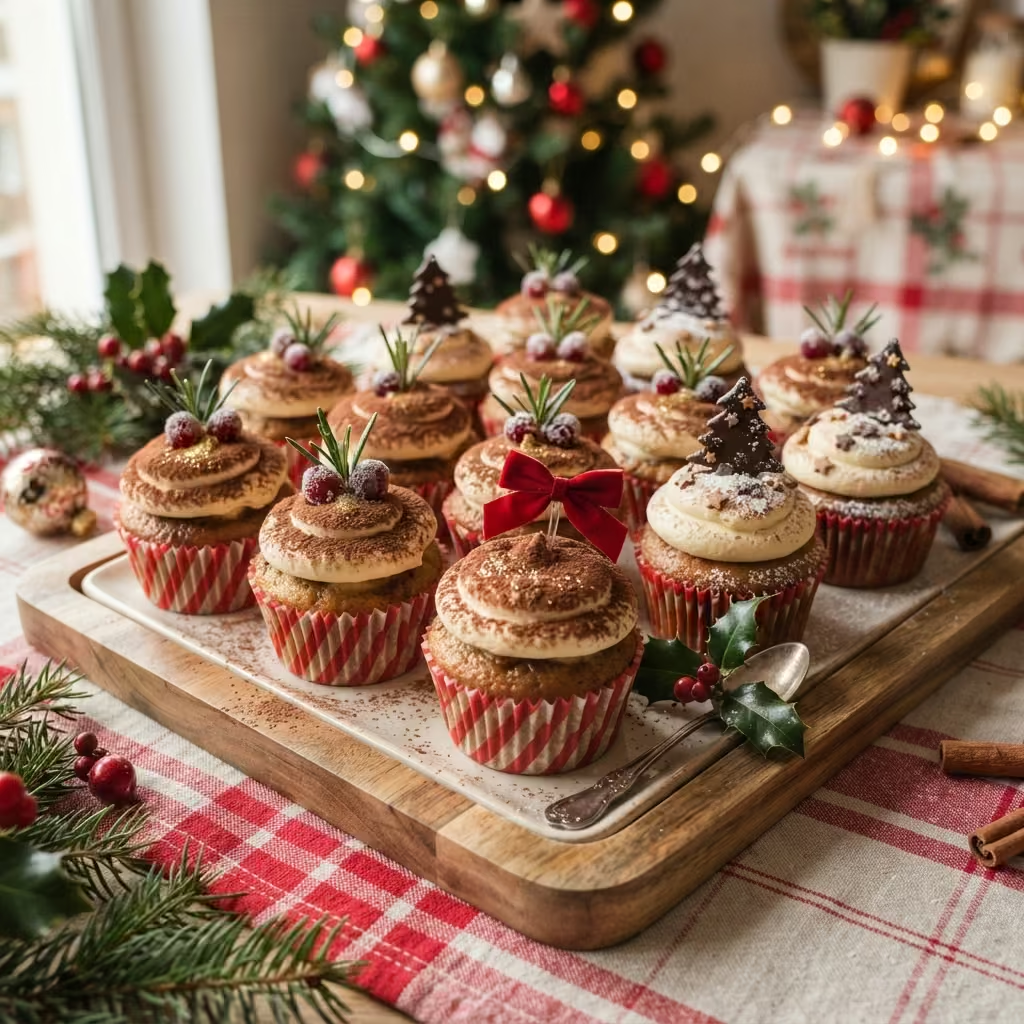
These Christmas Tiramisu Cupcakes combine soft vanilla cupcakes, a coffee soak, and fluffy mascarpone frosting for a festive twist on classic Italian tiramisu. Finished with cocoa powder and optional holiday decorations, they make an elegant dessert for Christmas parties and cookie trays.
Ingredients
For the Cupcakes
- 1 ½ cups (188 g) all-purpose flour
- 1 ½ teaspoons baking powder
- ¼ teaspoon salt
- ½ cup (113 g) unsalted butter, softened
- ¾ cup (150 g) granulated sugar
- 2 large eggs, room temperature
- 2 teaspoons vanilla extract
- ½ cup (120 ml) whole milk, room temperature
For the Coffee Soak
- ½ cup (120 ml) strong brewed espresso or coffee, cooled
- 1 tablespoon coffee liqueur (optional)
For the Mascarpone Frosting
- 8 ounces (225 g) mascarpone cheese, cold
- 1 cup (240 ml) heavy whipping cream, cold
- ½ cup (60 g) powdered sugar, sifted
- 1 teaspoon vanilla extract
- Unsweetened cocoa powder, for dusting
- Chocolate shavings or festive sprinkles, optional
Step-by-Step Directions
Prepare the oven and pan. Preheat the oven to 350°F (175°C). Line a 12-cup muffin pan with paper liners.
Mix the dry ingredients. In a medium bowl, whisk together the flour, baking powder, and salt.
Cream the butter and sugar. In a separate bowl, beat the softened butter and granulated sugar until light and fluffy, about 2–3 minutes. Beat in the eggs one at a time, then mix in the vanilla.
Finish the batter. Add the dry ingredients in two additions, alternating with the milk. Mix just until combined; avoid overmixing.
Bake the cupcakes. Divide the batter evenly among the liners, filling each about two-thirds full. Bake for 18–22 minutes, until the tops spring back and a toothpick inserted in the center comes out clean. Cool in the pan for 5 minutes, then transfer to a rack to cool completely.
Add the coffee soak. Stir the cooled coffee with the optional coffee liqueur. Use a skewer to poke a few small holes in each cooled cupcake, then slowly brush or spoon a little coffee mixture over each one. Use enough to add flavor without making the cupcakes soggy.
Make the frosting. Beat the cold mascarpone briefly until smooth. In another bowl, whip the cold heavy cream, powdered sugar, and vanilla to medium-stiff peaks. Gently fold the whipped cream into the mascarpone until smooth and fluffy. Do not overbeat, as mascarpone can become grainy.
Frost and decorate. Pipe or spread the frosting over the cupcakes. Dust lightly with unsweetened cocoa powder and add chocolate shavings or festive sprinkles if desired.
Chill before serving. Refrigerate for 20–30 minutes to help the frosting set. Serve chilled or let stand briefly at room temperature before serving.
Tips for the Best Christmas Tiramisu Cupcakes
- Let the cupcakes cool completely before adding the coffee soak or frosting.
- Use cold mascarpone and heavy cream for a stable, creamy frosting.
- Add the coffee gradually; too much liquid can make the cupcakes soggy.
- For a kid-friendly version, skip the coffee liqueur.
- For a festive finish, use a small stencil to dust cocoa powder in a star or snowflake pattern.
Storage
Store the frosted cupcakes in an airtight container in the refrigerator for up to 3 days. Because the frosting contains mascarpone and cream, do not leave the cupcakes at room temperature for more than 2 hours. For the best texture, add the cocoa powder just before serving.
Christmas spice cupcake with speculoos whipped cream
Prep Time: 25 minutes | Cook Time: 18–22 minutes | Total Time: 50 minutes | Yield: 12 cupcakes
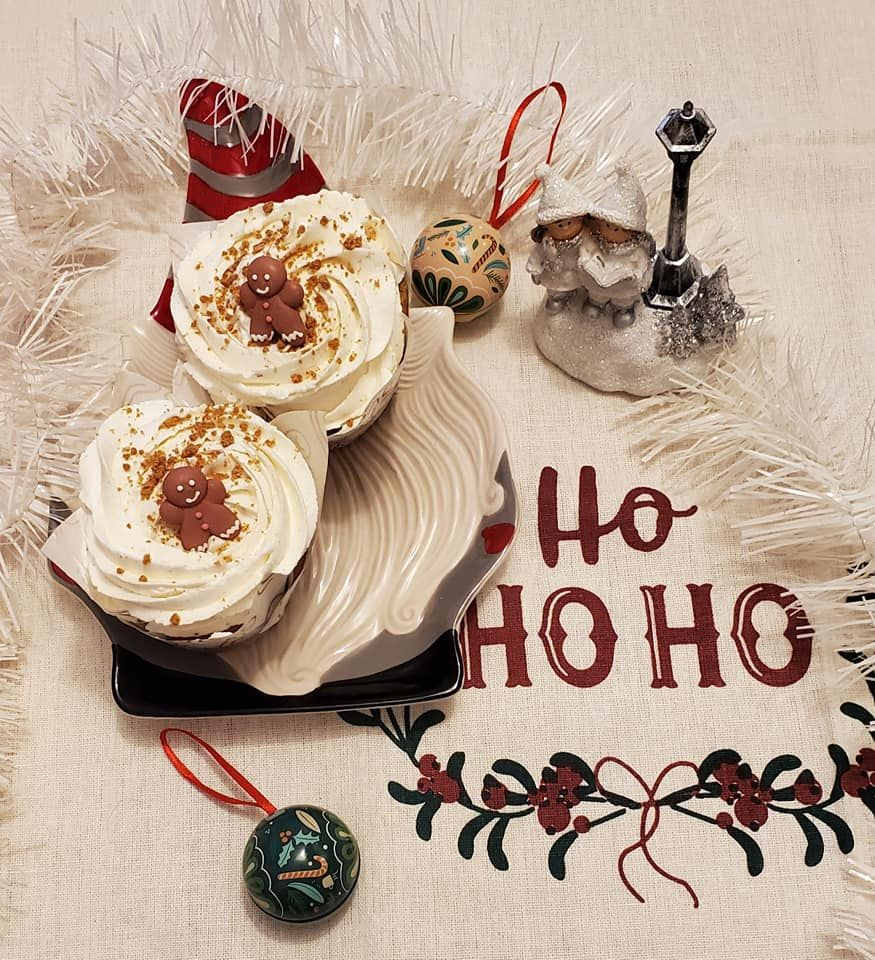
These Christmas Spice Cupcakes with Speculoos Whipped Cream are filled with the cozy flavors of cinnamon, ginger, nutmeg, and brown sugar. Each soft, warmly spiced cupcake is topped with a fluffy whipped cream frosting infused with Speculoos cookie butter for a delicious caramelized cookie flavor. Perfect for Christmas parties, holiday dessert tables, or a cozy winter baking afternoon, these festive cupcakes are guaranteed to bring a little extra sweetness to the season.
Ingredients
For the Christmas Spice Cupcakes
- 1 ½ cups (188 g) all-purpose flour
- 1 teaspoon baking powder
- ½ teaspoon baking soda
- ¼ teaspoon salt
- 1 ½ teaspoons ground cinnamon
- 1 teaspoon ground ginger
- ¼ teaspoon ground nutmeg
- ⅛ teaspoon ground cloves
- ½ cup (113 g) unsalted butter, softened
- ½ cup (100 g) packed brown sugar
- ¼ cup (50 g) granulated sugar
- 2 large eggs, at room temperature
- 1 teaspoon vanilla extract
- ½ cup (120 ml) buttermilk, at room temperature
- ¼ cup (60 ml) unsweetened applesauce
For the Speculoos Whipped Cream
- 1 cup (240 ml) cold heavy whipping cream
- ½ cup (120 g) Speculoos cookie butter, such as Biscoff
- 2 tablespoons (15 g) powdered sugar, optional
- ½ teaspoon vanilla extract
For Decoration (Optional)
- Crushed Speculoos cookies
- Mini gingerbread cookies
- A light dusting of ground cinnamon
- Holiday sprinkles
Step-by-Step Directions
Step 1: Prepare the Oven
Preheat the oven to 350°F (175°C). Line a 12-cup muffin pan with cupcake liners.
Step 2: Mix the Dry Ingredients
In a medium bowl, whisk together the flour, baking powder, baking soda, salt, cinnamon, ginger, nutmeg, and cloves until evenly combined.
Step 3: Cream the Butter and Sugars
In a large mixing bowl, beat the softened butter, brown sugar, and granulated sugar for 2–3 minutes until light and fluffy.
Add the eggs one at a time, mixing well after each addition. Stir in the vanilla extract.
Step 4: Make the Cupcake Batter
Add the dry ingredients in three additions, alternating with the buttermilk. Mix in the applesauce and stir just until the batter is smooth. Avoid overmixing to keep the cupcakes tender.
Step 5: Bake the Cupcakes
Divide the batter evenly among the cupcake liners, filling each about two-thirds full. Bake for 18–22 minutes, or until a toothpick inserted into the center comes out clean.
Let the cupcakes cool in the pan for 5 minutes, then transfer them to a wire rack to cool completely before frosting.
Step 6: Prepare the Speculoos Whipped Cream
Place the cold heavy whipping cream in a chilled mixing bowl and whip until soft peaks begin to form.
In a separate small bowl, gently stir the Speculoos cookie butter until smooth. If it is very firm, warm it for a few seconds until slightly softened, then let it cool to room temperature.
Add the cookie butter, powdered sugar if using, and vanilla extract to the whipped cream. Continue whipping on low to medium speed until the frosting is fluffy and holds its shape. Avoid overwhipping.
Tip: If the cookie butter is too warm, it may deflate the cream. Make sure it is soft but not hot before incorporating it.
Step 7: Frost the Cupcakes
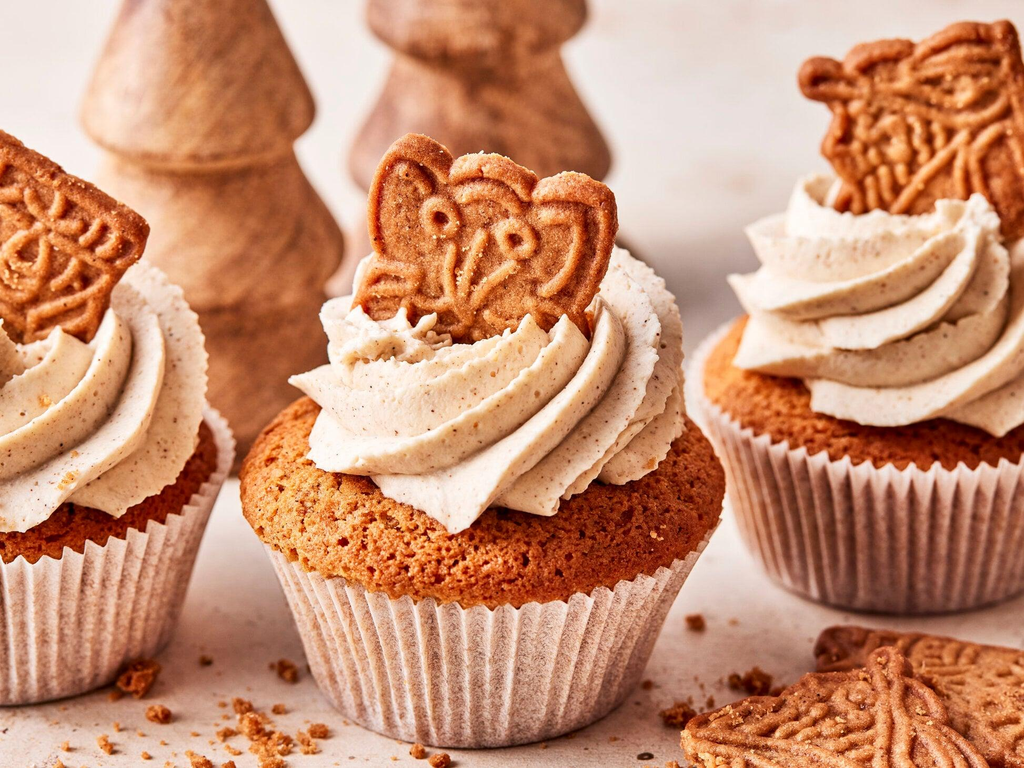
Once the cupcakes are completely cool, transfer the Speculoos whipped cream to a piping bag fitted with a star tip. Pipe generous swirls onto each cupcake.
Step 8: Add the Christmas Decorations
Sprinkle the cupcakes with crushed Speculoos cookies and a light dusting of cinnamon. For a festive finishing touch, add mini gingerbread cookies or holiday sprinkles.
Step 9: Chill and Serve
Refrigerate the cupcakes for 20–30 minutes before serving to help the whipped cream frosting set. Enjoy them chilled or let them sit out briefly before serving.
Tips for the Best Christmas Spice Cupcakes
- Use fresh spices: Freshly opened cinnamon and ginger provide a richer, warmer holiday flavor.
- Measure the flour carefully: Spoon it into the measuring cup and level it off to avoid dense cupcakes.
- Cool completely before frosting: Warm cupcakes will melt the Speculoos whipped cream.
- Keep the cream cold: Cold heavy cream whips more easily and produces a fluffier frosting.
- Adjust the sweetness: Speculoos cookie butter is already sweet, so the powdered sugar is optional.
- Make them extra festive: Top each cupcake with a mini gingerbread cookie or a small piece of cinnamon-dusted Speculoos biscuit.
Storage Instructions
Store the Christmas Spice Cupcakes with Speculoos Whipped Cream in an airtight container in the refrigerator for up to 3 days. Because the frosting contains whipped cream, keep the cupcakes refrigerated and avoid leaving them at room temperature for more than 2 hours.
For the best texture, add the cookie crumbs and decorative cookies shortly before serving.
Learn more : Champagne Cupcakes with Raspberry Frosting
Christmas Santa Hut cupcake
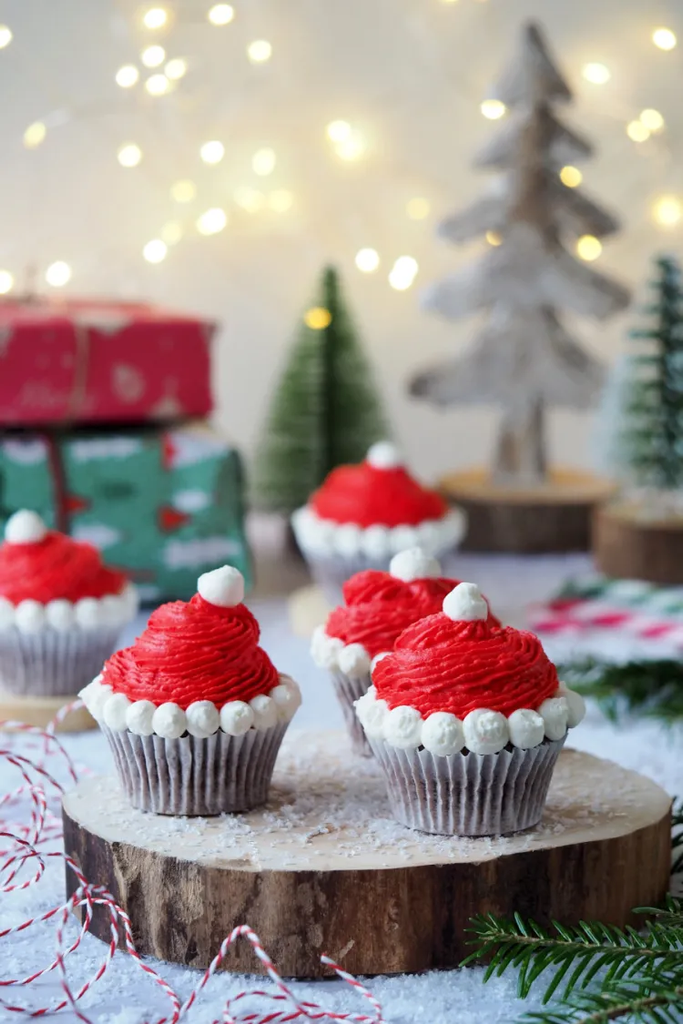
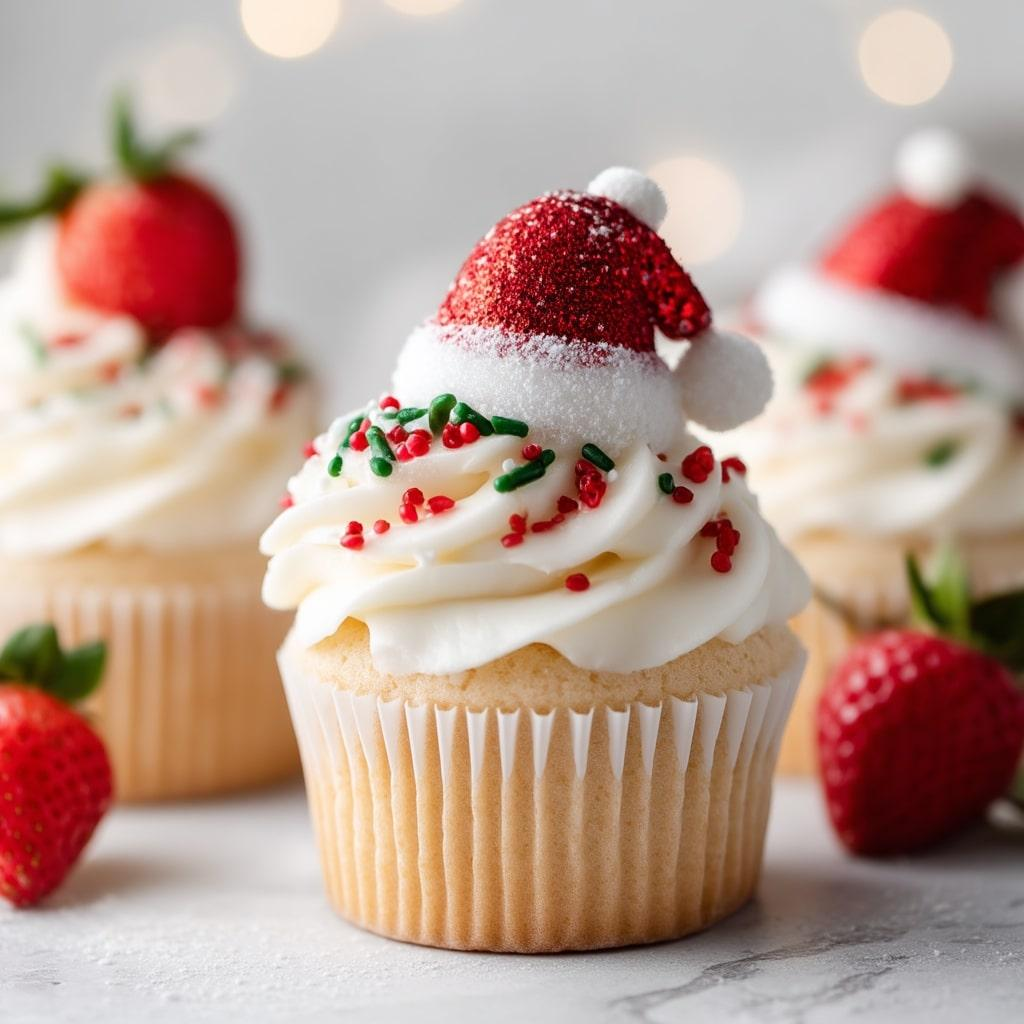
These Christmas Santa Hut Cupcakes are a festive holiday treat featuring soft vanilla cupcakes topped with fluffy buttercream and adorable Santa-inspired decorations. With bright red frosting, snowy white details, and little chocolate doors, these charming cupcakes look like tiny huts straight from Santa’s Christmas village. They are perfect for Christmas parties, holiday bake sales, classroom celebrations, and festive dessert tables.
Ingredients
For the Vanilla Cupcakes
- 1 ½ cups (188 g) all-purpose flour
- 1 ½ teaspoons baking powder
- ¼ teaspoon salt
- ½ cup (113 g) unsalted butter, softened
- ¾ cup (150 g) granulated sugar
- 2 large eggs, at room temperature
- 2 teaspoons vanilla extract
- ½ cup (120 ml) whole milk, at room temperature
For the Buttercream Frosting
- 1 cup (226 g) unsalted butter, softened
- 3 cups (360 g) powdered sugar
- 2 tablespoons heavy cream or milk, plus more if needed
- 2 teaspoons vanilla extract
- Red gel food coloring
- Green gel food coloring (optional)
For the Santa Hut Decorations
- 12 mini chocolate squares or chocolate wafer pieces, for doors
- 24 mini chocolate chips, for door handles and windows
- Mini marshmallows or white fondant, for snowy details
- White sugar pearls or festive sprinkles, optional
- Shredded coconut, optional, for a snowy effect
Step-by-Step Directions
Step 1: Prepare the Oven
Preheat the oven to 350°F (175°C). Line a 12-cup muffin pan with paper cupcake liners.
Step 2: Mix the Dry Ingredients
In a medium bowl, whisk together the flour, baking powder, and salt.
Step 3: Cream the Butter and Sugar
In a large bowl, beat the softened butter and granulated sugar for 2–3 minutes until light and fluffy. Add the eggs one at a time, mixing well after each addition, then stir in the vanilla extract.
Step 4: Make the Cupcake Batter
Add the flour mixture in three additions, alternating with the milk. Mix gently until just combined, being careful not to overmix.
Step 5: Bake the Cupcakes
Divide the batter evenly among the cupcake liners, filling each about two-thirds full. Bake for 18–22 minutes, or until a toothpick inserted into the center comes out clean.
Let the cupcakes cool in the pan for 5 minutes, then transfer them to a wire rack to cool completely.
Step 6: Prepare the Buttercream
Beat the softened butter until creamy, about 2 minutes. Gradually add the powdered sugar, followed by the vanilla extract and heavy cream. Beat for another 2–3 minutes until smooth and fluffy.
Divide the frosting into separate bowls. Color most of it bright red with gel food coloring, keeping some white for the snow and decorative trim. Add green frosting if you want to create little Christmas trees beside the huts.
Step 7: Create the Santa Hut Shapes
Transfer the red frosting to a piping bag fitted with a large star or round tip. Pipe a tall, slightly tapered swirl on each cupcake to create the appearance of a little Santa hut or a festive red roof.
For a more house-like design, spread a smooth layer of red frosting over each cupcake and shape the top into a small peak using an offset spatula.
Step 8: Add the Snowy Roof
Pipe white frosting around the base of each red hut and along the top edges to resemble fresh snow. Add tiny dots of white frosting around the roofline for a snowy, frosted finish.
Step 9: Decorate the Doors and Windows
Press a mini chocolate square into the front of each hut to create a door. Add a mini chocolate chip as the handle and use additional chocolate chips for small windows.
Finish with white sugar pearls, mini marshmallows, or shredded coconut to create a magical snowy village look.
Step 10: Serve and Enjoy
Arrange the decorated cupcakes on a festive serving platter. For an extra-special Christmas presentation, surround them with mini candy canes, edible snowflake decorations, or small gingerbread cookies.
Tips for the Best Christmas Santa Hut Cupcakes
- Use gel food coloring: Gel coloring creates a vivid Christmas red without making the frosting too runny.
- Cool completely: Always allow the cupcakes to cool before decorating to prevent the buttercream from melting.
- Chill the frosting if needed: If the red frosting becomes too soft, refrigerate it for 10–15 minutes before piping.
- Keep the decorations simple: Chocolate doors and white snowy trim are enough to make the Santa huts instantly recognizable.
- Make them with kids: Prepare the cupcakes and frosting in advance, then let children add the doors, windows, and sprinkles.
Storage Instructions
Store the decorated cupcakes in an airtight container at room temperature for up to 2 days if your kitchen is cool, or refrigerate them for up to 4 days. If refrigerated, let them sit at room temperature for about 20–30 minutes before serving for the best cake texture.
Christmas garland cupcakes
Prep Time: 30 minutes | Cook Time: 18–22 minutes | Total Time: 1 hour | Yield: 12 cupcakes
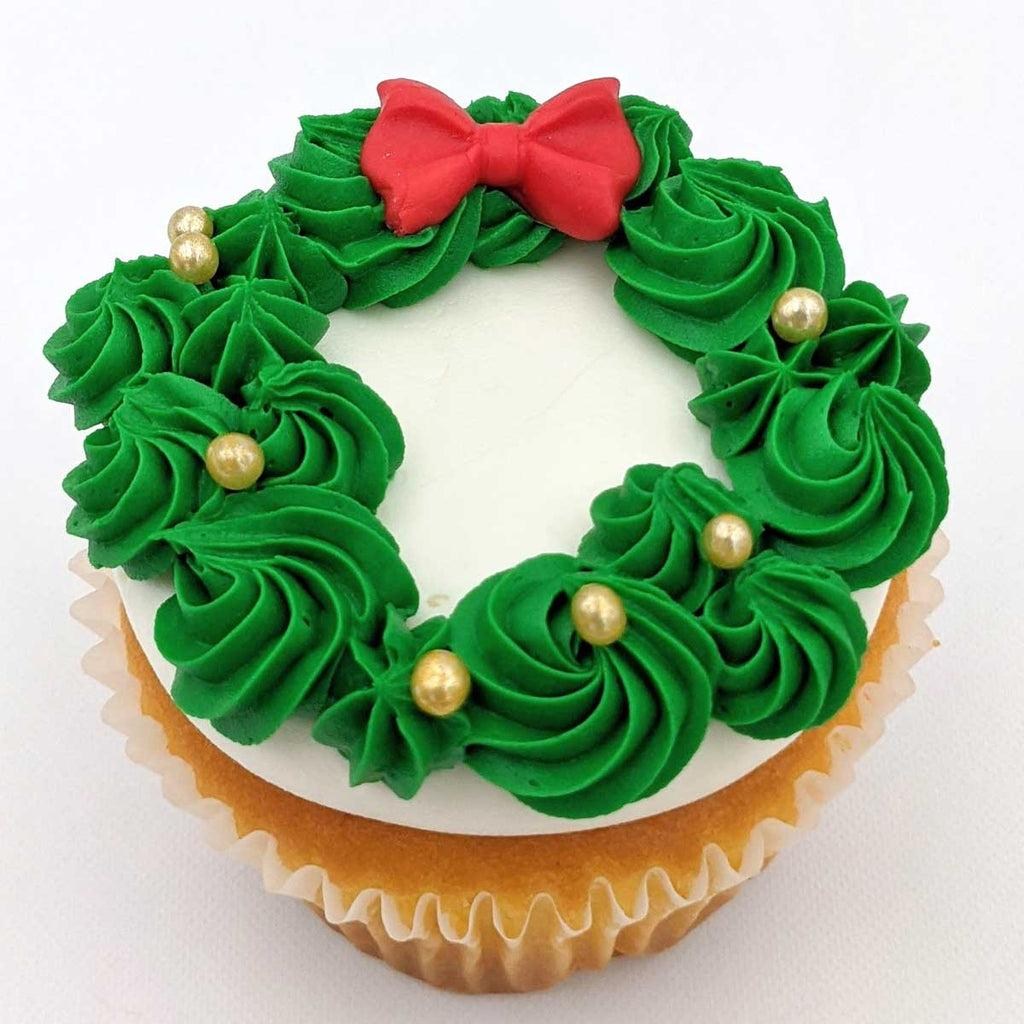
Christmas Garland Cupcake are a festive holiday dessert decorated with swirls of green buttercream, colorful candy berries, and sparkling edible ornaments. Made with soft, fluffy vanilla cupcakes and creamy frosting, these beautiful treats resemble miniature Christmas garlands and bring a cheerful touch to any holiday dessert table. They’re perfect for Christmas parties, family gatherings, cookie exchanges, and festive baking with kids.
Ingredients
For the Vanilla Cupcakes
- 1 ½ cups (188 g) all-purpose flour
- 1 ½ teaspoons baking powder
- ¼ teaspoon salt
- ½ cup (113 g) unsalted butter, softened
- ¾ cup (150 g) granulated sugar
- 2 large eggs, at room temperature
- 2 teaspoons vanilla extract
- ½ cup (120 ml) whole milk, at room temperature
For the Buttercream Frosting
- 1 cup (226 g) unsalted butter, softened
- 3 cups (360 g) powdered sugar
- 2–3 tablespoons heavy cream or milk
- 2 teaspoons vanilla extract
- Green gel food coloring
For the Christmas Garland Decorations
- Red candy pearls or mini red candies
- Gold or white sugar pearls
- Small star-shaped sprinkles
- Mini fondant bows, optional
- Edible glitter, optional
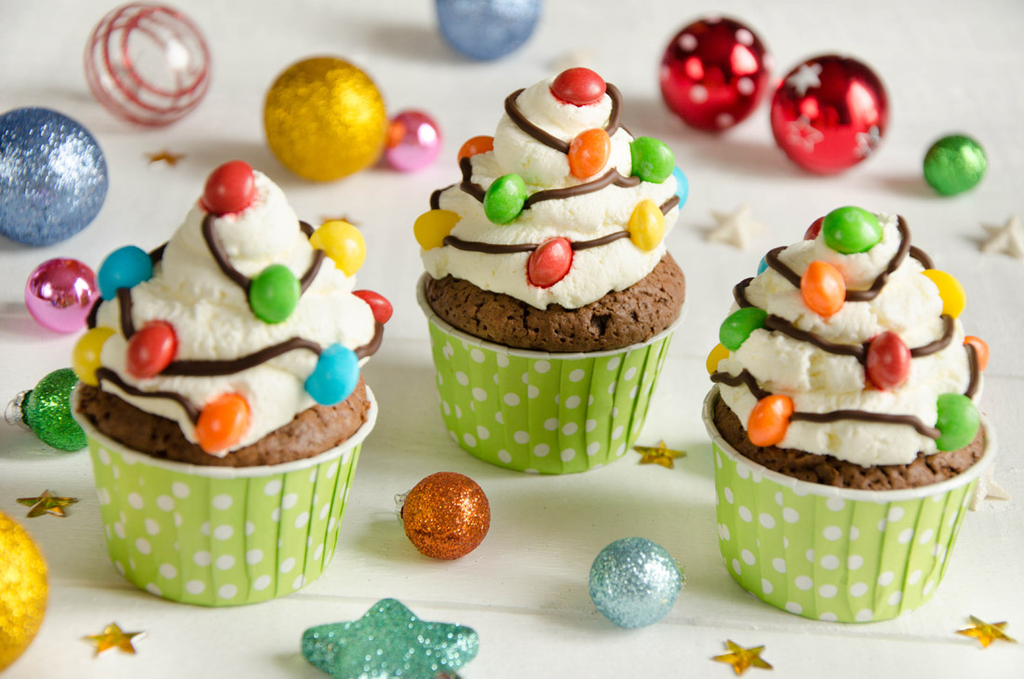
Vhristmas cupcake Step-by-Step Directions
Step 1: Prepare the Oven
Preheat the oven to 350°F (175°C). Line a 12-cup muffin pan with paper cupcake liners.
Step 2: Combine the Dry Ingredients
In a medium bowl, whisk together the flour, baking powder, and salt until evenly combined.
Step 3: Cream the Butter and Sugar
In a large mixing bowl, beat the softened butter and granulated sugar for 2–3 minutes until light and fluffy. Add the eggs one at a time, beating well after each addition, then mix in the vanilla extract.
Step 4: Make the Cupcake Batter
Add the flour mixture in three additions, alternating with the milk. Mix just until combined to keep the cupcakes soft and tender.
Step 5: Bake the Cupcakes
Divide the batter evenly among the liners, filling each about two-thirds full. Bake for 18–22 minutes, or until a toothpick inserted into the center comes out clean.
Let the cupcakes cool in the pan for 5 minutes, then transfer them to a wire rack to cool completely.
Step 6: Prepare the Buttercream
Beat the softened butter until creamy. Gradually add the powdered sugar, then mix in the vanilla extract and heavy cream. Beat for 2–3 minutes until smooth and fluffy.
Add green gel food coloring a little at a time until the frosting reaches your desired Christmas green.
Step 7: Pipe the Christmas Garland
Transfer the green buttercream to a piping bag fitted with a small leaf tip or star tip. Pipe curved lines, loops, or overlapping swirls across the top of each cupcake to resemble a festive Christmas garland.
For a wreath-style design, pipe the frosting in a circle around the cupcake, leaving a small open space in the center.
Step 8: Add the Festive Decorations
Decorate the green frosting with red candy pearls to resemble holly berries. Add gold and white sugar pearls as ornaments, then finish with tiny star sprinkles or a miniature fondant bow.
Step 9: Chill and Serve
Refrigerate the cupcakes for 15–20 minutes to help the buttercream hold its shape. Arrange them on a festive platter and serve at your Christmas celebration.
Tips for the Best Christmas Garland Cupcake
- Use gel food coloring: It gives the frosting a vibrant green color without making it too thin.
- Cool completely before decorating: Warm cupcakes can cause the buttercream to melt.
- Choose the right piping tip: A leaf tip creates realistic greenery, while a star tip gives the garland a textured, festive look.
- Mix your decorations: Combine red berries, gold pearls, and white sprinkles for a classic Christmas color palette.
- Make them ahead: Bake the cupcakes a day in advance and decorate them closer to serving time for the freshest appearance.
Storage Instructions
Store Christmas Garland Cupcakes in an airtight container for up to 2 days at a cool room temperature, or refrigerate for up to 4 days. If refrigerated, let them sit at room temperature for 20–30 minutes before serving for the best texture.
Christmas cupcake Chocolate orange gingerbread
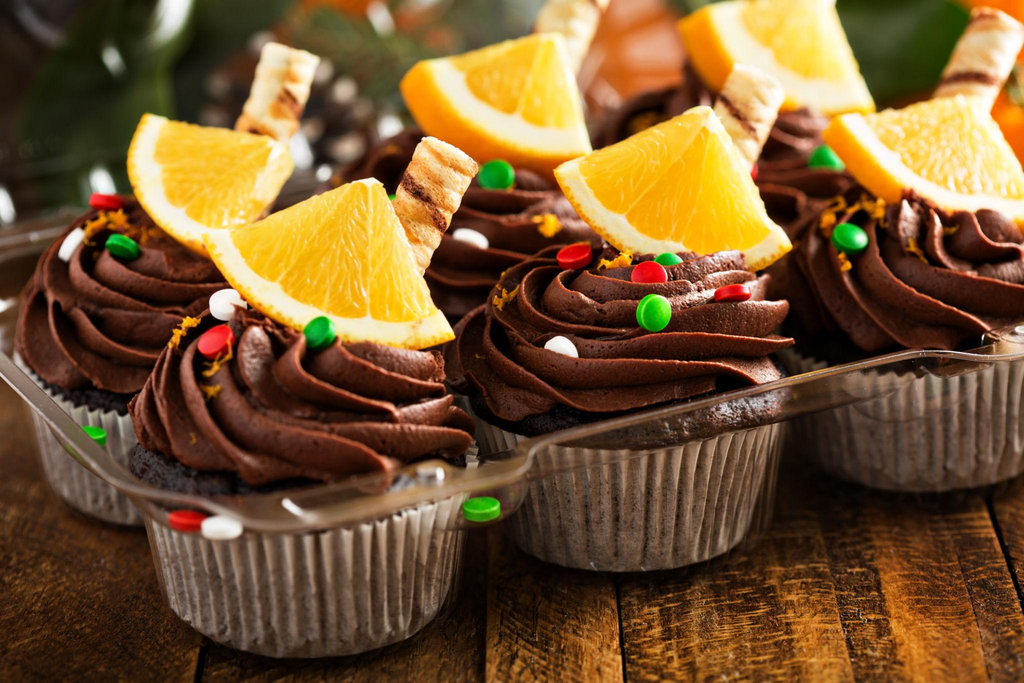
Prep Time: 25 minutes | Cook Time: 18–22 minutes | Total Time: 1 hour 10 minutes | Yield: 12 cupcakes
These Christmas Chocolate Orange Gingerbread Cupcakes bring together three irresistible holiday flavors: rich chocolate, fragrant orange, and warm gingerbread spices. Each moist chocolate cupcake is infused with molasses, cinnamon, ginger, and fresh orange zest, then topped with silky chocolate-orange frosting. Finished with chocolate shavings, candied orange peel, or mini gingerbread decorations, these festive cupcakes are perfect for Christmas parties, holiday dessert tables, and cozy winter celebrations.
Ingredients
For the Chocolate Orange Gingerbread Cupcakes
- 1 cup (125 g) all-purpose flour
- ½ cup (45 g) unsweetened cocoa powder
- ¾ teaspoon baking soda
- ½ teaspoon baking powder
- ¼ teaspoon salt
- 1 teaspoon ground ginger
- 1 teaspoon ground cinnamon
- ¼ teaspoon ground nutmeg
- ¼ teaspoon ground cloves
- ½ cup (100 g) packed brown sugar
- ¼ cup (60 ml) vegetable oil
- 1 large egg, at room temperature
- ⅓ cup (80 ml) molasses
- ½ cup (120 ml) buttermilk, at room temperature
- 1 teaspoon vanilla extract
- 1 teaspoon finely grated orange zest
- ¼ cup (60 ml) hot water
For the Chocolate Orange Frosting
- ½ cup (113 g) unsalted butter, softened
- 2 cups (240 g) powdered sugar
- ¼ cup (25 g) unsweetened cocoa powder
- 2 tablespoons (30 ml) heavy cream, plus more if needed
- 1 teaspoon finely grated orange zest
- 1 tablespoon fresh orange juice
- ½ teaspoon vanilla extract
- Pinch of salt
For Decoration
- Chocolate shavings or curls
- Candied orange peel
- Mini gingerbread cookies, optional
- A light dusting of cocoa powder, optional
Step-by-Step Directions
Step 1: Prepare the Oven
Preheat the oven to 350°F (175°C). Line a 12-cup muffin pan with paper cupcake liners.
Step 2: Combine the Dry Ingredients
In a medium bowl, whisk together the flour, cocoa powder, baking soda, baking powder, salt, ground ginger, cinnamon, nutmeg, and cloves until evenly combined.
Step 3: Mix the Wet Ingredients
In a large mixing bowl, whisk together the brown sugar, vegetable oil, egg, molasses, buttermilk, vanilla extract, and orange zest until smooth.
Step 4: Make the Cupcake Batter
Gradually add the dry ingredients to the wet mixture, stirring until just combined. Slowly mix in the hot water. The batter will be relatively thin, which helps create moist, tender cupcakes.
Step 5: Bake the Cupcakes
Divide the batter evenly among the cupcake liners, filling each about two-thirds full. Bake for 18–22 minutes, or until a toothpick inserted into the center comes out with a few moist crumbs but no wet batter.
Let the cupcakes cool in the pan for 5 minutes before transferring them to a wire rack to cool completely.
Step 6: Prepare the Chocolate Orange Frosting
Beat the softened butter until creamy. Add the powdered sugar and cocoa powder gradually, mixing on low speed to prevent a cloud of sugar.
Add the heavy cream, orange juice, orange zest, vanilla extract, and salt. Beat for 2–3 minutes until the frosting is smooth, fluffy, and easy to pipe. Add a little more cream if needed to reach the desired consistency.
Step 7: Frost the Cupcakes
Transfer the frosting to a piping bag fitted with a star tip. Pipe generous swirls onto the completely cooled cupcakes, or spread the frosting with a spatula for a more rustic look.
Step 8: Add the Christmas Decorations
Top each cupcake with chocolate shavings and a small piece of candied orange peel. Add a mini gingerbread cookie for an extra festive touch, or dust lightly with cocoa powder just before serving.
Step 9: Serve and Enjoy
Arrange the cupcakes on a Christmas serving platter and serve with hot chocolate, coffee, or spiced tea. The chocolate, orange, and gingerbread flavors make these cupcakes especially delicious during the holiday season.
Tips for the Best Christmas Chocolate Orange Gingerbread Cupcakes
- Use fresh orange zest: It gives the cupcakes a brighter citrus aroma that balances the rich chocolate.
- Measure the molasses carefully: It adds moisture, deep sweetness, and the classic gingerbread flavor.
- Don’t overmix the batter: Mix only until the ingredients are combined to keep the cupcakes tender.
- Cool completely before frosting: Warm cupcakes can cause the buttercream to melt.
- Adjust the orange flavor: Add a little extra zest to the frosting if you prefer a more pronounced citrus taste.
- Decorate just before serving: Add delicate chocolate curls and candied orange peel at the last minute for the prettiest finish.
Storage Instructions
Store the frosted cupcakes in an airtight container in the refrigerator for up to 4 days. Let them stand at room temperature for 20–30 minutes before serving for the best texture and flavor.
You can also bake the cupcakes up to 2 days ahead and store them unfrosted in an airtight container at room temperature. Prepare the frosting and decorate them closer to your Christmas celebration.
Christmas Lemon Cupcake
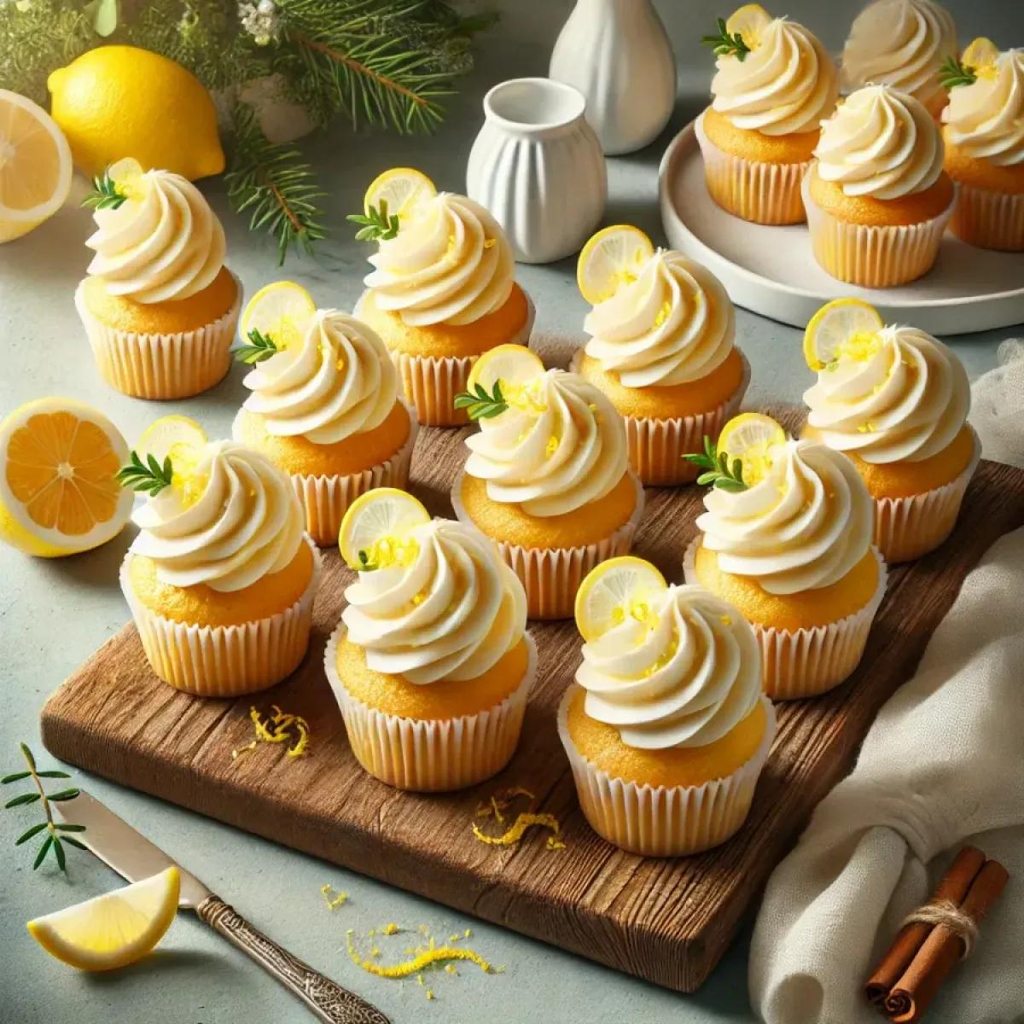
Prep Time: 25 minutes | Cook Time: 18–22 minutes | Total Time: 1 hour 10 minutes | Yield: 12 cupcakes
These Christmas Lemon Cupcakes, inspired by the famous lemon cakes of Italy’s Amalfi Coast, bring a burst of sunshine to your holiday baking. Made with fresh lemon zest, tangy lemon juice, and a soft, buttery crumb, these cupcakes capture the bright citrus flavors of Southern Italy. Each cupcake is topped with silky lemon buttercream and finished with candied lemon slices or a sprinkle of lemon zest for an elegant, festive touch. They’re perfect for Christmas parties, winter gatherings, and anyone who loves a refreshing alternative to traditional chocolate and spice desserts.
Ingredients
For the Lemon Cupcakes
- 1 ½ cups (188 g) all-purpose flour
- 1 ½ teaspoons baking powder
- ¼ teaspoon baking soda
- ¼ teaspoon salt
- ½ cup (113 g) unsalted butter, softened
- ¾ cup (150 g) granulated sugar
- 2 large eggs, at room temperature
- 2 tablespoons finely grated lemon zest
- 2 tablespoons fresh lemon juice
- 1 teaspoon vanilla extract
- ½ cup (120 ml) whole milk, at room temperature
- ¼ cup (60 g) sour cream, at room temperature
For the Lemon Buttercream
- ½ cup (113 g) unsalted butter, softened
- 2 ½ cups (300 g) powdered sugar
- 2 tablespoons fresh lemon juice
- 1 teaspoon finely grated lemon zest
- 1–2 tablespoons heavy cream, if needed
- Pinch of salt
For the Optional Lemon Syrup
- 2 tablespoons fresh lemon juice
- 2 tablespoons granulated sugar
For the Christmas Decorations
- Thin slices of candied lemon
- Freshly grated lemon zest
- White chocolate curls, optional
- Small rosemary sprigs, optional, for a festive look
Step-by-Step Directions
Step 1: Prepare the Oven
Preheat the oven to 350°F (175°C). Line a 12-cup muffin pan with paper cupcake liners.
Step 2: Combine the Dry Ingredients
In a medium bowl, whisk together the flour, baking powder, baking soda, and salt. Set aside.
Step 3: Cream the Butter and Sugar
In a large mixing bowl, beat the softened butter and sugar for 2–3 minutes until pale and fluffy. Add the lemon zest and mix briefly to release its fragrant citrus oils.
Beat in the eggs one at a time, followed by the vanilla extract and fresh lemon juice.
Step 4: Make the Lemon Batter
Add the dry ingredients in three additions, alternating with the milk. Gently fold in the sour cream until the batter is smooth. Avoid overmixing to keep the cupcakes light and tender.
Step 5: Bake the Cupcakes
Divide the batter evenly among the cupcake liners, filling each about two-thirds full. Bake for 18–22 minutes, or until a toothpick inserted into the center comes out clean.
Let the cupcakes cool in the pan for 5 minutes, then transfer them to a wire rack to cool completely.
Step 6: Prepare the Lemon Syrup
If using the optional syrup, combine the lemon juice and sugar in a small saucepan. Warm over low heat, stirring until the sugar dissolves. Let cool slightly.
Brush a small amount over the tops of the warm cupcakes for extra moisture and a more pronounced Amalfi-style lemon flavor.
Step 7: Make the Lemon Buttercream
Beat the softened butter until creamy. Gradually add the powdered sugar, then mix in the lemon juice, lemon zest, and salt.
Beat for 2–3 minutes until light and fluffy. Add a little heavy cream if the frosting is too thick, or a little extra powdered sugar if it needs more structure.
Step 8: Frost the Cupcakes
Once the cupcakes are completely cool, transfer the lemon buttercream to a piping bag fitted with a star tip. Pipe elegant swirls onto each cupcake, or spread the frosting with a spatula for a simple Italian-inspired finish.
Step 9: Add the Festive Decorations
Top each cupcake with a small piece of candied lemon or a sprinkle of fresh lemon zest. For a Christmas-inspired presentation, add a tiny rosemary sprig and a few white chocolate curls.
Step 10: Chill and Serve
Refrigerate the cupcakes for 15–20 minutes to help the frosting set. Bring them to room temperature for about 15–20 minutes before serving to enjoy their full buttery, citrus flavor.
Tips for the Best Amalfi-Style Lemon Cupcakes
- Use fresh lemons: Freshly grated zest and juice provide the bright, fragrant flavor associated with Italian lemon desserts.
- Choose unwaxed lemons when possible: Since the zest is an important ingredient, wash the lemons thoroughly before grating.
- Don’t overmix the batter: Gentle mixing helps create a soft, delicate crumb.
- Add lemon syrup for extra moisture: A light brushing of syrup gives the cupcakes a more intense citrus flavor.
- Balance the sweetness: Taste the frosting and adjust the lemon juice slightly to achieve your preferred level of tartness.
- Keep the decorations elegant: Candied lemon, white chocolate, and a small rosemary sprig create a beautiful Christmas presentation.
Storage Instructions
Store the frosted cupcakes in an airtight container in the refrigerator for up to 4 days. Let them sit at room temperature for 15–20 minutes before serving for the best texture and flavor.
Unfrosted cupcakes can be baked one day ahead and kept in an airtight container at room temperature. For the freshest citrus aroma, prepare the buttercream and decorate the cupcakes closer to serving time.
Apple Cinnamon Cupcakes with Cinnamon Buttercream
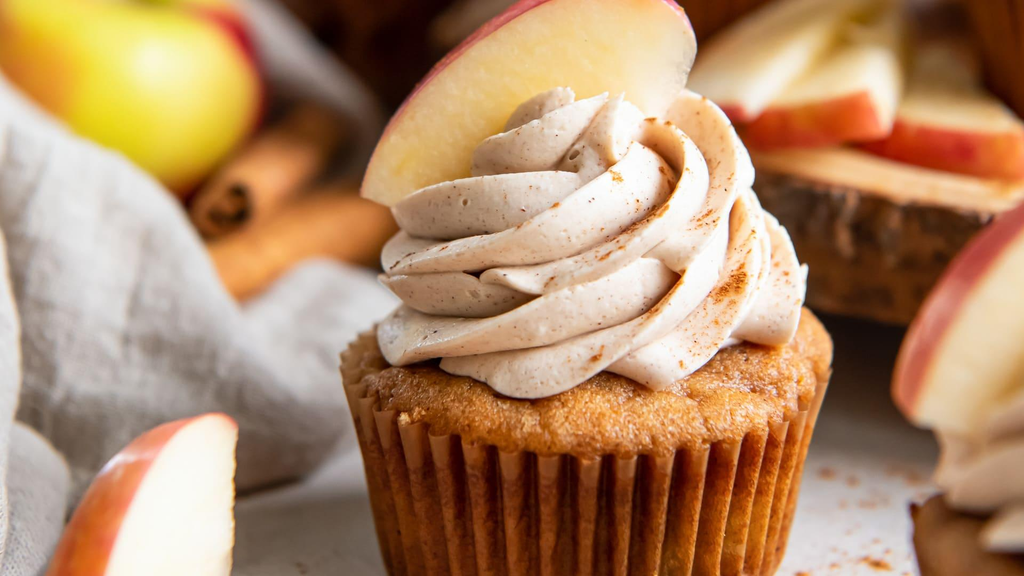
Prep Time: 20 minutes | Cook Time: 18–22 minutes | Total Time: 50 minutes | Yield: 12 cupcakes
These Apple Cinnamon Cupcakes are packed with tender apple pieces, warm cinnamon, and a soft, buttery crumb that tastes just like homemade apple pie. Each cupcake is topped with creamy cinnamon buttercream for the perfect balance of sweetness and spice. Whether you’re baking for a fall gathering, a Thanksgiving dessert table, or a cozy Christmas celebration, these homemade apple cupcakes are a delicious way to bring comforting seasonal flavors to every bite.
Ingredients
For the Apple Cinnamon Cupcakes
- 1 ½ cups (188 g) all-purpose flour
- 1 ½ teaspoons baking powder
- ¼ teaspoon baking soda
- ¼ teaspoon salt
- 1 ½ teaspoons ground cinnamon
- ¼ teaspoon ground nutmeg
- ½ cup (113 g) unsalted butter, softened
- ¾ cup (150 g) granulated sugar
- 2 large eggs, at room temperature
- 1 teaspoon vanilla extract
- ½ cup (120 ml) whole milk, at room temperature
- 1 medium apple, peeled and finely diced (about 1 cup or 130 g)
For the Cinnamon Buttercream
- ½ cup (113 g) unsalted butter, softened
- 2 cups (240 g) powdered sugar
- 1 teaspoon ground cinnamon
- 1 teaspoon vanilla extract
- 1–2 tablespoons heavy cream or milk
- Pinch of salt
Optional Decorations
- Thin apple slices
- A light dusting of ground cinnamon
- Caramel sauce
- Cinnamon sticks for styling
Step-by-Step Directions
Step 1: Prepare the Oven
Preheat the oven to 350°F (175°C). Line a 12-cup muffin pan with paper cupcake liners.
Step 2: Mix the Dry Ingredients
In a medium bowl, whisk together the flour, baking powder, baking soda, salt, cinnamon, and nutmeg. Set aside.
Step 3: Cream the Butter and Sugar
In a large mixing bowl, beat the softened butter and granulated sugar for 2–3 minutes until light and fluffy. Add the eggs one at a time, mixing well after each addition. Stir in the vanilla extract.
Step 4: Make the Batter
Add the dry ingredients in three additions, alternating with the milk. Mix just until combined, then gently fold in the diced apple.
Step 5: Bake the Cupcakes
Divide the batter evenly among the cupcake liners, filling each about two-thirds full. Bake for 18–22 minutes, or until a toothpick inserted into the center comes out clean or with a few moist crumbs.
Let the cupcakes cool in the pan for 5 minutes before transferring them to a wire rack to cool completely.
Step 6: Prepare the Cinnamon Buttercream
Beat the softened butter until smooth and creamy. Gradually add the powdered sugar and cinnamon, followed by the vanilla extract and 1 tablespoon of cream.
Beat for 2–3 minutes until fluffy. Add a little more cream if necessary to achieve a smooth, pipeable consistency.
Step 7: Frost the Cupcakes
Transfer the cinnamon buttercream to a piping bag fitted with a star tip. Pipe generous swirls onto the completely cooled cupcakes, or spread the frosting with a spatula.
Step 8: Add the Finishing Touches
Dust the frosting lightly with cinnamon. For an extra-special dessert, drizzle with caramel sauce or garnish with a thin apple slice just before serving.
Step 9: Serve and Enjoy
Arrange the cupcakes on a serving platter and enjoy them with coffee, tea, or hot apple cider. Their warm cinnamon flavor and tender apple pieces make them especially comforting on chilly days.
Tips for the Best Apple Cinnamon Cupcakes
- Choose the right apples: Granny Smith apples add a pleasant tartness, while Honeycrisp or Gala apples provide a sweeter flavor.
- Dice the apples finely: Small, evenly sized pieces distribute better throughout the batter.
- Avoid overmixing: Stir just until the ingredients are combined to keep the cupcakes soft.
- Cool completely before frosting: This prevents the buttercream from melting.
- Add caramel for extra flavor: A light caramel drizzle complements the apples and cinnamon beautifully.
Storage Instructions
Store the frosted Apple Cinnamon Cupcakes in an airtight container in the refrigerator for up to 4 days. Let them sit at room temperature for 20–30 minutes before serving for the best texture.
For advance preparation, bake the cupcakes a day ahead and store them unfrosted in an airtight container. Prepare the buttercream and decorate them closer to serving time.
Christmas Nutella Cupcake
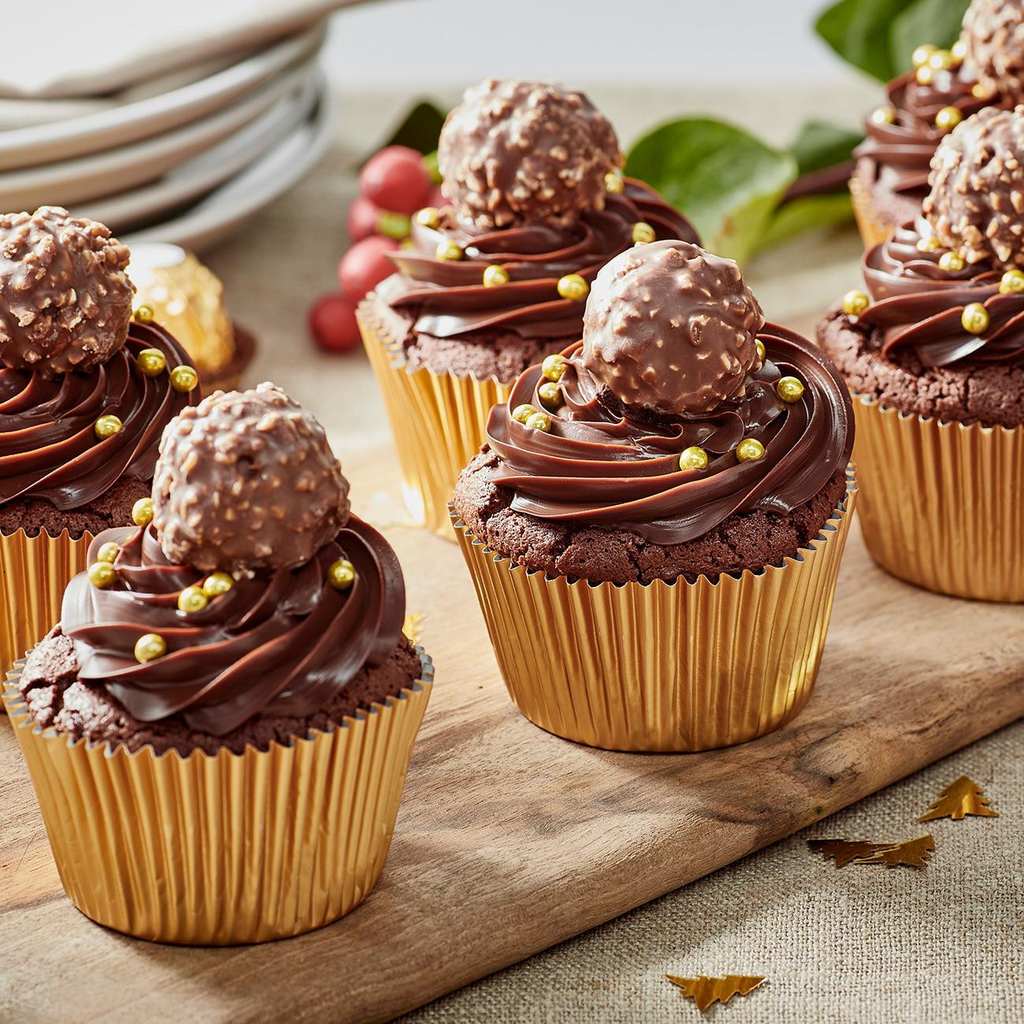
Prep Time: 25 minutes | Cook Time: 18–22 minutes | Total Time: 1 hour 10 minutes | Yield: 12 cupcakes
These Christmas Nutella Cupcakes are a chocolate lover’s dream, combining rich, moist chocolate cupcakes with creamy Nutella frosting and irresistible hazelnut flavor. Each cupcake is topped with a generous swirl of chocolate-hazelnut buttercream and finished with festive sprinkles, chopped hazelnuts, or a chocolate truffle for an extra-special holiday touch. Perfect for Christmas parties, family gatherings, and festive dessert tables, these easy homemade cupcakes are guaranteed to disappear quickly!
Ingredients
For the Chocolate Cupcakes
- 1 cup (125 g) all-purpose flour
- ½ cup (45 g) unsweetened cocoa powder
- ¾ cup (150 g) granulated sugar
- 1 teaspoon baking powder
- ½ teaspoon baking soda
- ¼ teaspoon salt
- 2 large eggs, at room temperature
- ½ cup (120 ml) whole milk, at room temperature
- ¼ cup (60 ml) vegetable oil
- 1 teaspoon vanilla extract
- ½ cup (120 ml) hot water or hot coffee
For the Nutella Buttercream
- ½ cup (113 g) unsalted butter, softened
- ¾ cup (225 g) Nutella chocolate hazelnut spread
- 1 ½ cups (180 g) powdered sugar
- 2 tablespoons heavy cream or milk, plus more if needed
- 1 teaspoon vanilla extract
- Pinch of salt
For the Christmas Decorations
- 12 small chocolate truffles or chocolate-hazelnut candies, optional
- ¼ cup (30 g) chopped toasted hazelnuts
- Red and green Christmas sprinkles
- Chocolate shavings, optional
- Powdered sugar, for a snowy effect
Step-by-Step Directions
Step 1: Prepare the Oven
Preheat the oven to 350°F (175°C). Line a 12-cup muffin pan with paper cupcake liners.
Step 2: Mix the Dry Ingredients
In a large bowl, whisk together the flour, cocoa powder, sugar, baking powder, baking soda, and salt until evenly combined.
Step 3: Add the Wet Ingredients
Add the eggs, milk, vegetable oil, and vanilla extract to the dry ingredients. Whisk until the batter is smooth and no large lumps remain.
Step 4: Finish the Chocolate Batter
Slowly pour in the hot water or hot coffee, stirring gently until combined. The batter will be thin, which helps create moist, tender chocolate cupcakes.
Step 5: Bake the Cupcakes
Divide the batter evenly among the cupcake liners, filling each about two-thirds full. Bake for 18–22 minutes, or until a toothpick inserted into the center comes out clean or with a few moist crumbs.
Let the cupcakes cool in the pan for 5 minutes, then transfer them to a wire rack to cool completely.
Step 6: Make the Nutella Buttercream
Beat the softened butter for 2 minutes until creamy. Add the Nutella and vanilla extract, then beat until smooth.
Gradually add the powdered sugar and salt. Pour in the heavy cream and beat for another 2–3 minutes until the frosting is light, fluffy, and easy to pipe. Add a little extra cream if needed.
Step 7: Frost the Cupcakes
Transfer the Nutella buttercream to a piping bag fitted with a large star tip. Pipe generous swirls onto each completely cooled cupcake.
Step 8: Add the Christmas Decorations
Sprinkle the frosting with chopped toasted hazelnuts and red and green Christmas sprinkles. Add a chocolate truffle or chocolate-hazelnut candy to the top of each cupcake for a luxurious finish.
For a snowy effect, lightly dust the decorations with powdered sugar just before serving.
Step 9: Chill and Serve
Refrigerate the cupcakes for 15–20 minutes to help the frosting set. Let them sit at room temperature for about 15 minutes before serving for the best texture and flavor.
Tips for the Best Christmas Nutella Cupcakes
- Use hot coffee for deeper chocolate flavor: Coffee enhances the chocolate taste without making the cupcakes taste strongly of coffee.
- Don’t overbake: Remove the cupcakes as soon as a toothpick comes out clean or with a few moist crumbs.
- Use room-temperature ingredients: Eggs and milk blend more evenly into the batter.
- Toast the hazelnuts: A few minutes in a dry skillet brings out their nutty flavor. Let them cool before decorating.
- Make the frosting pipeable: If it is too soft, refrigerate it briefly. If it is too thick, add cream a teaspoon at a time.
- Decorate just before serving: This keeps the sprinkles crisp and the powdered sugar looking fresh.
Storage Instructions
Store Christmas Nutella Cupcakes in an airtight container for up to 2 days in a cool room, or refrigerate them for up to 4 days. Let refrigerated cupcakes sit at room temperature for 15–20 minutes before serving.
You can bake the cupcakes a day ahead and store them unfrosted in an airtight container. Prepare the Nutella buttercream and decorate them on the day of your Christmas celebration.
Christmas Peppermint Mocha Cupcake with Chocolate Ganache
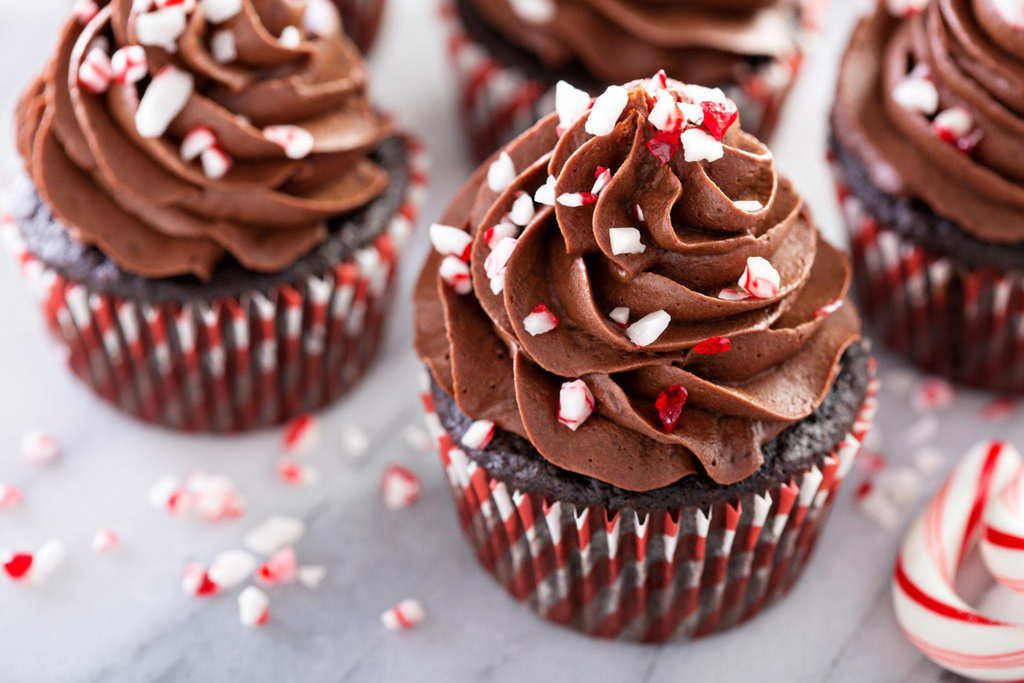
Prep Time: 30 minutes | Cook Time: 18–22 minutes | Total Time: 1 hour 20 minutes | Yield: 12 cupcakes
These Christmas Peppermint Mocha Cupcakes with Chocolate Ganache combine rich chocolate cake, bold coffee flavor, refreshing peppermint, and a silky chocolate topping. Inspired by the classic holiday peppermint mocha, each cupcake is topped with creamy peppermint frosting, glossy chocolate ganache, and crushed candy canes for a festive finish. Perfect for Christmas parties, holiday dessert tables, and winter celebrations, these decadent cupcakes are a must-try for chocolate and coffee lovers.
Ingredients
For the Chocolate Mocha Cupcakes
- 1 cup (125 g) all-purpose flour
- ½ cup (45 g) unsweetened cocoa powder
- ¾ cup (150 g) granulated sugar
- 1 teaspoon baking powder
- ½ teaspoon baking soda
- ¼ teaspoon salt
- 2 large eggs, at room temperature
- ½ cup (120 ml) whole milk, at room temperature
- ¼ cup (60 ml) vegetable oil
- 1 teaspoon vanilla extract
- 1 tablespoon instant espresso powder
- ½ cup (120 ml) hot coffee or hot water
For the Peppermint Buttercream
- ½ cup (113 g) unsalted butter, softened
- 2 cups (240 g) powdered sugar
- 2 tablespoons heavy cream or milk
- ½ teaspoon peppermint extract, or to taste
- 1 teaspoon vanilla extract
- Pinch of salt
For the Chocolate Ganache
- 4 ounces (113 g) semi-sweet chocolate, finely chopped
- ½ cup (120 ml) heavy whipping cream
For Decoration
- 3–4 candy canes, crushed
- Chocolate shavings, optional
- Mini candy canes, optional
- Red and white festive sprinkles, optional
Step-by-Step Directions
Step 1: Prepare the Oven
Preheat the oven to 350°F (175°C). Line a 12-cup muffin pan with paper cupcake liners.
Step 2: Mix the Dry Ingredients
In a large bowl, whisk together the flour, cocoa powder, sugar, baking powder, baking soda, salt, and espresso powder until evenly combined.
Step 3: Add the Wet Ingredients
Add the eggs, milk, vegetable oil, and vanilla extract. Whisk until the mixture is smooth and the ingredients are fully incorporated.
Step 4: Finish the Mocha Batter
Slowly pour in the hot coffee or hot water, stirring gently until combined. The batter will be thin, which helps produce moist, tender chocolate cupcakes.
Step 5: Bake the Cupcakes
Divide the batter evenly among the cupcake liners, filling each about two-thirds full. Bake for 18–22 minutes, or until a toothpick inserted into the center comes out clean or with a few moist crumbs.
Let the cupcakes cool in the pan for 5 minutes, then transfer them to a wire rack to cool completely.
Step 6: Make the Peppermint Buttercream
Beat the softened butter for 2 minutes until creamy. Gradually add the powdered sugar, then mix in the heavy cream, peppermint extract, vanilla extract, and salt.
Beat for another 2–3 minutes until light and fluffy. Start with ¼ teaspoon of peppermint extract, taste, and add more gradually if desired, as peppermint can quickly become overpowering.
Step 7: Prepare the Chocolate Ganache
Place the chopped chocolate in a heatproof bowl. Heat the heavy cream in a small saucepan until steaming and just beginning to simmer. Pour it over the chocolate and let stand for 3 minutes.
Stir gently until the chocolate melts and the ganache becomes smooth and glossy. Allow it to cool for 10–15 minutes, or until thick enough to spoon over the cupcakes without running off completely.
Step 8: Frost the Cupcakes
Transfer the peppermint buttercream to a piping bag fitted with a large star tip. Pipe a generous swirl onto each completely cooled cupcake.
Step 9: Add the Chocolate Ganache
Spoon a little cooled ganache over each frosting swirl, allowing it to drip gently down the sides. Alternatively, drizzle the ganache in thin ribbons for a more delicate finish.
Step 10: Decorate for Christmas
Immediately sprinkle crushed candy canes over the ganache before it sets. Add chocolate shavings, festive sprinkles, or a small candy cane to each cupcake for an extra-special holiday look.
Step 11: Chill and Serve
Refrigerate the cupcakes for 15–20 minutes to help the ganache set. Let them sit at room temperature for about 15 minutes before serving for the best flavor and texture.
Tips for the Best Christmas Peppermint Mocha Cupcakes
- Use hot coffee: It enhances the chocolate flavor and gives the cupcakes a deeper mocha taste.
- Measure peppermint extract carefully: Too much can overpower the chocolate and coffee.
- Cool the cupcakes completely: Warm cupcakes will melt the buttercream and cause the ganache to slide off.
- Let the ganache thicken: If it is too warm, it may run off the frosting instead of forming a glossy topping.
- Add candy canes at the end: Crushed peppermint candies can dissolve and become sticky when exposed to moisture.
- Use good-quality chocolate: Semi-sweet chocolate creates a rich ganache that balances the sweet frosting.
Storage Instructions
Store Christmas Peppermint Mocha Cupcakes in an airtight container in the refrigerator for up to 4 days. Let them stand at room temperature for 15–20 minutes before serving.
For the best candy cane crunch, add the crushed peppermint decorations shortly before serving. You can bake the cupcakes a day ahead and prepare the frosting and ganache when you’re ready to assemble them.
Christmas Red Velvet Snowflake Cupcake
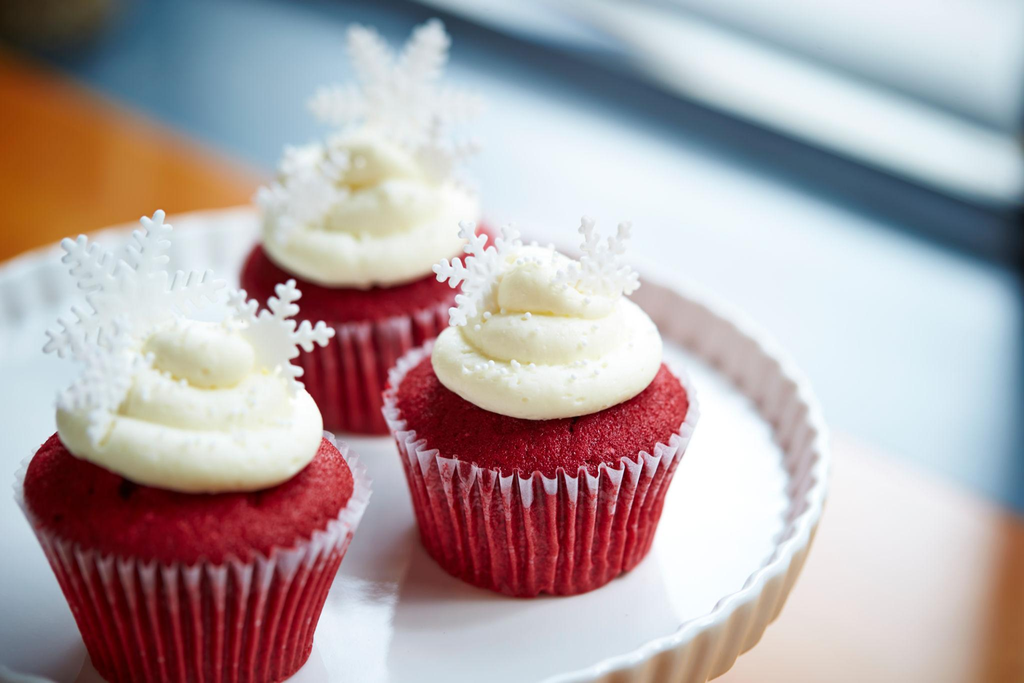
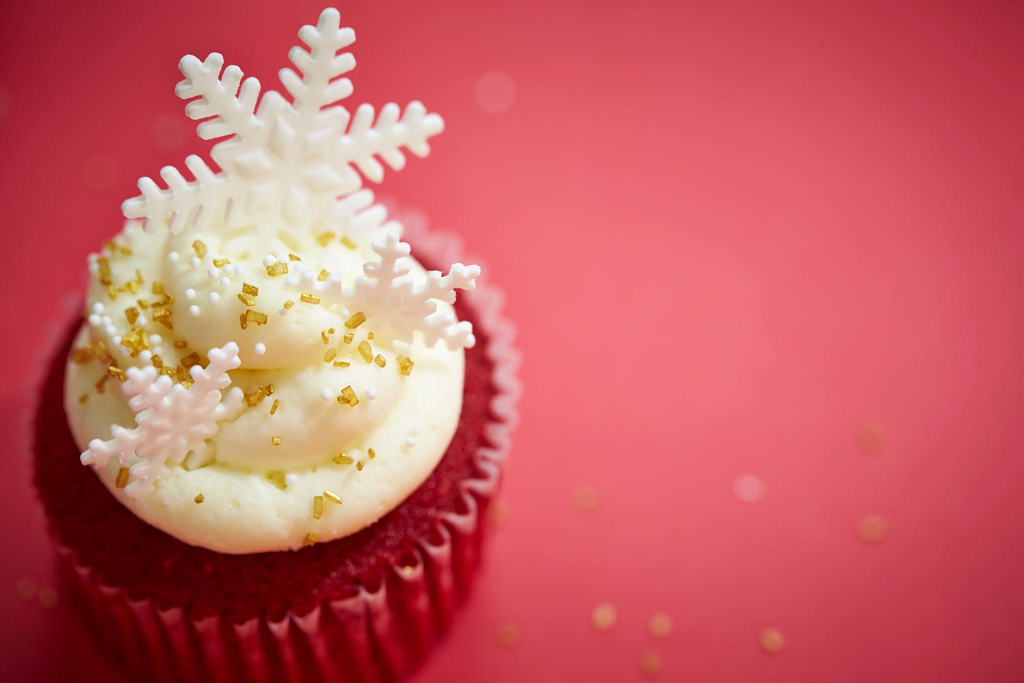
These Christmas Red Velvet Snowflake Cupcakes are a festive twist on classic red velvet cupcakes. Each cupcake has a soft, moist cocoa-kissed crumb, a vibrant red color, and a swirl of tangy cream cheese frosting. Delicate white chocolate snowflakes make them look like little winter masterpieces—perfect for Christmas parties, cookie exchanges, and holiday dessert tables.
Prep Time: 35 minutes
Cook Time: 18–22 minutes
Cooling Time: 45 minutes
Total Time: About 1 hour 45 minutes
Yield: 12 cupcakes
Ingredients
For the Red Velvet Cupcakes
- 1 ¼ cups (156 g) all-purpose flour
- 1 tablespoon unsweetened cocoa powder
- ½ teaspoon baking soda
- ¼ teaspoon salt
- ½ cup (113 g) unsalted butter, softened
- ¾ cup (150 g) granulated sugar
- 1 large egg, room temperature
- 1 teaspoon vanilla extract
- ½ cup (120 ml) buttermilk, room temperature
- 1 teaspoon white vinegar
- 1–2 teaspoons red gel food coloring, or as needed
For the Cream Cheese Frosting
- 8 oz (226 g) full-fat cream cheese, softened but still cool
- ½ cup (113 g) unsalted butter, softened
- 3 cups (360 g) powdered sugar, sifted
- 1 teaspoon vanilla extract
- 1 pinch salt
For the White Chocolate Snowflakes
- 4 oz (113 g) white chocolate, chopped, or white candy melts
- Edible silver sprinkles or white sugar pearls, optional
Step-by-Step Directions
1. Prepare the oven and cupcake pan
- Preheat the oven to 350°F (175°C).
- Line a 12-cup muffin pan with paper cupcake liners.
- In a bowl, whisk together the flour, cocoa powder, baking soda, and salt.
2. Make the red velvet batter
- Beat the butter and sugar for 2–3 minutes until light and fluffy.
- Add the egg and vanilla extract, mixing until combined.
- Stir the red gel coloring into the buttermilk.
- Add the dry ingredients in three additions, alternating with the buttermilk mixture.
- Mix in the vinegar just until incorporated. Avoid overmixing.
3. Bake the cupcakes
- Divide the batter evenly among the liners, filling each about two-thirds full.
- Bake for 18–22 minutes, or until a toothpick inserted into the center comes out clean or with a few moist crumbs.
- Let the cupcakes cool in the pan for 5 minutes, then transfer them to a wire rack to cool completely.
4. Create the white chocolate snowflakes
- Melt the white chocolate gently in the microwave in 15–20-second intervals, stirring between each interval.
- Transfer the melted chocolate to a piping bag with a very small opening.
- Pipe snowflake shapes onto parchment paper, making a small center with six branching arms.
- Add sugar pearls or silver sprinkles while the chocolate is still soft, if desired.
- Let the snowflakes set at room temperature or refrigerate for 10–15 minutes until firm.
5. Make the cream cheese frosting
- Beat the butter until smooth and creamy.
- Add the cream cheese and beat briefly until smooth.
- Gradually mix in the powdered sugar, vanilla, and salt.
- Beat just until fluffy. If the frosting feels too soft, chill it for 15–20 minutes before piping.
6. Frost and decorate
- Make sure the cupcakes are completely cool before decorating.
- Pipe generous swirls of cream cheese frosting onto each cupcake.
- Carefully place one white chocolate snowflake on top of each swirl.
- Finish with a light sprinkle of edible silver decorations for a snowy Christmas look.
Tips for Perfect Christmas Snowflake Cupcakes
- Use gel food coloring: It gives a vivid red color without adding too much liquid to the batter.
- Avoid overmixing: Mix only until the ingredients are combined to keep the cupcakes tender.
- Keep the frosting cool: Cream cheese frosting softens quickly, so chill it if necessary before piping.
- Make the snowflakes ahead: Prepare the chocolate decorations a day in advance and store them in a cool, dry place.
- Handle decorations carefully: White chocolate snowflakes can break easily, so make a few extras.
Storage Instructions
- Refrigerator: Store frosted cupcakes in an airtight container for up to 4 days because of the cream cheese frosting.
- Room temperature: Keep them out for no more than 2 hours when serving.
- Freezer: Freeze unfrosted cupcakes for up to 2 months. Thaw overnight in the refrigerator or at room temperature before decorating.
- Snowflake decorations: Store separately in an airtight container in a cool, dry place until needed.
Christmas Cranberry Orange Cupcake with Cream Cheese Frosting
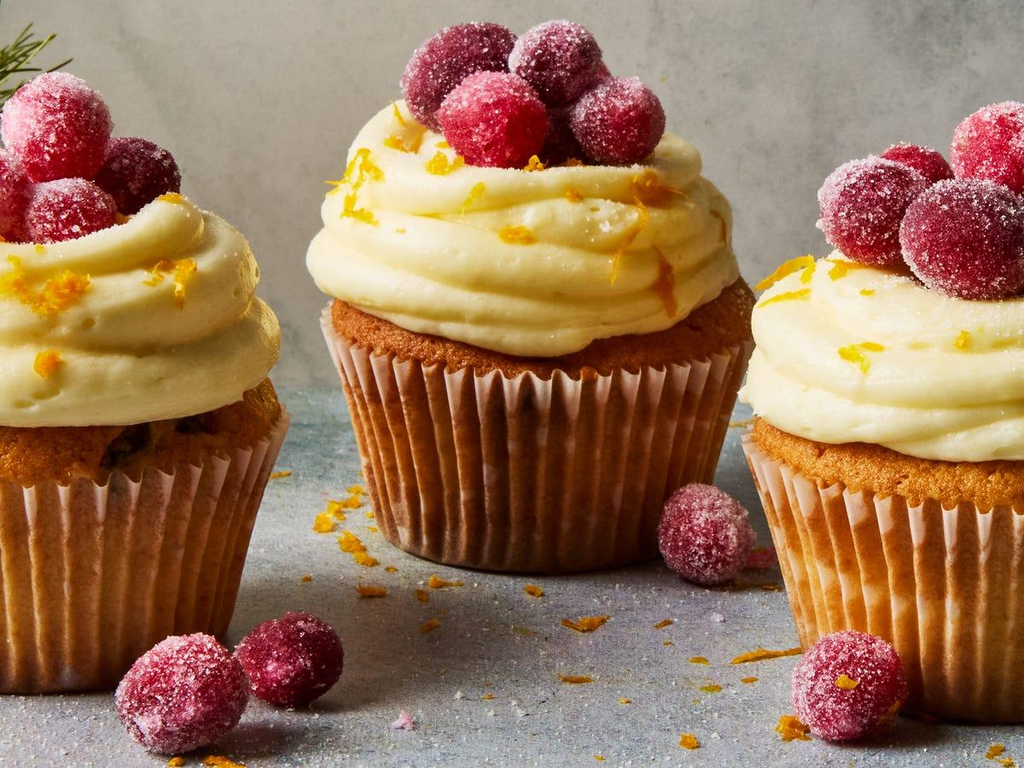
These Cranberry Orange Cupcakes with Cream Cheese Frosting bring together the bright, citrusy flavor of fresh oranges and the sweet-tart taste of cranberries in a soft, tender cupcake. Topped with silky cream cheese frosting, fresh orange zest, and ruby-red cranberries, they make a beautiful addition to any Christmas dessert table.
Perfect for holiday parties, winter birthdays, and festive family gatherings, these homemade cranberry orange cupcakes are as delicious as they are pretty.
Prep Time: 25 minutes
Cook Time: 18–22 minutes
Cooling Time: 45 minutes
Total Time: About 1 hour 30 minutes
Yield: 12 cupcakes
Ingredients
For the Cranberry Orange Cupcakes
- 1 ½ cups (188 g) all-purpose flour
- 1 ½ teaspoons baking powder
- ¼ teaspoon baking soda
- ¼ teaspoon salt
- ½ cup (113 g) unsalted butter, softened
- ¾ cup (150 g) granulated sugar
- 2 large eggs, room temperature
- 2 tablespoons finely grated orange zest
- ¼ cup (60 ml) fresh orange juice
- ½ teaspoon vanilla extract
- ½ cup (120 g) sour cream, room temperature
- 1 cup (100 g) fresh or frozen cranberries, roughly chopped
For the Cream Cheese Frosting
- 8 oz (226 g) full-fat cream cheese, softened but still cool
- ½ cup (113 g) unsalted butter, softened
- 3 cups (360 g) powdered sugar, sifted
- 1 teaspoon vanilla extract
- 1 teaspoon finely grated orange zest
- Pinch of salt
For Decoration
- Fresh cranberries
- Thin strips of orange zest
- Powdered sugar, optional
- Small rosemary sprigs, optional and for decoration only
Step-by-Step Directions
1. Prepare the oven and ingredients
- Preheat the oven to 350°F (175°C).
- Line a 12-cup muffin pan with paper liners.
- In a medium bowl, whisk together the flour, baking powder, baking soda, and salt.
- Chop the cranberries into small pieces. If using frozen cranberries, keep them frozen until ready to fold into the batter.
2. Cream the butter and sugar
- Beat the softened butter and granulated sugar for 2–3 minutes until pale and fluffy.
- Add the eggs one at a time, beating well after each addition.
- Mix in the orange zest and vanilla extract.
3. Make the cupcake batter
- Combine the fresh orange juice and sour cream in a small bowl.
- Add the flour mixture to the butter mixture in three additions, alternating with the orange juice and sour cream mixture.
- Mix on low speed just until combined.
- Gently fold in the chopped cranberries with a spatula. Do not overmix.
4. Bake the cupcakes
- Divide the batter evenly among the cupcake liners, filling each about two-thirds full.
- Bake for 18–22 minutes, until the tops spring back lightly and a toothpick inserted in the center comes out clean or with a few moist crumbs.
- Let the cupcakes cool in the pan for 5 minutes, then transfer them to a wire rack.
- Cool completely before frosting.
5. Prepare the cream cheese frosting
- Beat the softened butter until smooth and creamy.
- Add the cream cheese and beat briefly until combined.
- Gradually add the powdered sugar, vanilla, orange zest, and salt.
- Beat just until smooth and fluffy. Avoid excessive mixing, which can make cream cheese frosting too soft.
- If necessary, refrigerate the frosting for 15–20 minutes before piping.
6. Frost and decorate
- Transfer the frosting to a piping bag fitted with a star tip.
- Pipe a generous swirl onto each completely cooled cupcake.
- Garnish with fresh cranberries and a little orange zest.
- Dust lightly with powdered sugar just before serving for a snowy holiday finish.
Tips for the Best Cranberry Orange Cupcakes
- Use fresh orange zest: Most of the orange’s fragrant flavor comes from the zest, so grate only the orange-colored peel and avoid the bitter white pith.
- Choose the right cranberries: Fresh cranberries give a bright, tart flavor. Frozen cranberries work well too; add them without thawing.
- Keep the cupcakes moist: Sour cream adds tenderness and balances the citrus.
- Make the frosting stable: Use full-fat block cream cheese rather than cream cheese spread from a tub.
- Decorate before serving: Add fresh cranberries and powdered sugar close to serving time for the prettiest finish.
Storage Instructions
- Refrigerator: Store frosted cupcakes in an airtight container for up to 4 days.
- Before serving: Let refrigerated cupcakes stand at room temperature for about 20–30 minutes for the best texture.
- Freezer: Freeze unfrosted cupcakes in an airtight container for up to 2 months. Thaw completely before frosting.
- Make-ahead option: Bake the cupcakes one day ahead and prepare the frosting separately. Refrigerate the frosting and assemble the cupcakes the next day.
Christmas Pineapple Upside Down Cupcake
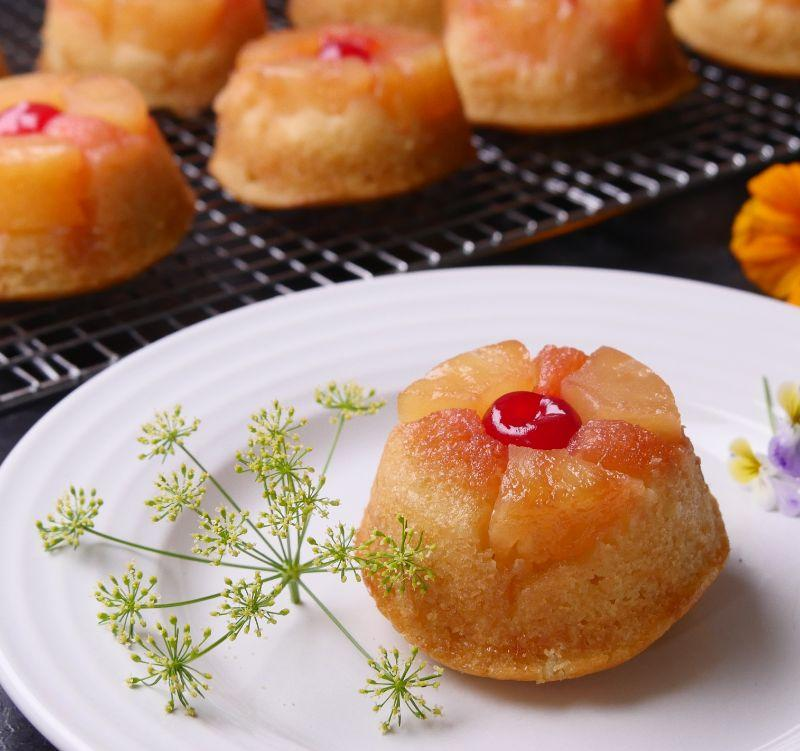
Once flipped out of the pan, the cupcakes reveal a beautiful glossy pineapple topping that looks impressive but is surprisingly easy to make. They’re perfect for summer gatherings, potlucks, birthdays, and anytime you crave a sweet, tropical dessert.
Prep Time: 20 minutes
Cook Time: 20–25 minutes
Cooling Time: 10 minutes
Total Time: About 55 minutes
Yield: 12 cupcakes
Ingredients
For the Pineapple Topping
- ¼ cup (56 g) unsalted butter, melted
- ½ cup (100 g) packed light brown sugar
- 1 can (20 oz / 567 g) pineapple rings in juice, drained
- 12 maraschino cherries, stems removed if desired
For the Cupcake Batter
- 1 ½ cups (188 g) all-purpose flour
- 1 ½ teaspoons baking powder
- ¼ teaspoon salt
- ½ cup (113 g) unsalted butter, softened
- ¾ cup (150 g) granulated sugar
- 2 large eggs, room temperature
- 1 teaspoon vanilla extract
- ½ cup (120 ml) pineapple juice reserved from the can
- ¼ cup (60 g) sour cream, room temperature
Step-by-Step Directions
1. Prepare the cupcake pan
- Preheat the oven to 350°F (175°C).
- Generously grease a standard 12-cup muffin pan with butter or nonstick baking spray.
- In a small bowl, mix the melted butter and brown sugar until combined.
- Spoon approximately 1 tablespoon of the mixture into each muffin cup, spreading it over the bottom.
2. Arrange the pineapple and cherries
- Drain the pineapple rings thoroughly and pat them dry with paper towels.
- Cut the rings into smaller pieces that fit inside the muffin cups. Depending on their size, you may use a full ring, a half ring, or several pieces per cupcake.
- Place one maraschino cherry in the center of each cup, then arrange the pineapple around it.
3. Make the cupcake batter
- In a medium bowl, whisk together the flour, baking powder, and salt.
- In a separate large bowl, beat the softened butter and granulated sugar for 2–3 minutes until light and fluffy.
- Beat in the eggs one at a time, followed by the vanilla extract.
- In a small bowl, combine the pineapple juice and sour cream.
4. Combine the ingredients
- Add the flour mixture to the butter mixture in three additions, alternating with the pineapple juice and sour cream mixture.
- Begin and end with the dry ingredients.
- Mix on low speed just until combined. The batter should be thick but spoonable.
- Divide the batter evenly over the pineapple topping, filling each cup approximately two-thirds to three-quarters full.
5. Bake the cupcakes
- Bake for 20–25 minutes, or until the cake tops are golden and a toothpick inserted into the center of the cake comes out clean.
- Remove the pan from the oven and let the cupcakes rest for 5–10 minutes.
- Run a thin knife around the edges of each cupcake to loosen any caramelized sugar.
6. Invert and serve
- Place a baking sheet or large serving platter over the muffin pan.
- Carefully flip the pan over while holding the platter firmly in place.
- Lift the muffin pan slowly to release the cupcakes.
- If any pineapple or caramel remains in the pan, gently spoon it back onto the cupcakes.
- Serve warm or at room temperature.
Tips for Perfect Pineapple Upside Down Cupcakes
- Dry the pineapple well: Excess juice can make the topping watery and prevent the cupcakes from releasing cleanly.
- Grease the pan generously: Pay special attention to the bottoms and sides of each muffin cup to help prevent sticking.
- Don’t wait too long to invert: Let the cupcakes rest for 5–10 minutes. If the caramel cools completely, it may stick to the pan.
- Avoid overfilling: Leave room for the cake to rise so the cupcakes bake evenly.
- Use canned pineapple juice: The reserved juice adds flavor and moisture without wasting ingredients.
Storage Instructions
- Room temperature: Store in an airtight container for up to 1 day in a cool environment.
- Refrigerator: Refrigerate in an airtight container for up to 4 days.
- Freezer: Freeze individually wrapped cupcakes for up to 2 months. Thaw in the refrigerator overnight.
- Reheating: Warm a cupcake in the microwave for about 10–15 seconds to soften the caramel topping.
Learn more
- How to Create Perfect Mini Cheesecake cupcakes
- Red Velvet Cupcakes Recipe: Perfectly Fluffy and Delicious
- Champagne Cupcakes with Raspberry Frosting
- How to Make Cupcake Moscato: A Delightful Fusion
- Harry Potter Butterbeer Cupcakes: A Magical Treat
- Mini Strawberry Cheesecakes with Easy Homemade Sauce
Frequently Asked Questions About Christmas Cupcakes - 1. What are the best cupcakes to make for Christmas?
- Some of the best Christmas cupcakes include red velvet snowflake cupcakes, gingerbread cupcakes, peppermint mocha cupcakes, cranberry orange cupcakes, chocolate cupcakes, and vanilla cupcakes decorated with festive buttercream. Choose flavors like cinnamon, nutmeg, ginger, peppermint, and cranberry to create a delicious holiday dessert spread.
- 2. Can I make Christmas cupcakes ahead of time?
- Yes! You can bake Christmas cupcakes 1–2 days ahead and store them in an airtight container. For the freshest results, prepare the frosting separately and decorate the cupcakes on the day of serving. Cupcakes topped with cream cheese frosting should be refrigerated.
- 3. How do I decorate cupcakes for Christmas?
- Decorate Christmas cupcakes with red and green buttercream, white chocolate snowflakes, crushed candy canes, sugared cranberries, festive sprinkles, or gingerbread cookies. Piping frosting into Christmas trees, wreaths, or snowflake designs is an easy way to make homemade cupcakes look festive.
- 4. How should I store Christmas cupcakes?
- Unfrosted cupcakes can generally be stored in an airtight container at room temperature for up to 2 days. Cupcakes with cream cheese frosting should be refrigerated and are best enjoyed within 3–4 days. Let refrigerated cupcakes sit at room temperature for about 20–30 minutes before serving for the best texture.
- 5. Can I freeze Christmas cupcakes?
- Yes! Freeze unfrosted cupcakes in an airtight container or freezer-safe bag for up to 2–3 months for best quality. Thaw them completely before decorating. Buttercream frosting can also be frozen separately, while delicate decorations are best added just before serving.